This documenation is how to use Subscribie, if you’re just starting out create an account to start your shop.
Read this documentatino to understand how to use Subscribie to collect subscription payments and automate payments for your business.
This is the multi-page printable view of this section. Click here to print.
This documenation is how to use Subscribie, if you’re just starting out create an account to start your shop.
Read this documentatino to understand how to use Subscribie to collect subscription payments and automate payments for your business.
Subscribie is for automating payment collection, businesses use this service to collect subscription payments automatically.
Whilst Subscribie
is subscription focused, it also supports on-time payments.
With Subscribie, after creating an account, you get an online service to setup and sell subscription plans for your business. You might be a business, a members club, or a software company seling charging license fees- wanting to collect subscription payments.
The primary goal of Subscribie is to automate the boring, and collecting / chasing payments for small businesses can waste a lot of time.
Subscribie automates payment collection and lets you focus on what matters- your business, your clients and customers. Sports Clubs, Golf Instructors, Software companies, Sales Teams, and Wine Clubs are all examples of business owners successully using Subscribie to automate their payment collectiion.
Reasons people choose to use Subscribie:
Time Saver: Before using Subscribie, a sports club was collecting payments manually which was a lot of effort for their members. They didn’t want anything complicated, just simple automated payment collection. Another example is a sales team, which uses Subscribie to sign-up their members to plans which are on offer.
Simple & no coding skills required: Subscribie is very easy to set-up and use, it only takes about 10 minutes to get started. More importantly, it’s simple for your subscribers too, all they need to do is choose from the plans you create, and Subscribie will charge them accordingly.
Give your users next steps from the Overview. For example:
The goal of Subscribie is to automate the boring- starting with subscription payment collection. Be sure to read the overview section.
Quickly set-up a subscription site which can:
Do you know? You can create a test shop here.
This example shop below shows the key subscription software features:
If you’d prefer to visit the example shop directly, go to: footballclub.subscriby.shop
See also Subscribie blog for guides & articles on collecting Subscription payments.
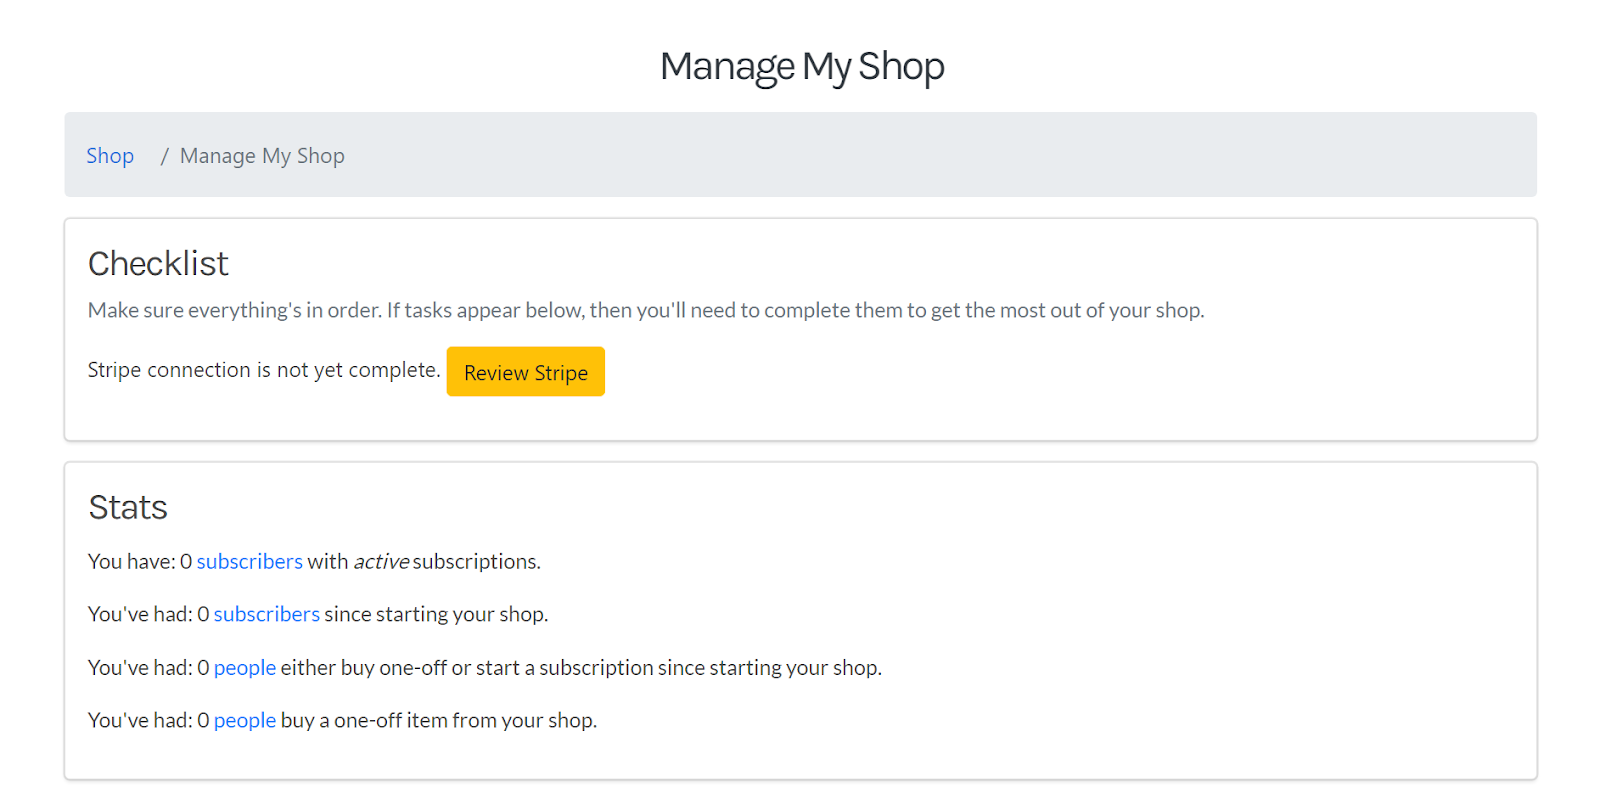
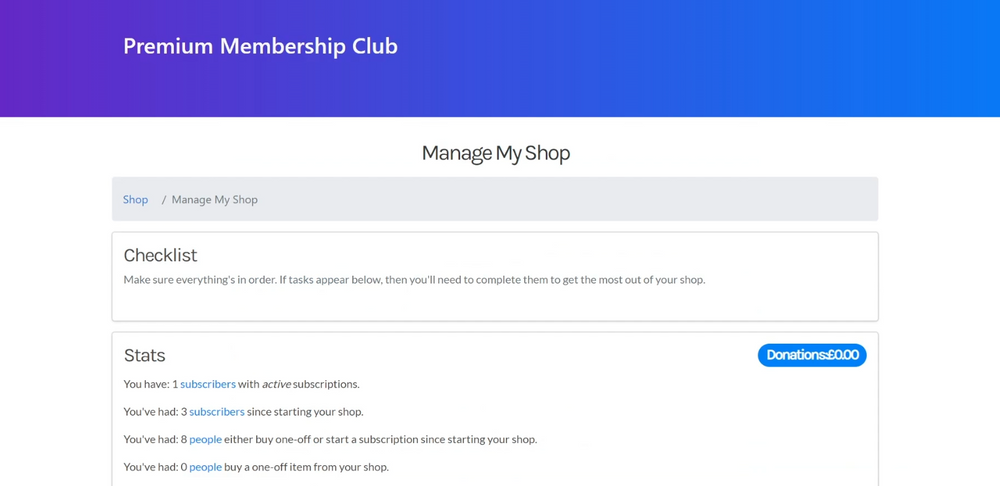
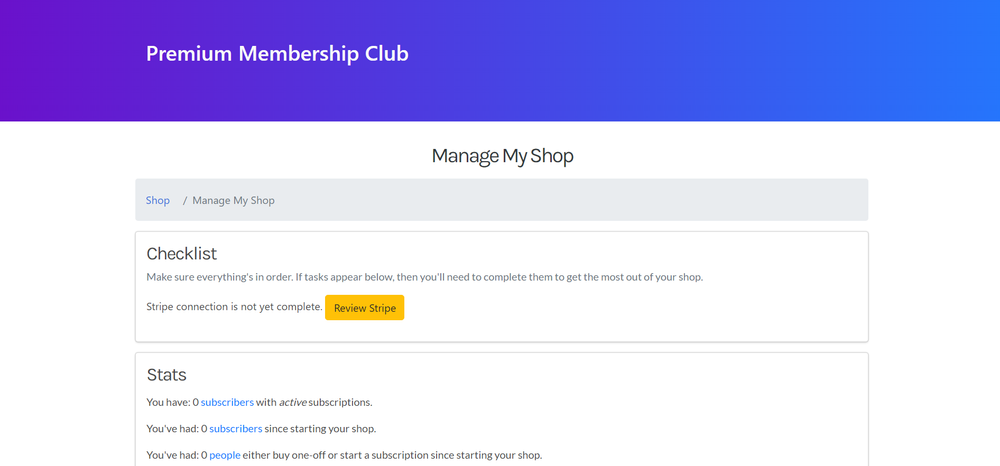
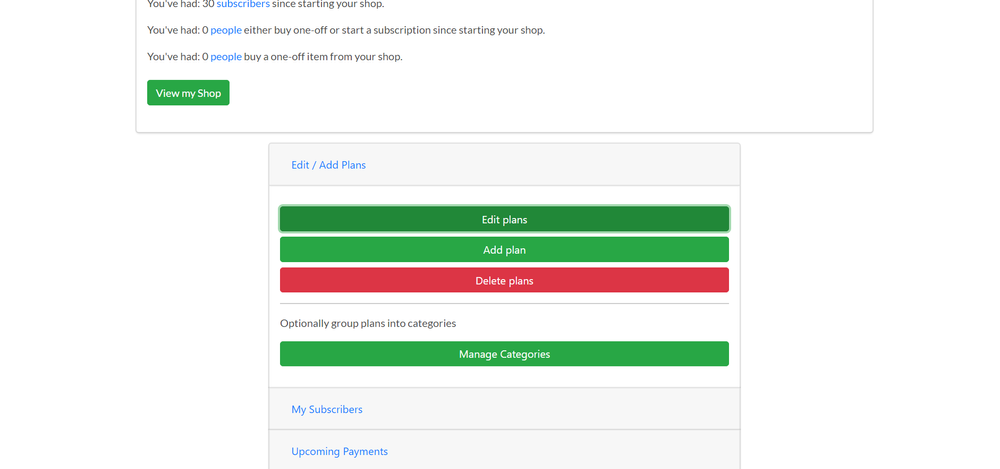
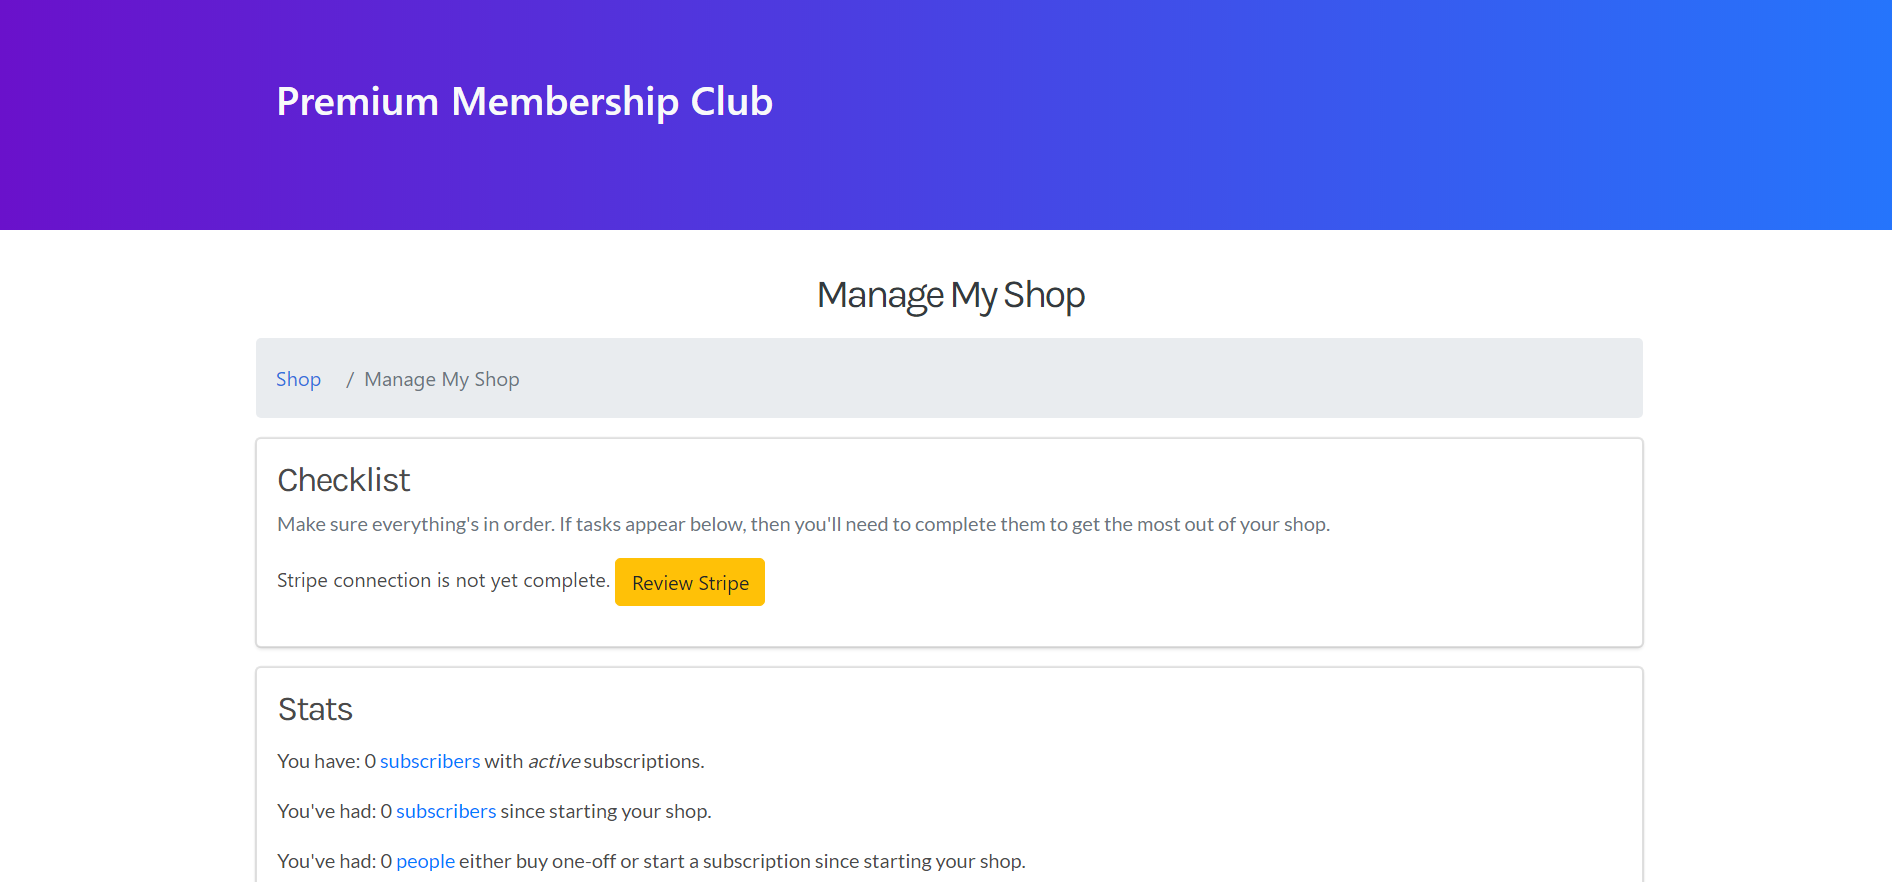
You shop owners dashboard is the ‘homepage’ for the adminstration of your shop. From your dashboard, you can add plans, change settings, view Subscribers and many other tasks.
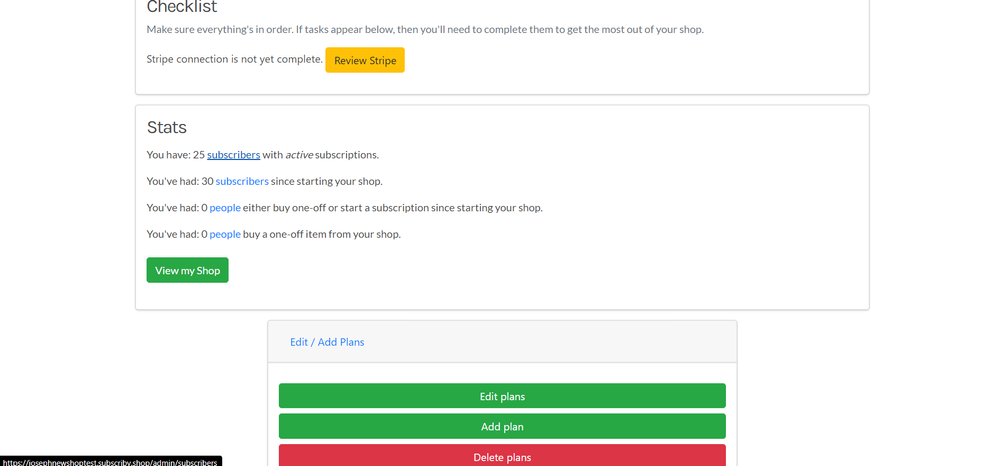
The stats section shows your real-time subscriber data all in one place.
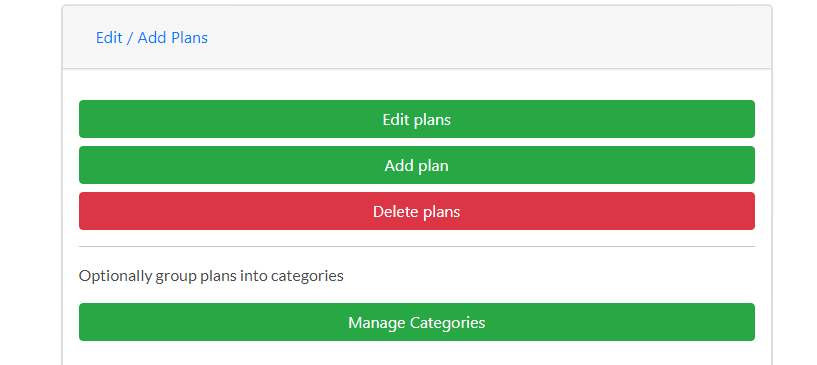
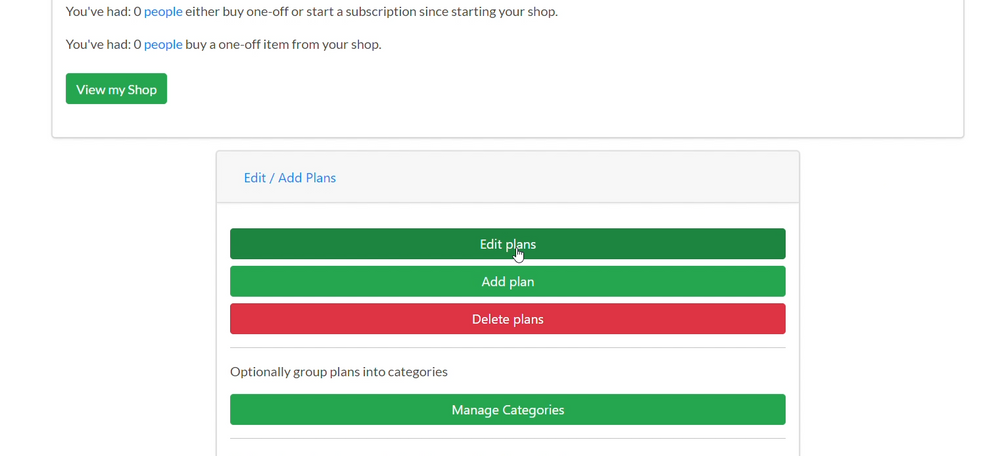
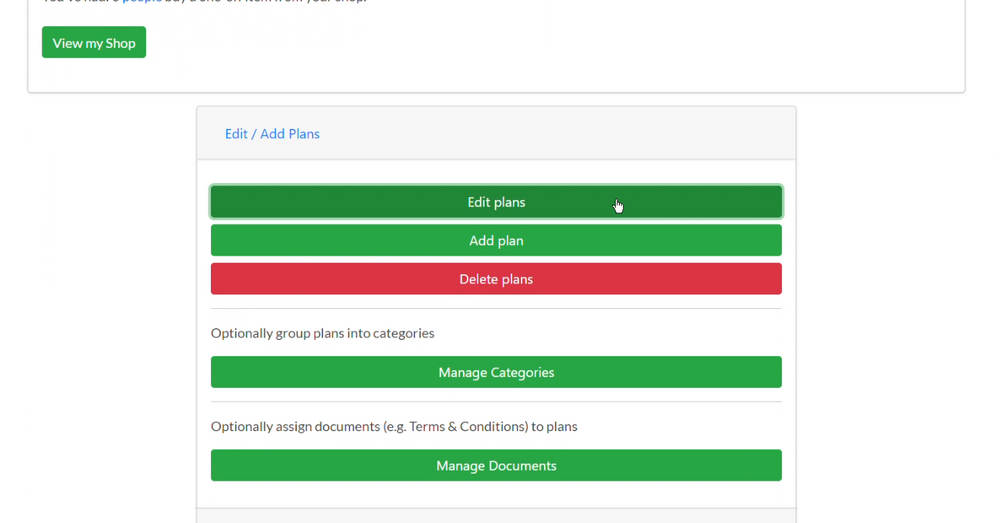
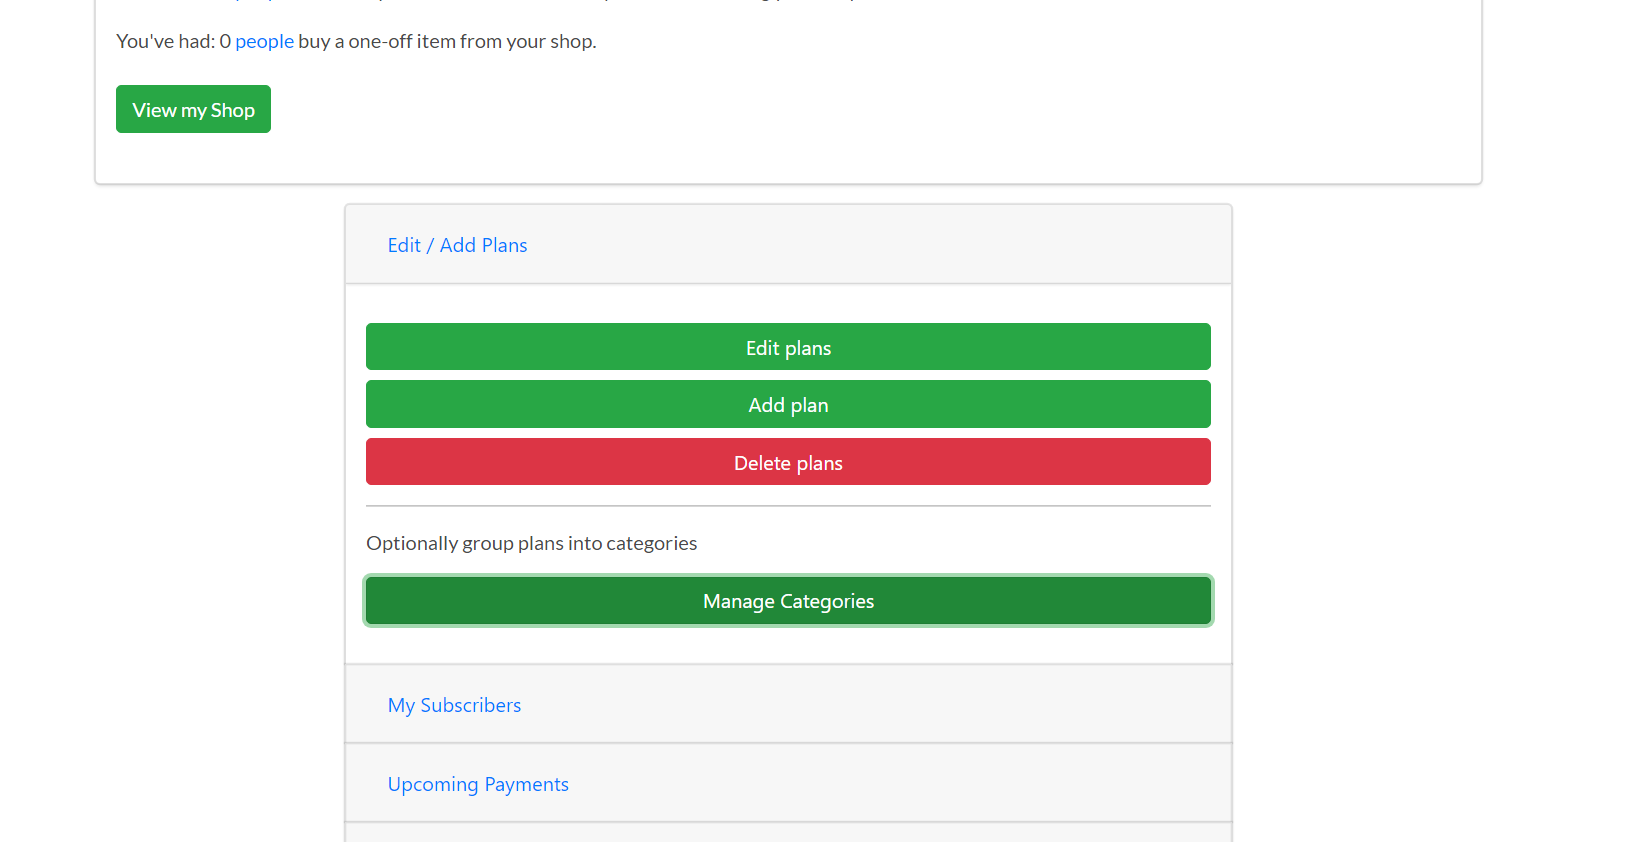
Edit plans - Change the title, pricing, description, bullet points and image of your plans
Add plans - Add new plans, including details such as title, pricing, description, bullet points and image
Delete Plans - Archive unwanted or obsolete plans
Additionally, can put your plans into categories:
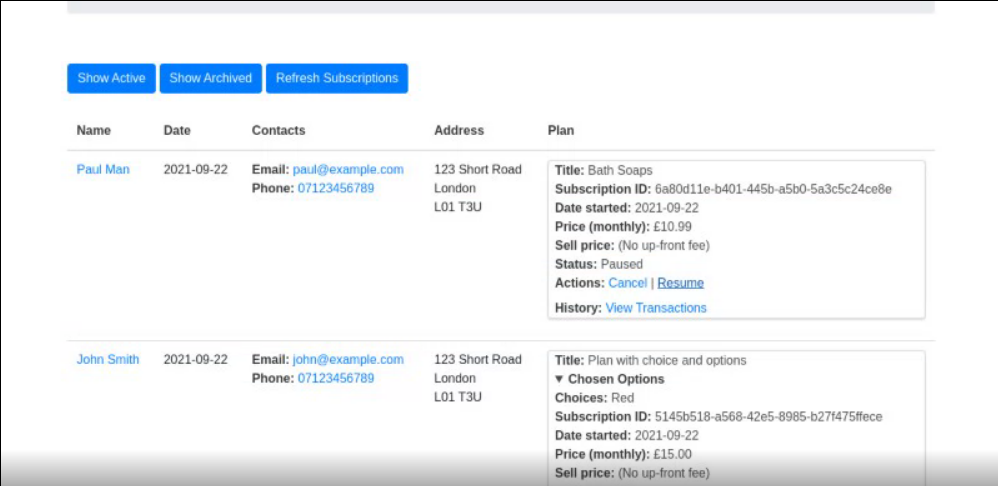
Here you can view a list of your subscribiers who have subscribed to your shop.
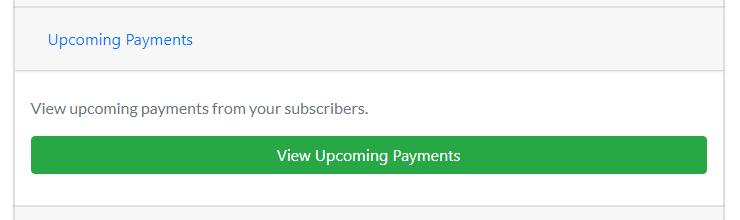
In this section, you can check out the upcoming payments from your subscribers.
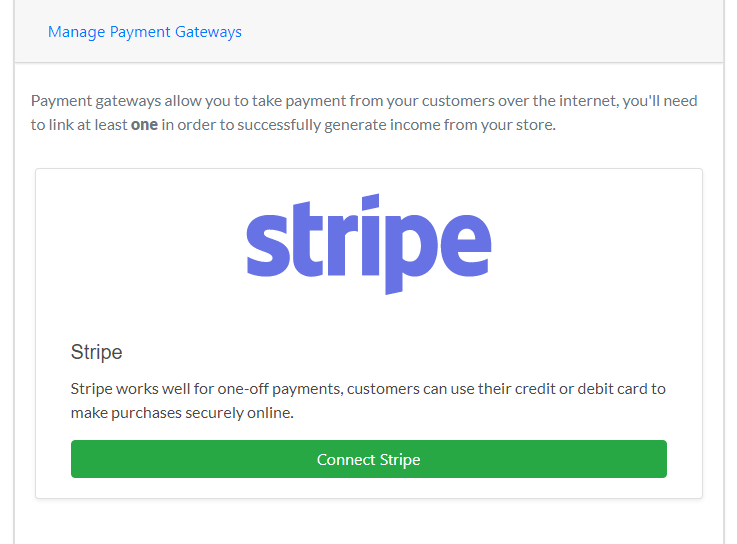
Here you can set up your Stripe account to help you to collect your subscription payments from subscribers.
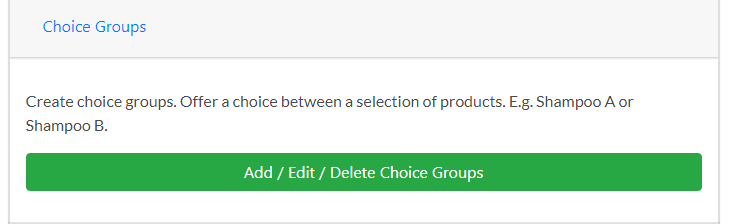
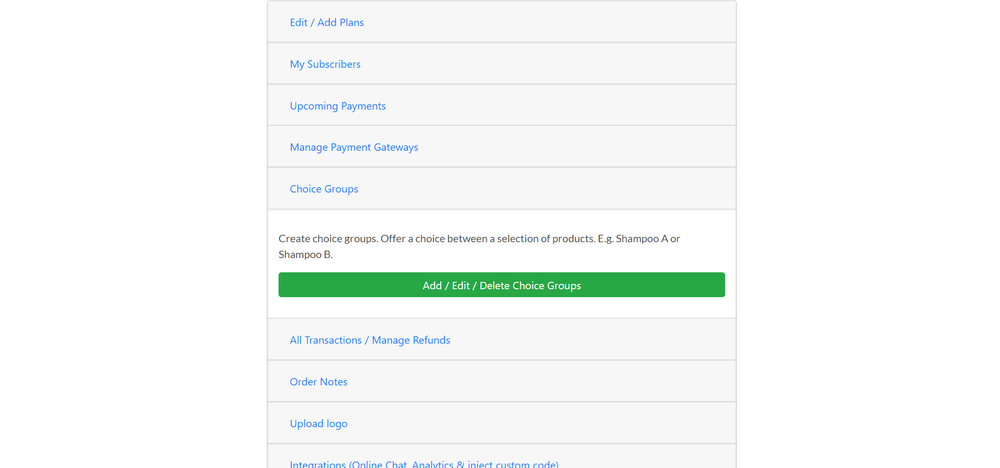
Choice groups are for small variants of products which your customers may choose from to refine their plan,
For example, by chosing a colour.
It is important to understand that choud groups are not for affecting price. If you want to affect price, it is best to create an additional plan .e.g an
Extra largeplan.
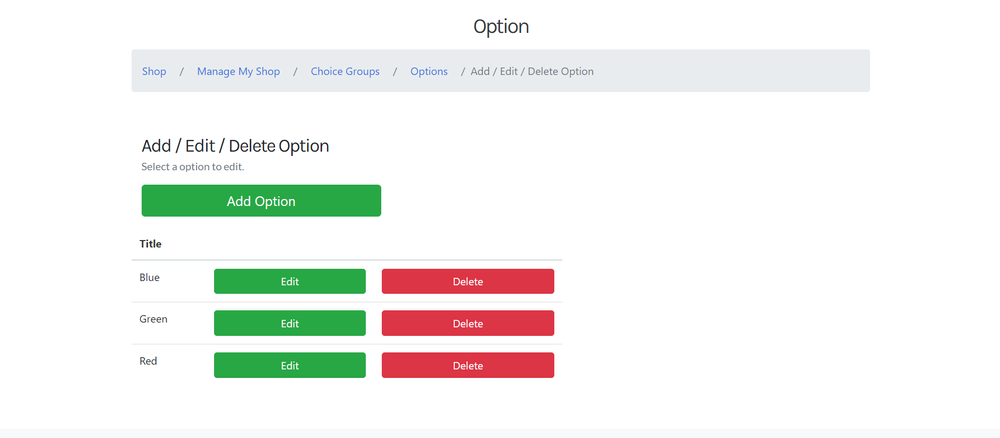
Once you’ve added choice groups, you can add ‘options’.
For example: You might create a choice group called “Colour”, and add the options: Red, Green, Blue).
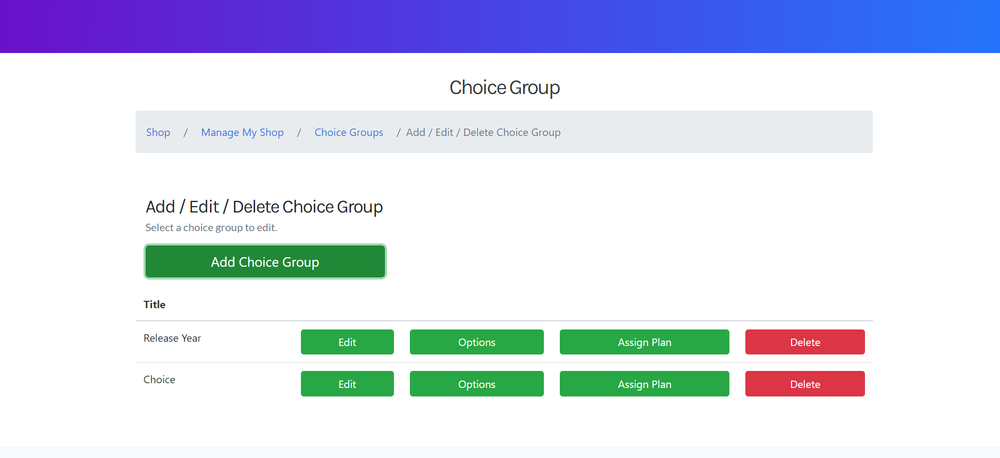
Finally, you would then assign your choice group to one or more plans. E.g. Perhaps you boxes available in those different colours.
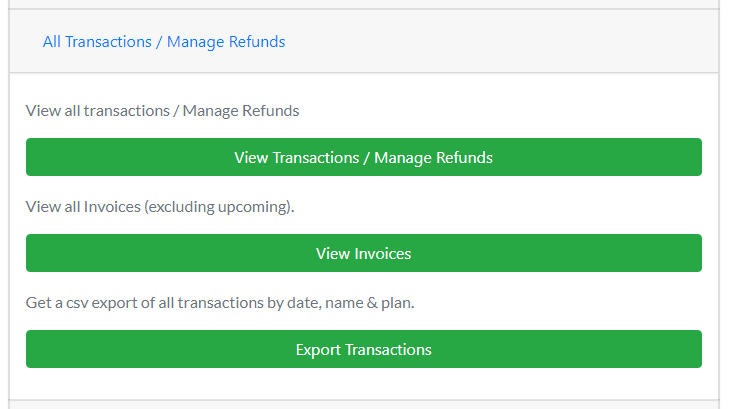
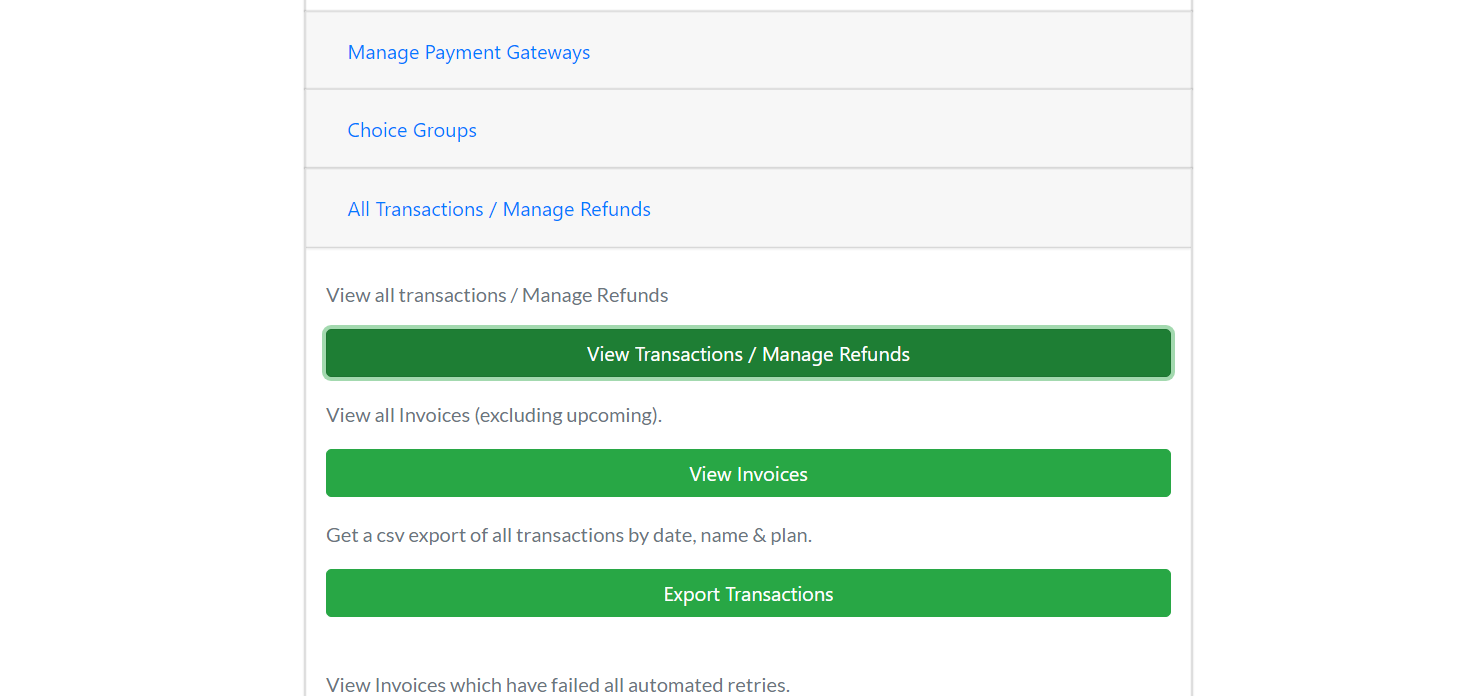
View all transactions and manage refunds.
Order notes can be used to collect additional written information from your subscriber during purchase, and can be made mandatory if required.
Here, you can upload your logo on the Subscription page to show your subscribers when they view your Shop.
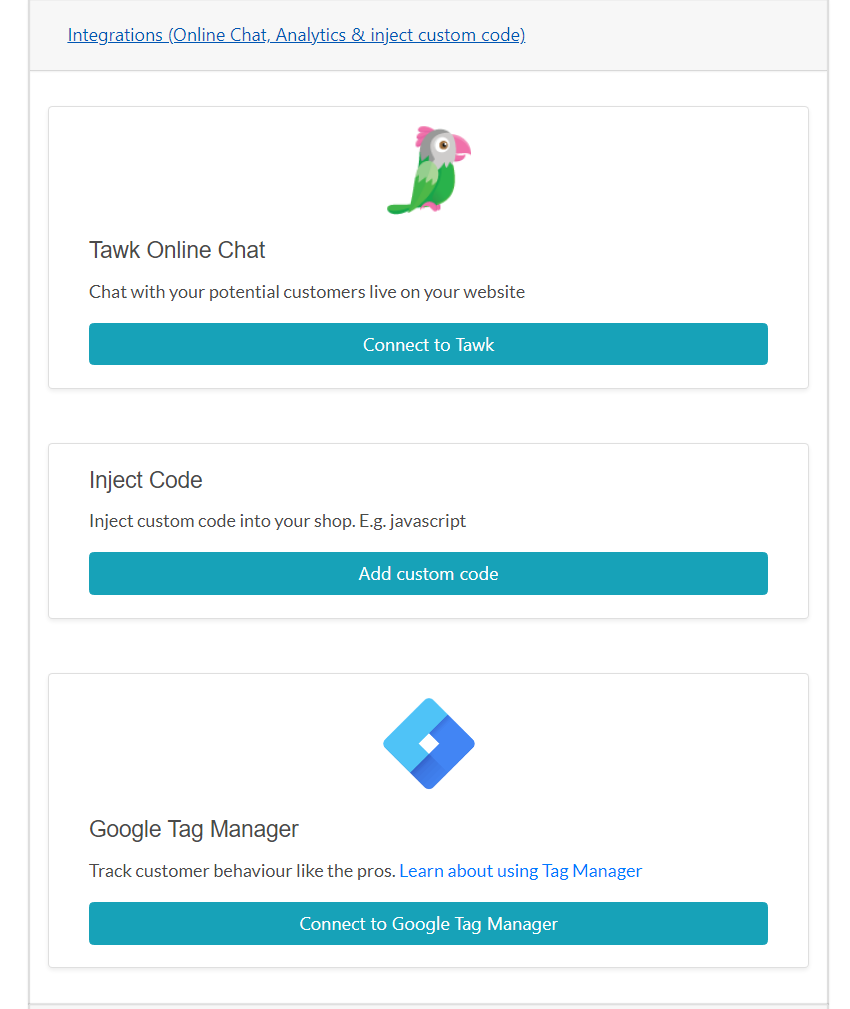
With integrations, you can
Add live chat to your shop (using Free Tawk Online Chat)
Paste code snippets into your shop
Connect Google Tag Manager for Google Anaytics and other marketing tools
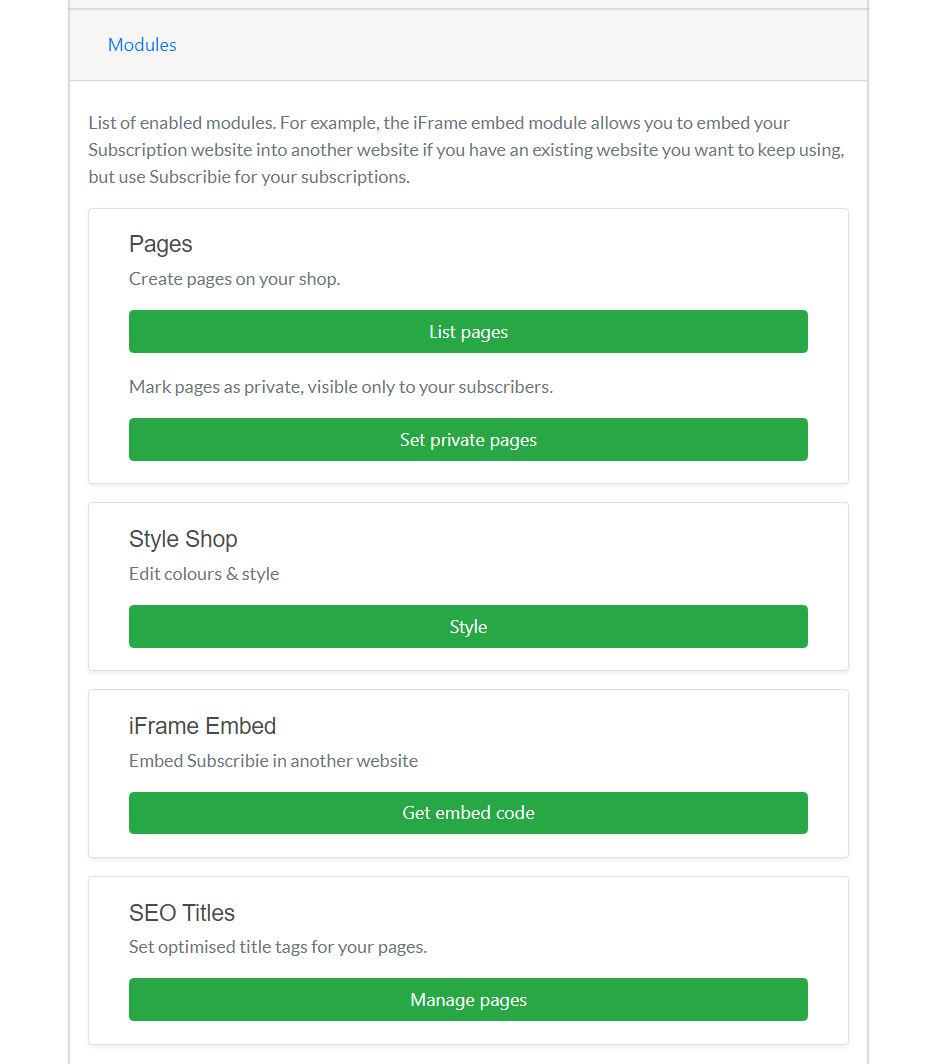
In this modules section, you can
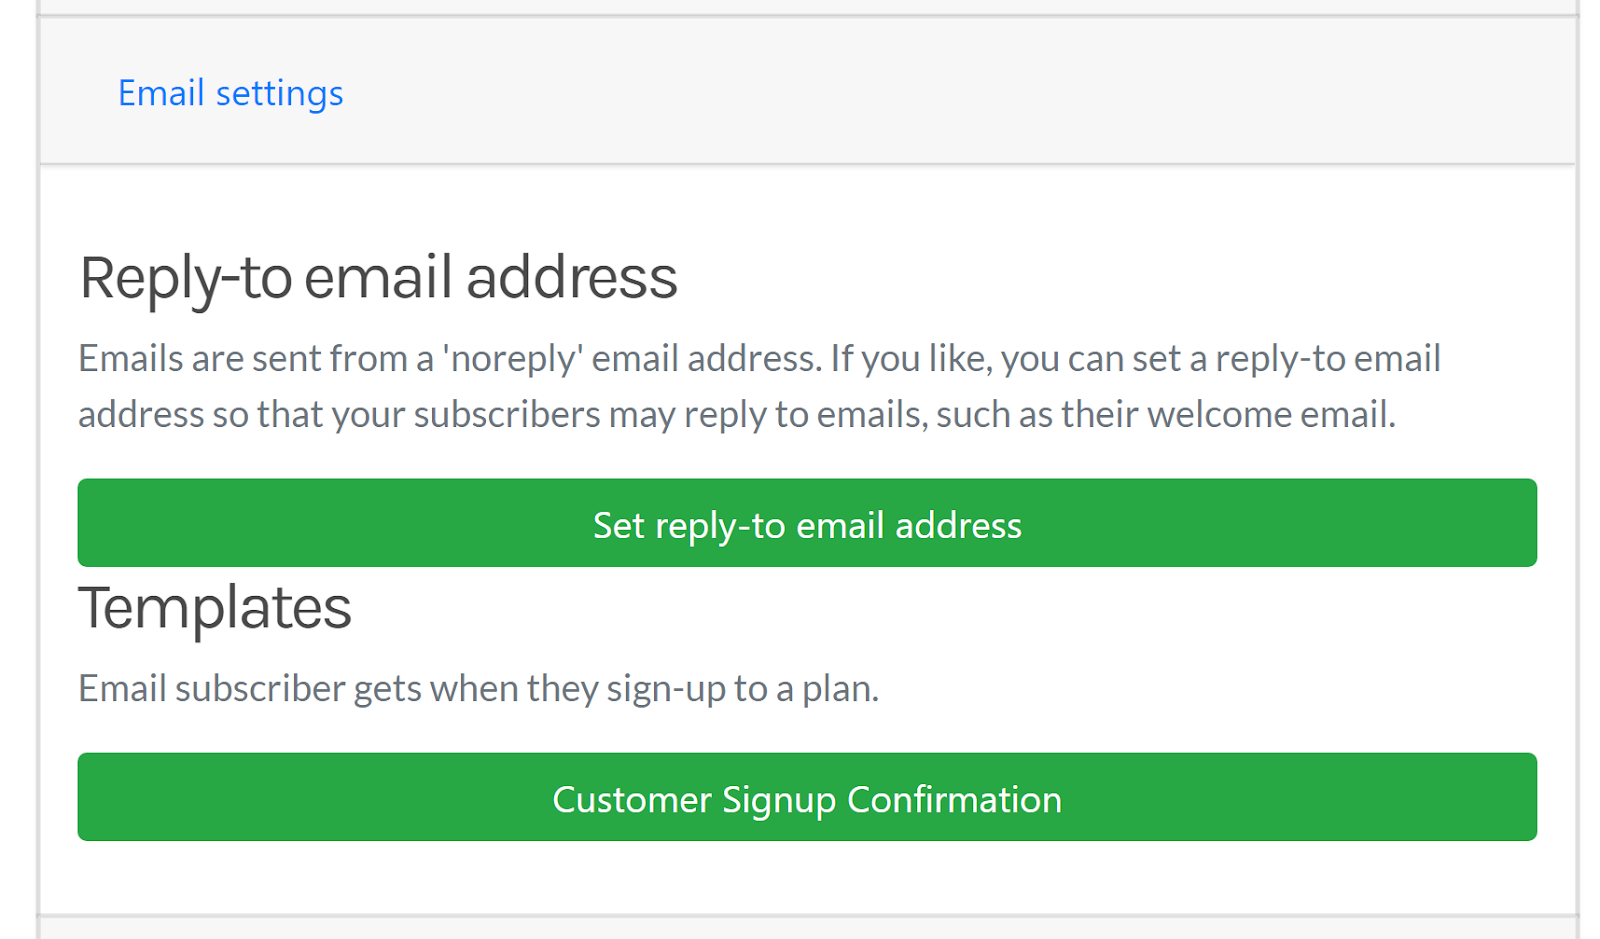
In the email section, you can set your own reply-to email address if you prefer not to use our default email address to send emails to your customers.
By default email notifications are sent from a “noreply” email address. If you want your Subscribers to be able to reply to these notification email, you can set a “reply to” email to your own email address. This will make it possible for your Subscribers to reply to email notifications, such as the welcome email.
You can also create a welcome email template to send to new subscribers when they sign up to your subscription.
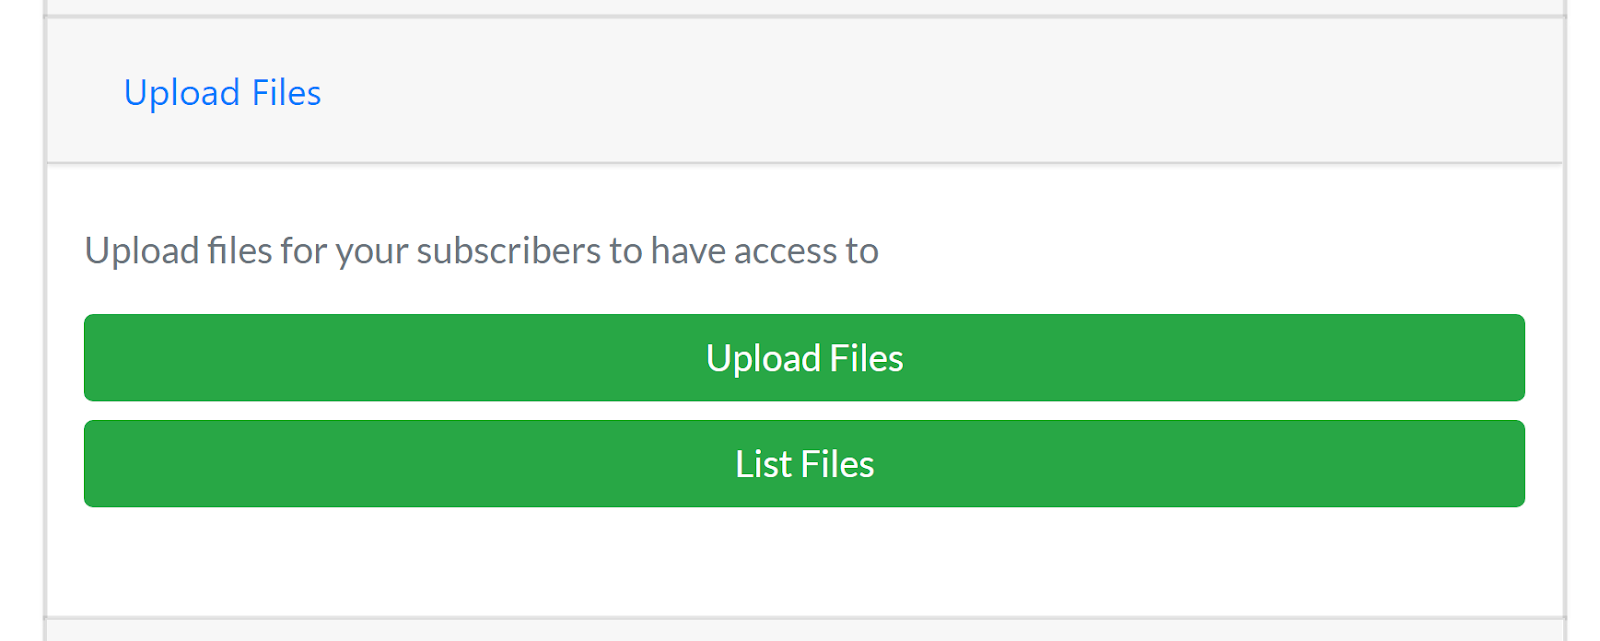
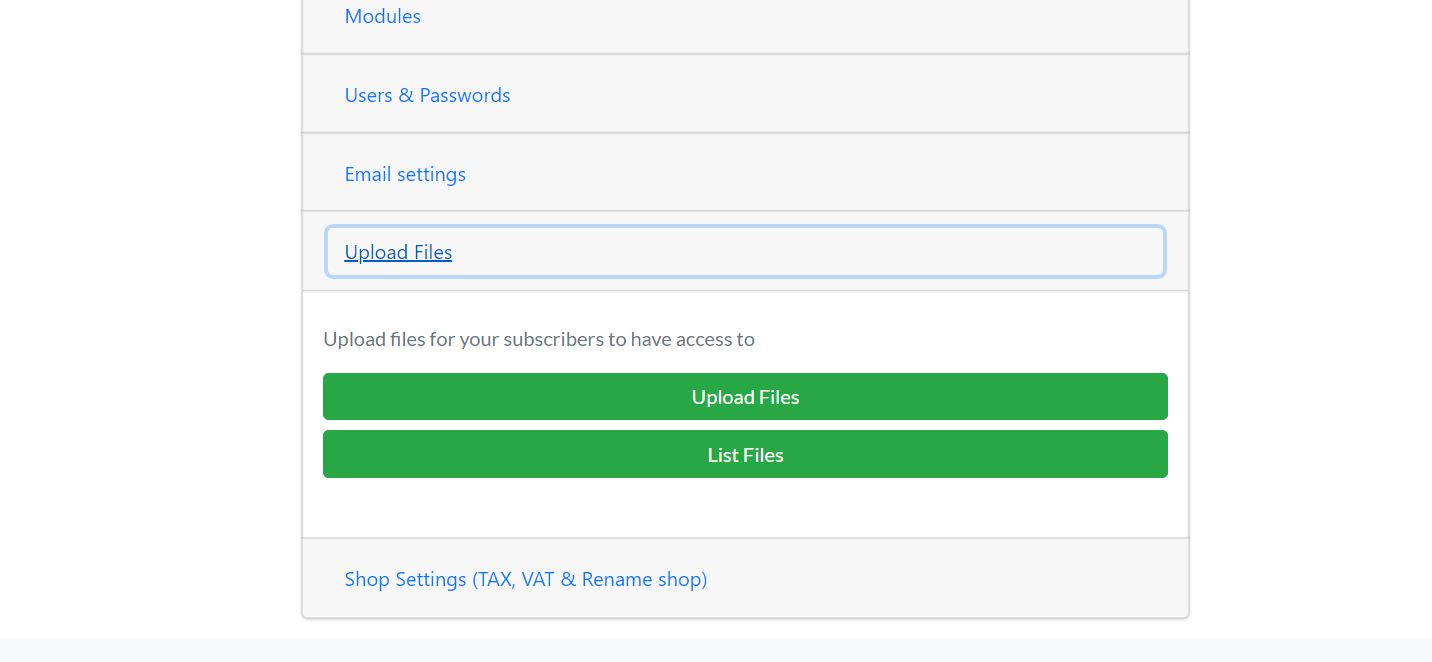
In Subscribie, you have the option to upload files that become visible to customers only after they become a subscriber to your shop. In the upload files section of the Dashboard, you can upload and manage the files that you upload to your shop.
Once uploaded, active Subscribers will be able to login to their account and download those files.
Step 1: In the Shop Dashboard, click “Review Stripe” in your Checklist.

Step 2: Choose your country from the drop down menu. Now choose “Live” under Live/Test mode and click “Start taking live payments”.

Step 3: Fill out mobile number and email then click continue and enter the six-digit verification code sent to your mobile number.

Step 4:The next step is to select your Type of Business from the drop-down box, then click continue. If you are an individual, chose “Individual/Sole Trader”
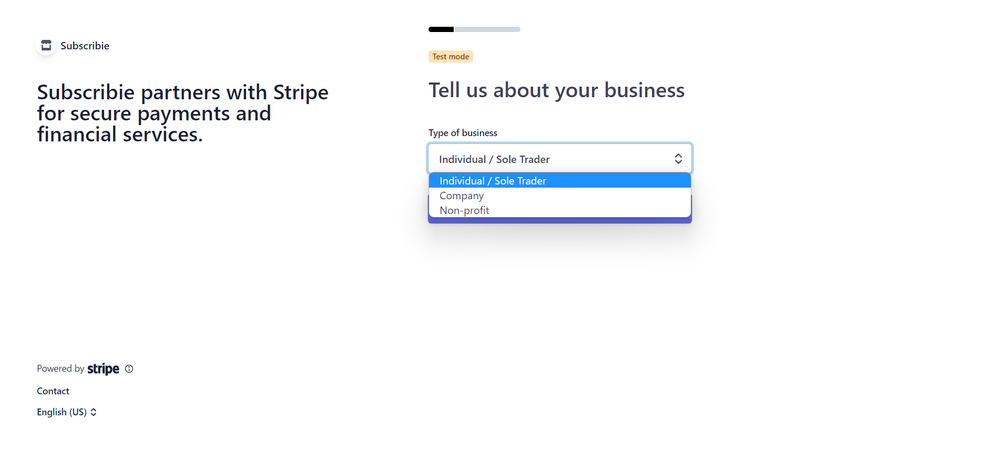
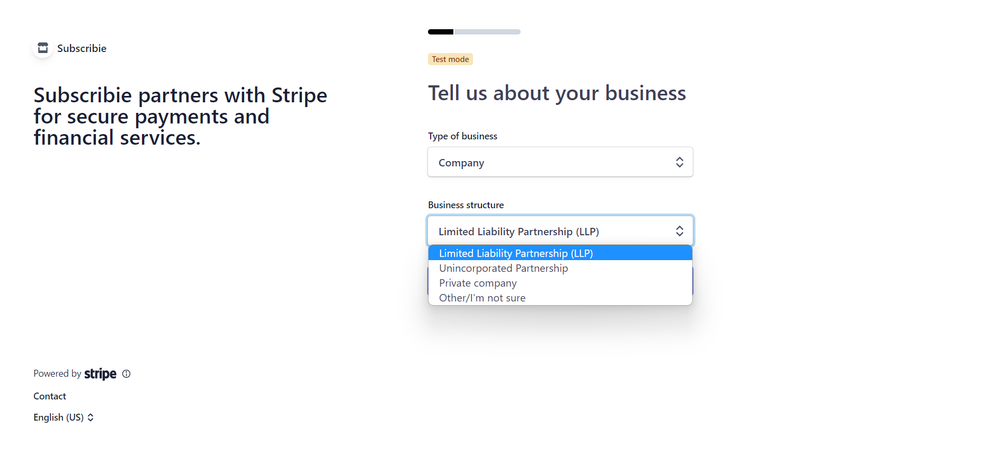
If you are a limited company, private company or partnership, choose “Company” followed by your Business Structure.
For Example - A partnership that is not limited would choose “Company -> Unincorporated Partnership”
If you are a Non-Profit Organization, then choose “Non-profit” followed by your Business Structure.
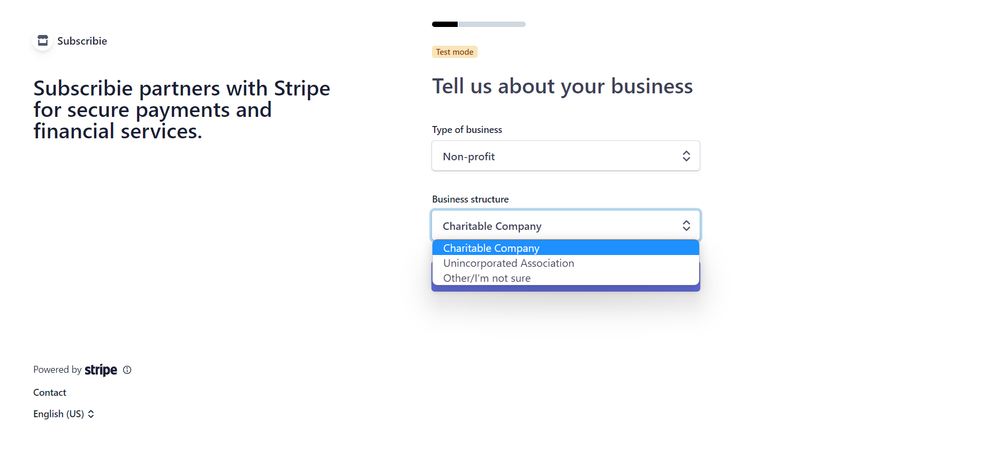
At any point during this step if you are unsure choose “Other/I’m not sure” or use our LiveChat on Subscribie’s Homepage here
Step 5: Next, fill out the personal details required to set up your Stripe account and select continue.
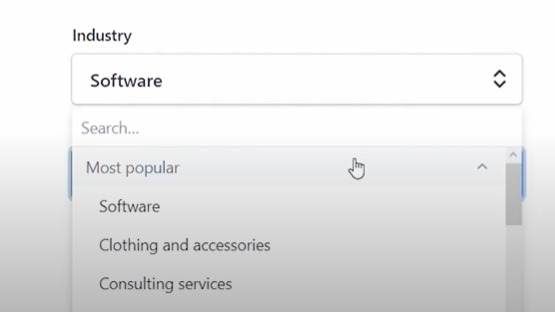
Step 6: Here, select the Industry of your business from the drop-down box, then continue.
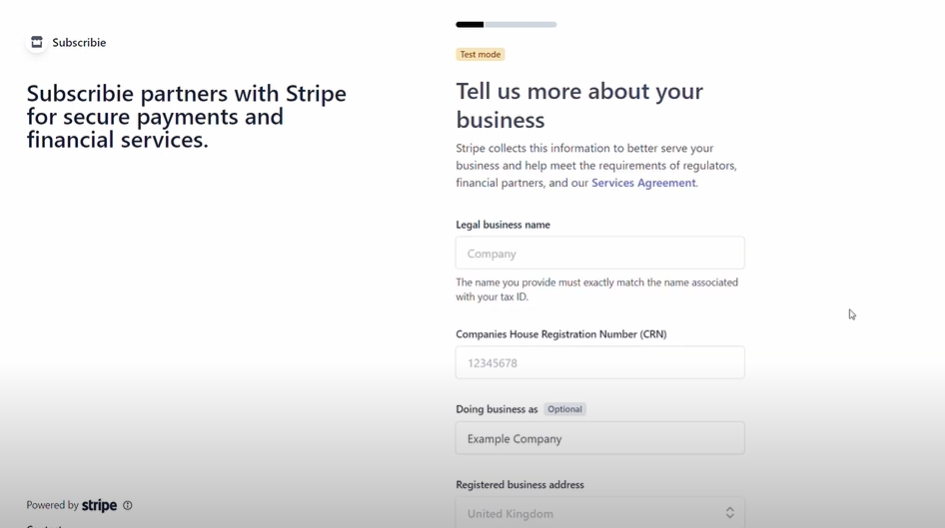
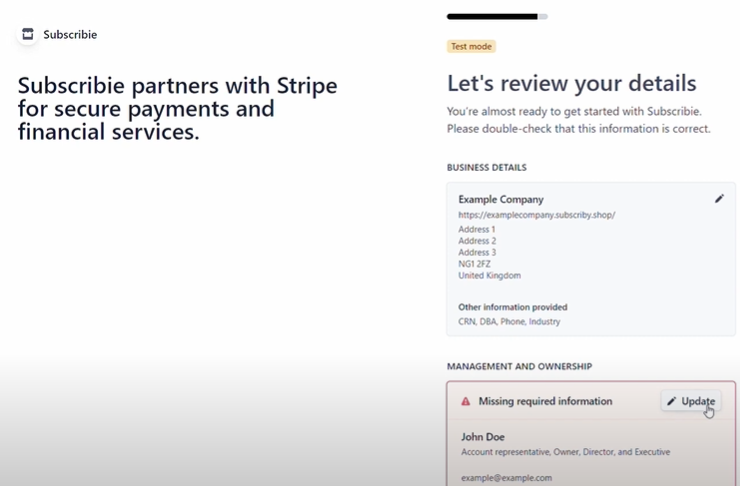
Step 7: Set your currency and fill in the necessary information needed and continue, then Finally review the details and additional information you entered and if prompted fill out any information that you might have missed.
Step 8: Pick the document you would like to submit as your Proof of Address.
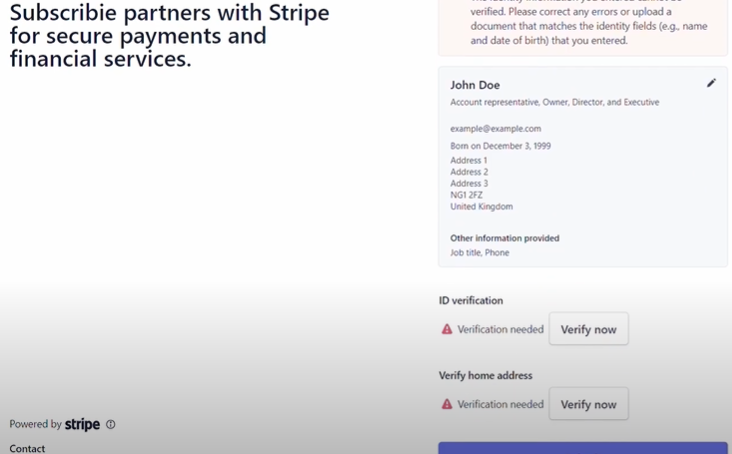
Step 9: Click “Verify Now” and upload the documents then click Submit.
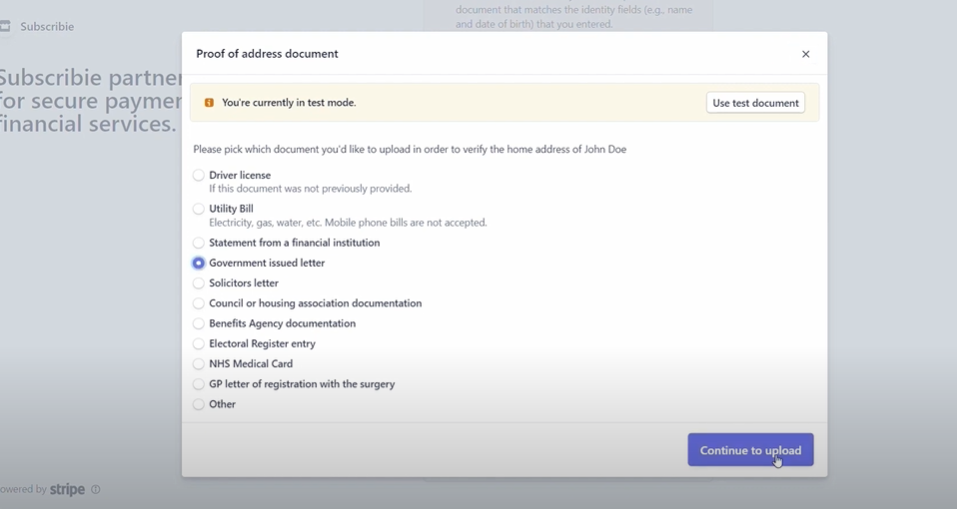
Step 10: Review all the information once more before clicking Submit.
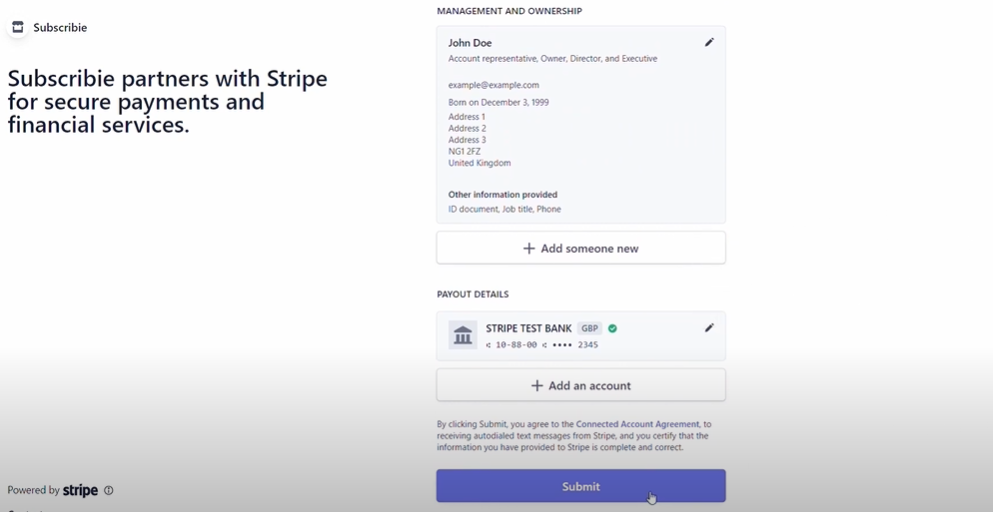
Now you are ready to start collecting subscription payments!
Step 1: On the main page of Subscribie.co.uk, click Get Started

Step 2: Fill in your Business Name, E-mail and type a password then scroll down.

Step 3: Provide the necessary information to set up your subscription.
Here you will have to fill in:
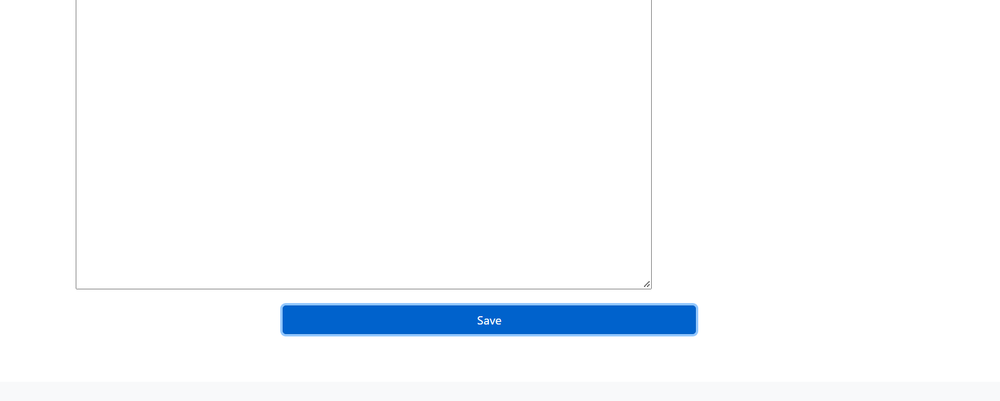
Once you have provided the following information, click Save.

Step 4: Once you have clicked Save, Subscribie will build your website and redirect you to the shop dashboard.

Next, learn how to activate payment collection to start automating payment collection.
You must run Subscribie, see running Subscribie locally.
After Subscribie is set-up locally, you can stop Subscribie (ctrl + c) then view the translation commands:
export FLASK_APP=subscribie
flask translate --help
Usage: flask translate [OPTIONS] COMMAND [ARGS]...

  Translation and localization commands.

Options:
  --help  Show this message and exit.

Commands:
  compile  Compile all languages.
  init     Initialize a new language.
  update   Update all languages.
When new text gets added to Subscribie, it needs to be translated. For example:
Before marked for translation:
@app.route("/new-route")
def my_new_route():
    return "This is my new route"
After marked for translation:
from flask_babel import _

@app.route("/new-route")
def my_new_route():
    return _("This is my new route")
warning Make sure you didn’t miss above, the
_is a function, from theflask_babellibrary.babeluses_to help find all the translatable text.
For more complex translation markets in Jinja2 templates see examples:
The main steps to perform static translation in Subscribie are:
_ functionflask translate update.po file with translations (e.g. subscribie/subscribie/translations/de/LC_MESSAGES/messages.po)flask translate compile, which generates a speed optimised translation file (e.g. subscribie/subscribie/translations/de/LC_MESSAGES/messages.po)flask run, commit the changes and raise a pull request.The Subscribie i18n translation process was expedited thanks to Miguel Grinberg who wrote an article the-flask-mega-tutorial-part-xiii-i18n-and-l10n, and is the author of Flask Web Development, 2nd Edition
Subscribie uses Playwright for automated browser testing which tests most features at every pull request.
There are two types of test Subscribie has:
Tests are in the tests directory of the Subscribie repo
pytest. venv/bin/activate # activates venv
python -m pytest --ignore=node_modules # run pytest
Run a single test
python -m pytest -vv -k 'test_create_PriceList_and_price_list_rule_percent_discount'
playwrightnpm install
npm i -D @playwright/test
npx playwright install
npx playwright install-deps
If you see:
UnhandledPromiseRejectionWarning: browserType.launch: Host system is missing dependencies!
  Install missing packages with:
      sudo apt-get install libgstreamer-plugins-bad1.0-0\
          libenchant1c2a
Stripe webhooks are recieved when payment events occur. The test suite needs to listen to these events locally when running tests.
tldr:
stripe listen --events checkout.session.completed,payment_intent.succeeded,payment_intent.payment_failed,payment_intent.payment_failed --forward-to 127.0.0.1:5000/stripe_webhookFor testing failed payments using test cards table, the test card
4000000000000341is especially useful because the cards in the previous table can’t be attached to a Customer object, but4000000000000341can be (and will fail which is useful for testing failed subscription payments such asinsufficient_funds).
Stripe takes payments. Stripe sends payment related events to Subscribie via
POSTrequests- also known as ‘webhooks’). If you’re doing local development, then you need Stripe to send you the test payment events you’re creating.stripe cliis a tool created by Stripe to do that.
stripe login (this shoud open the browser with stripe page where you should enter your credentials). If this command doesn’t work use stripe login -i (this will login you in interactive mode where instead of opening browser you’ll have to put Stripe secret key directly into terminal)stripe listen --events checkout.session.completed,payment_intent.succeeded,payment_intent.payment_failed --forward-to 127.0.0.1:5000/stripe_webhook
You will see:
⢿ Getting ready... > Ready!
stripe listen --events checkout.session.completed,payment_intent.succeeded --forward-to 127.0.0.1:5000/stripe_webhook
Remember Stripe will give you a key valid for 90 days, if you get the following error you will need to do step 2 again:
Error while authenticating with Stripe: Authorization failed, status=401
Warning Stripe webhooks will be automatically disabled if error rates go above a certain %. To delete in bulk test Stripe Connect express accounts see: ./tests/delete_stripe_accounts_bulk.py
Important: Stripe cli must be running locally to recieve payment events:
stripe listen --events checkout.session.completed,payment_intent.succeeded --forward-to 127.0.0.1:5000/stripe_webhook
Stripe-connect-account-announcer needs to be running locally if you’re runnning browser automated tests locally.
export PLAYWRIGHT_HEADLESS=false
export PLAYWRIGHT_HOST=http://127.0.0.1:5000/
export SUBSCRIBER_EMAIL_USER=test@example.com
There’s two key ways to run tests:
. venv/bin/activate # activate python virtual environment
cd tests/browser-automated-tests-playwright
python run-playwright-tests.py
cd tests/browser-automated-tests-playwright
# Run the test '@133_shop_owner_order_plan_with_cooling_off_period' in debug mode
npx playwright test --debug --headed --grep @133_shop_owner_order_plan_with_cooling_off_period
# Run test @stripe_connect in debug mode:
npx playwright test --debug --headed --grep @stripe_connect
Something not working? Debug playwright tests with the playwright inspector
PWDEBUG=1 npx playwright test
If you don’t see the playwright inspector, make sure you have an up to date version of playwright.
Alternative debugging with breakpoints
debugger; anywhere you want a breakpoint in a test.
Then run with the node debugger active:unset PWDEBUG
node inspect index.js
Useful node debug commands:
help # shows helpn # go to next linelist() # show code where pausedcont # continue execution until next breakpointYou can run individual playwright tests by:
@ are used to run tests by issue numbershop-owner, subscriber)For example, you may want to run only tests which impact the shop-owner
The test file name structure is
Worker Name--Issue Number-User Based-Test Name
npx playwright test --grep @issue-numer/User Based/Test Name --update-snapshots
For example:
Run only tests for issue #704
npx playwright test --grep @704 --update-snapshots
Run all subscriber tests:
npx playwright test --grep @subscriber --update-snapshots
Run only plan creation tests:
npx playwright test --grep @plan_creation --update-snapshots
To exclude specific test, but run all others:
npx playwright test --grep-invert @issue-numer/User Based/Test Name --update-snapshots.
The workers are specified in the playwright.config.ts file. Which is the file containing the global settings for the playwright tests:
Using Chromium because headless only works in chromium not mobile
In worker 1 we have these tests:
Before each test, playwright logs in with a shop-owner user.
Stripe test: Check if Stripe is connected, otherwise connect to Stripe. (this is the longest tests 3minutes if not connected)
order_plan_with_only_recurring_charge
order_plan_with_only_upfront_charge
Order_plan_with_free_trial
Order_plan_with_subscription_and_upfront_charge
Transaction filter by name and plan title
pause, resume subscription test
cancel subscription test.
Subscriber filter by name and plan title
plan_creation
changing_plans_order
share_private_plan_url
order_plan_with_choice_options_and_required_note
order_plan_with_cancel_at
order_plan_cooling_off
Why these tests? plan creation, changing plans order, and sharing private plan url do not depend on the previous tests so while Worker 1, Stripe Connect, test is running (takes 3min to complete) this worker is running those 3 tests first. By the time those 3 tests are run, tripe is already connected and we can start doing tests that require Stripe to be connected like ordering plans.
clear_DB
categories_creation
private_page_creation
Public_page_creation
Slogan_creation
Change_shop_colour
Adding_vat
ordering_plan_with_VAT
subscriber_magic_login
subscriber_order_free_plan
subscriber_change_card_details
Worker 3 mostly contains tests that don’t require Stripe to be connected, only the 4th last ones requires Stripe to be connected.
The worker name example, test.spec, worker1.spec, worker2.spec.
The spec is necessary for the tests to be discovered by Playwright as another worker.
To run only the specified tests, the syntax is:

signal_payment_failed. This is achieved using the python blinker library.When an ’event’ happens, you find out by receiving a signal- but you must subscribie to the signals you’re interested in.
For a more in depth generic explanation of signals see the official blinker documentation.
By convention, signal names are prefixed with
signal_
Subscribie has the following signals (see signals.py for most up to date list:
signal_journey_completesignal_payment_failedsignal_new_subscribersignal_new_donation (see donations)Structure:
signals.py is where signals are definedreceivers.py is where signals are connected to recieversnotifications.py & email.pyIt’s helpful to think in terms of Signals which emit notifications to all connected recievers. Many Receivers may be interested in a single event. For example, a new order your email notification system might be interested, plus your postal service. One Signal can have multiple Receivers connected to it.
First, you must have created a signal.
Events are ‘fired’ when send is called on the signal.
For example, send() is called on the journey_complete signal when
a subscriber gets to the ’thank you’ page. Any recievers connected to that
signal withh receive that event.
Note in the example below, we are passing the current app, and the associated email address for the event. Be careful doing this if your reciever runs in a background thread, as that will not have access to the application context.
journey_complete.send(current_app._get_current_object(), email=email)
Subscribie using python standard logging module, with log handlers configred for stdout and Telegram.
tldr: Set
PYTHON_LOG_LEVEL=DEBUGin your.envsettings file.
In the file .env, set the PYTHON_LOG_LEVEL to DEBUG or lower.
PYTHON_LOG_LEVEL=DEBUG
Then re-start Subscribie.
Loglevel options are:
DEBUGINFOWARNINGERRORCRITICALSee also: When to use logging
In the same way, you can configure telegram log level verbosity by setting TELEGRAM_PYTHON_LOG_LEVEL
in your .env settings file.
TELEGRAM_PYTHON_LOG_LEVEL=ERROR
Where is the logger setup?
See logger.py
log.warning etcIf your log PYTHON_LOG_LEVEL is too high, e.g. if set to ERROR, then the logger (or more precisely, a given log handler, won’t display any log messages lower than ERROR.
Python logging has two key concepts: The logger, and log handlers.
In Subscribie, we log to stdout using the built-in StreamHandler and use an additonal built-in handler QueueHandler which is configured to send to Telegram if configured.
See logger.py for implementation.
POST request with your webhook endpoint address (see example below)Please see also CONTRIBUTING.md
We use Hugo to format and generate our website, and site structure. Hugo is an open-source static site generator that provides us with templates, content organisation in a standard directory structure, and a website generation engine. You write the pages in Markdown (or HTML if you want), and Hugo wraps them up into a website.
If you’ve just spotted something you’d like to change while using the docs, Subscribie has a shortcut for you:
If you want to run your own local Hugo server to preview your changes as you work:
Follow the instructions in Getting started to install Hugo and any other tools you need. You’ll need at least Hugo version 0.45 (we recommend using the most recent available version), and it must be the extended version, which supports SCSS.
Fork the Subscribie repo repo into your own project, then create a local copy using git clone. Don’t forget to use --recurse-submodules or you won’t pull down some of the code you need to generate a working site.
git clone --recurse-submodules --depth 1 https://github.com/subscribie/Subscribie.git
Run hugo server in the site root directory. By default your site will be available at http://localhost:1313/. Now that you’re serving your site locally, Hugo will watch for changes to the content and automatically refresh your site.
Continue with the usual GitHub workflow to edit files, commit them, push the changes up to your fork, and create a pull request.
If you’ve found a problem in the docs, but you’re not sure how to fix it yourself, please create an issue in the Subscribie repo. You can also create an issue about a specific page by clicking the Create Issue button in the top right hand corner of the page.
This is page is being updated, please refer to Documentation
Think about your project’s features and use cases. Use these to choose your core tasks. Each granular use case (enable x, configure y) should have a corresponding tasks page or tasks page section. Users should be able to quickly refer to your core tasks when they need to find out how to do one specific thing, rather than having to look for the instructions in a bigger tutorial or example. Think of your tasks pages as a cookbook with different procedures your users can combine to create something more substantial.
You can give each task a page, or you can group related tasks together in a page, such as tasks related to a particular feature. As well as grouping related tasks in single pages, you can also group task pages in nested folders with an index page as an overview, as seen in this example site. Or if you have a small docset like the Subscribie User Guide with no Tutorials or Concepts pages, consider adding your feature-specific pages at the top level of your docs rather than in a Tasks section.
Each task should give the user
Failed payments do not need to be manually managed. You automatically receive a notification of a failed payment and when it will be retried again. All failed payments are automatically retried for a maximum of 5 times. Please reach out to your subscriber and ask them to keep their payment accounts in order before the next payment attempt.
If you’d like to know how to get your customer’s information, check out our documentation on subscriber information.
When an attempted payment collection is unsuccessful, it is retried a set number of times to collect the payment. If the attempt falls during the next subscription payment cycle, both the attempted payment collection and the next subscription payment will be collected. Both payments are collected because time is constant and moving. So failed payments will be retried up to 5 times* and if it overlaps with future subscription payments, both payments will be deducted.
Step 1: In the Shop Dashboard, Look for All Transactions / Manage Refunds and click on Failed Invoices.
Step 2: Here you will see all of your attempted and failed invoices.
Step 1: In your dashboard go to Customer Signup Confirmation under Email settings.
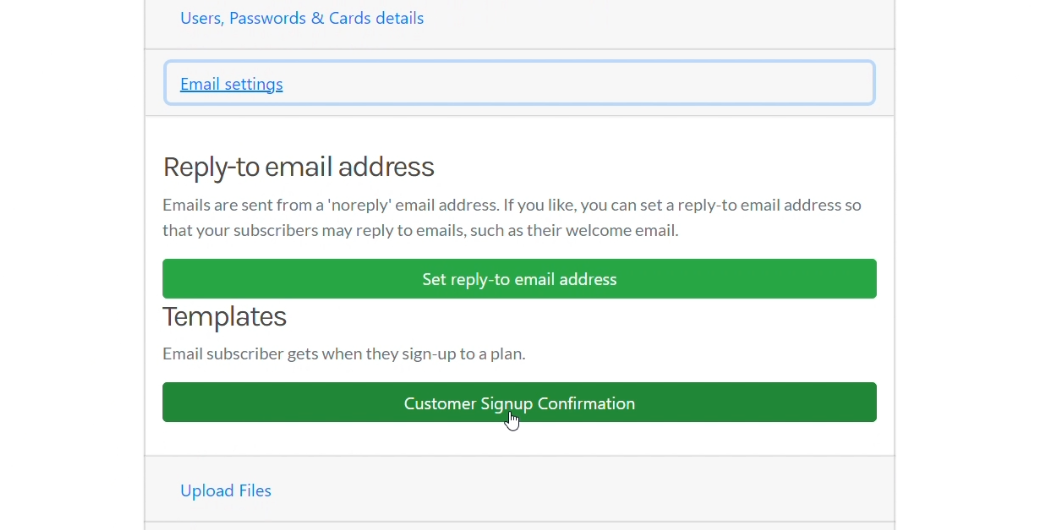
Step 2: Change the default setting from default to “use my template below” to set the customised signup confirmation to your customised email.
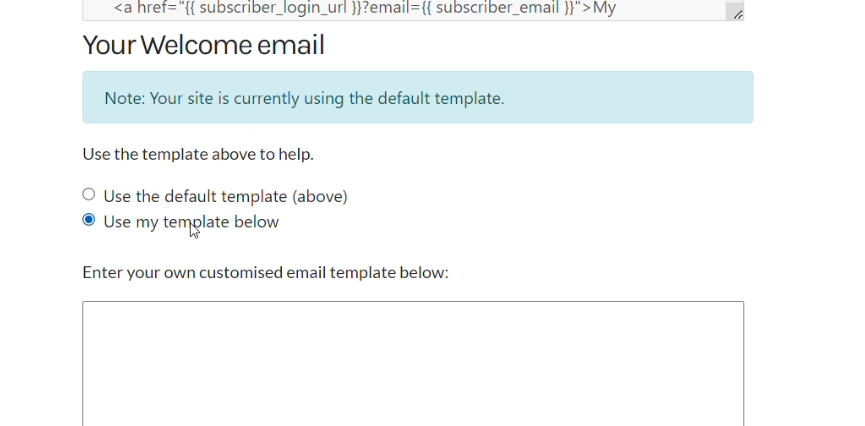
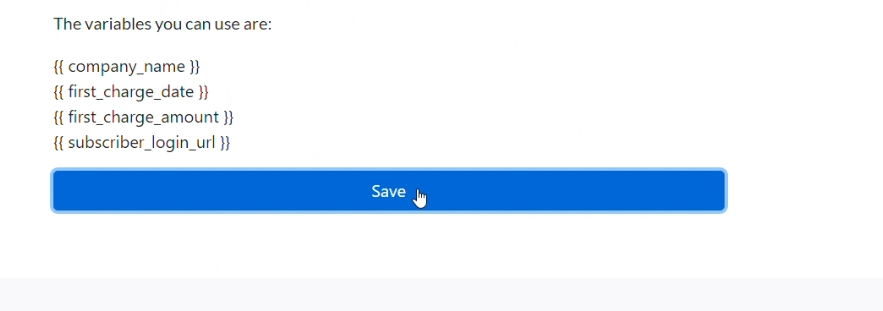
Step 3: Enter your new customised signup confirmation email in the text box. You can use the following variables to insert dynamic information about your customers and your service:
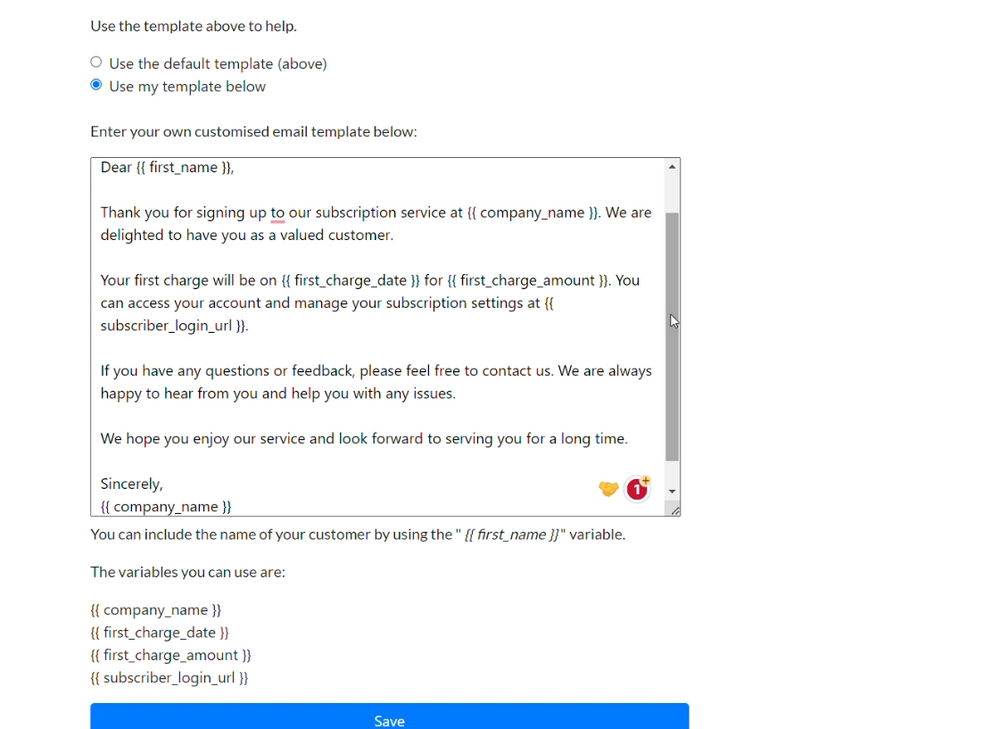
Step 4: Click save to save this new email format to send out to customers when they sign up.
That’s it! You have successfully customised your customer signup confirmation email for Subscribie.
Do you want to make emails even more personal? Learn how to add a reply to email to your automated emails.
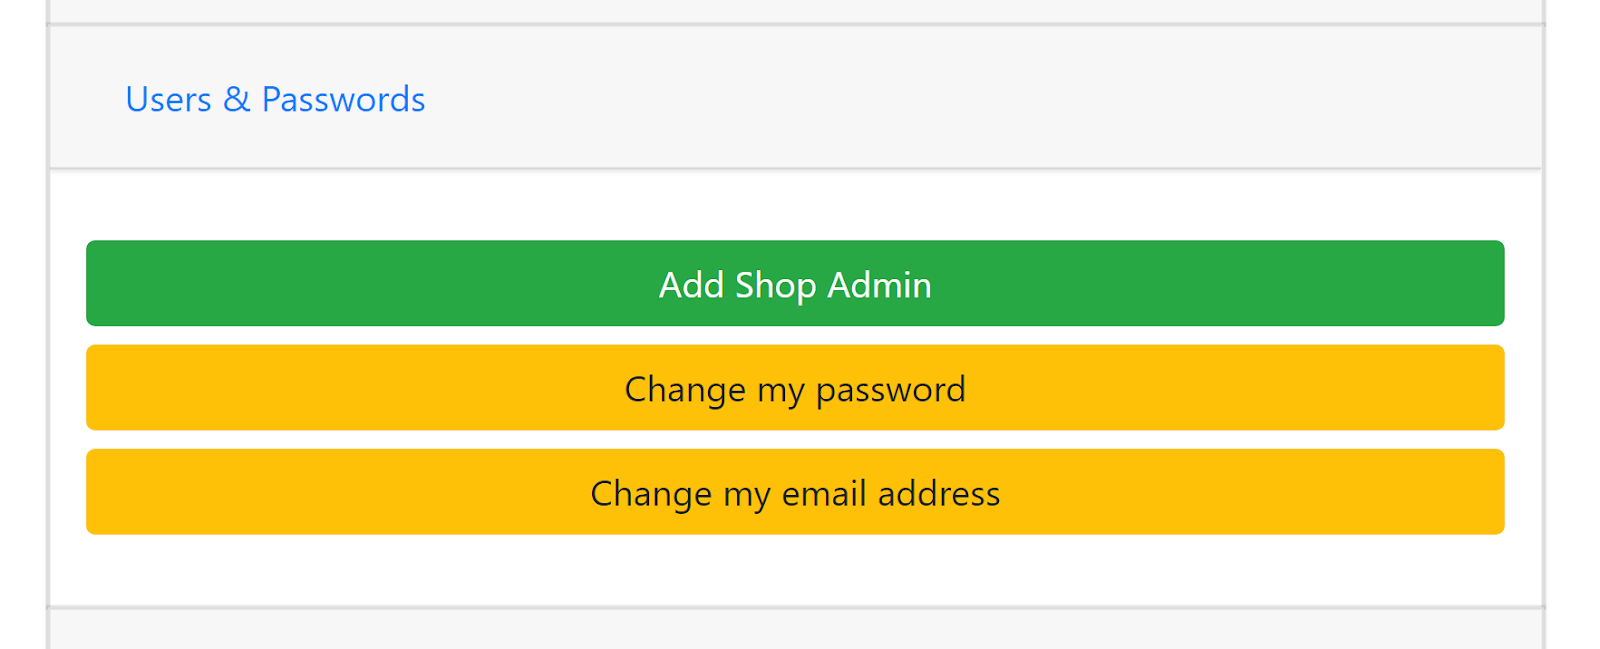
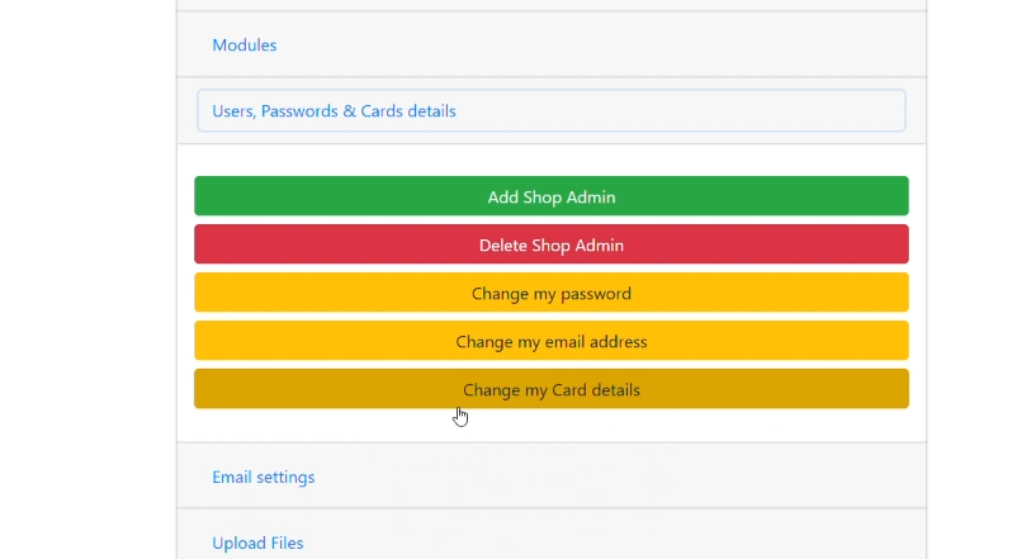
Step 1: In your Dashboard, Click on Users, Passwords & Cards details.
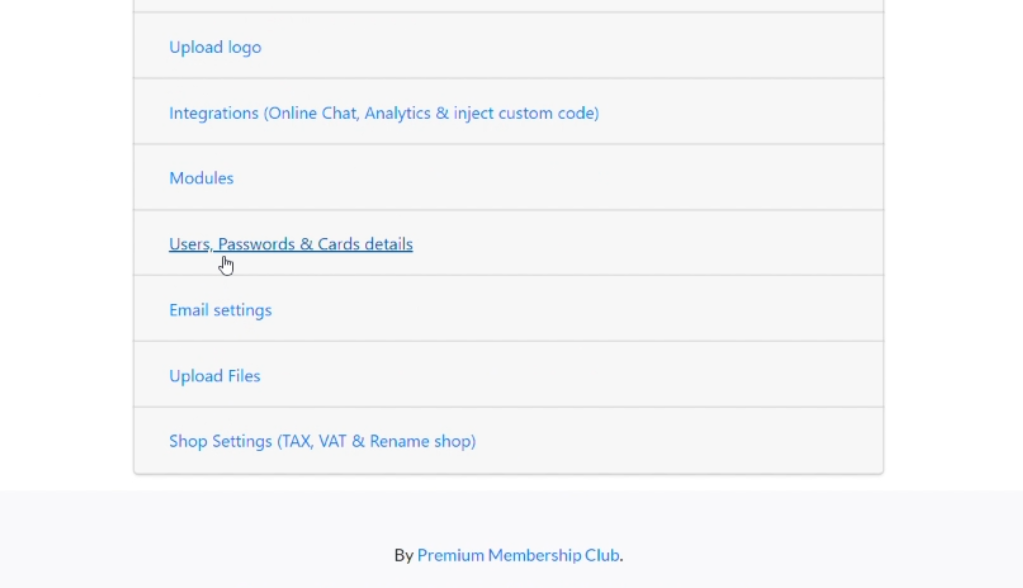
Step 2: Click Change my Card details.
Step 3: Enter your Login Details.
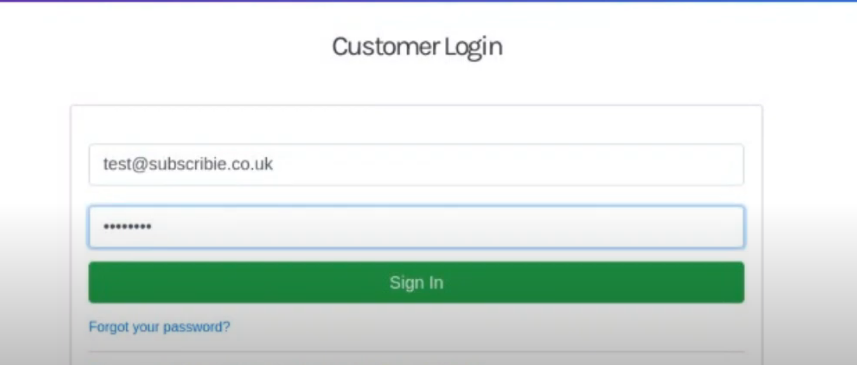
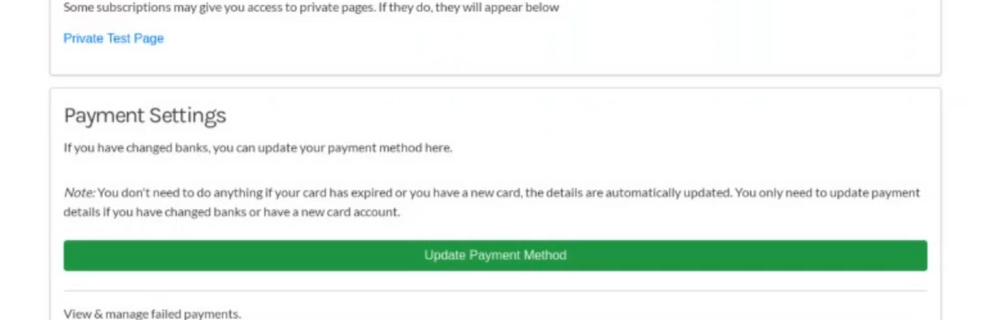
Step 4: Click Update Payment Method.
Step 5: Enter your card details and click Save.
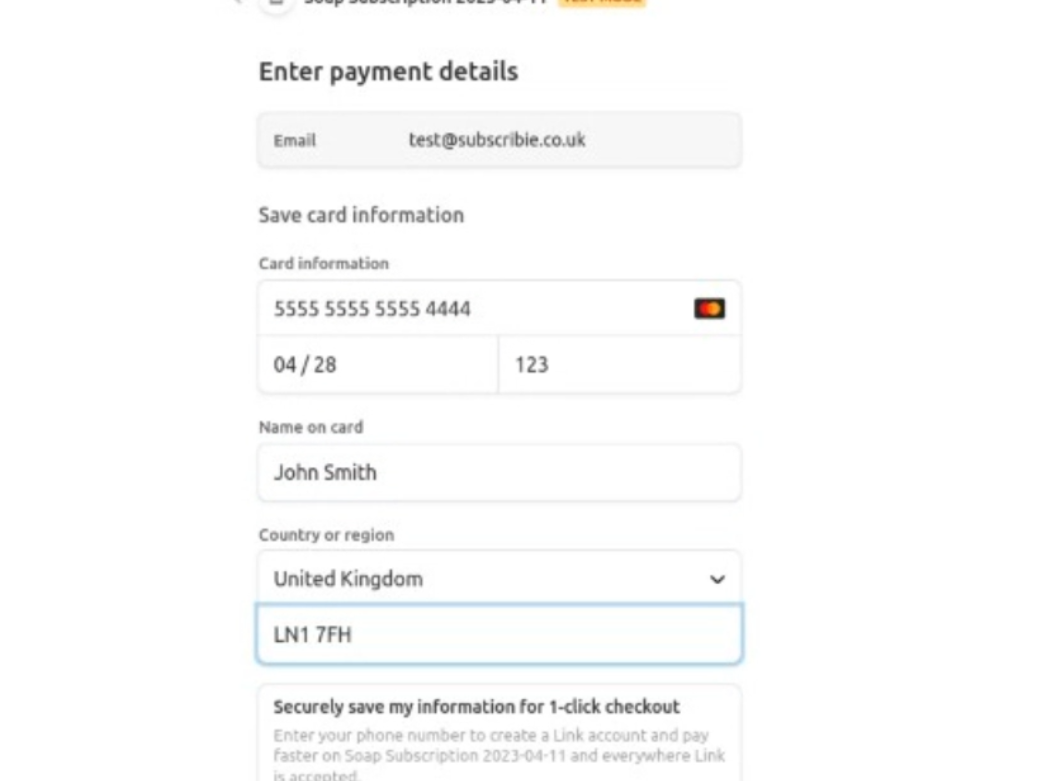
That’s it! You have successfully updated your card details and can continue to use Subscribie.
Step 1: Go to View Subscribers under My Subscribers.
Step 2: Click Refresh Subscriptions. This will update your subscriptions with the latest data and show you the available actions for each subscription.
Please note that if you have an extremely large number of subscriptions, this will take longer to complete.

Once the refresh is done, you will be able to see the option to pause or cancel a subscription for your subscribers.
Step 3: Now, your subscriber list will be updated and you can pause or cancel your subscriber’s subscription.
Want to know how to pause or cancel a subscription? Check out how you can do it on Subscribie and how you can refund a subscription.
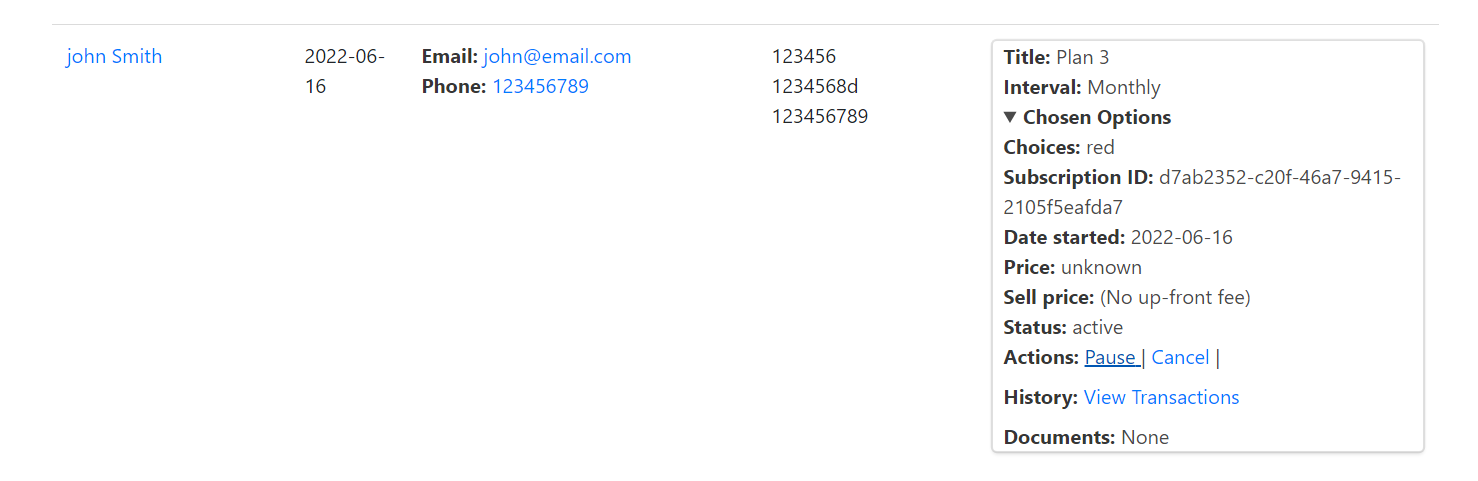
When you add documents to plans, subscribers get access to those documents for easy viewing. Use documents to add useful subscription related information, such as terms of business, or simply generic text you want subscribers to read when they sign-up to your plans.
For adding files to your plans (such as images, PDFs etc), learn how to upload files to your shop.
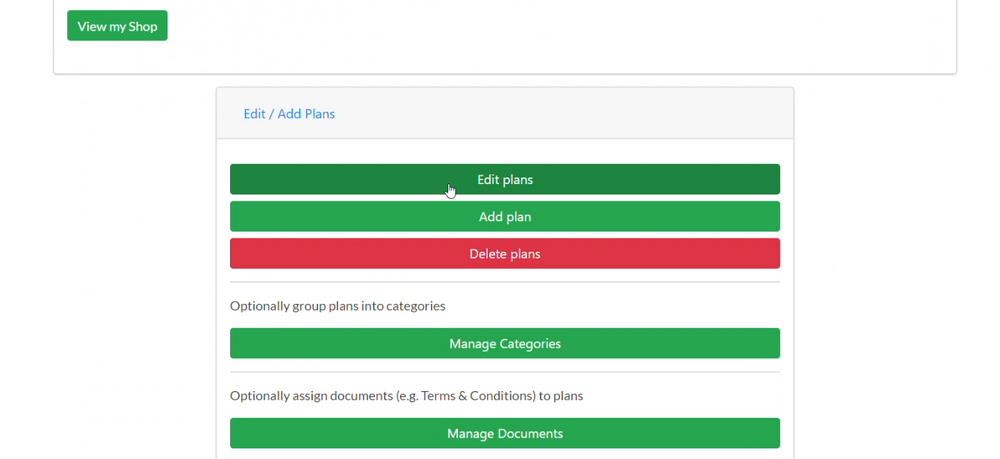
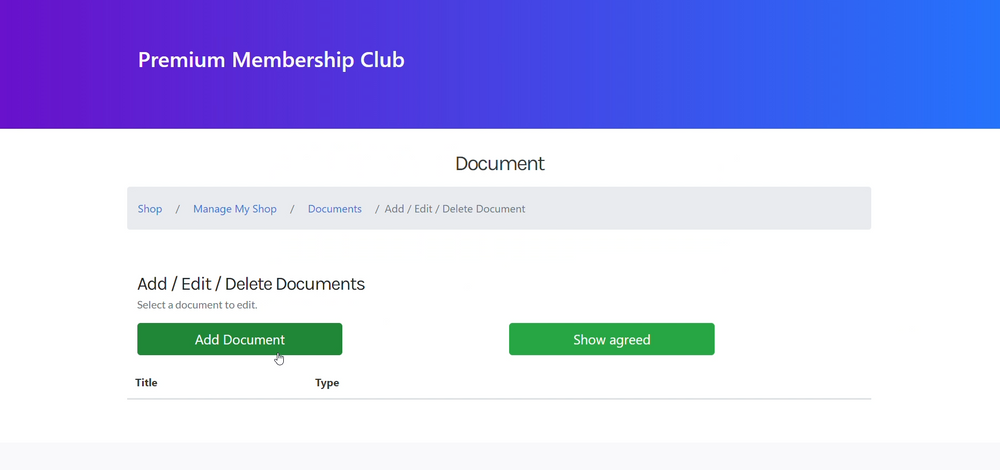
Step 1: Go to Manage Documents in Edit/ Add Plans.
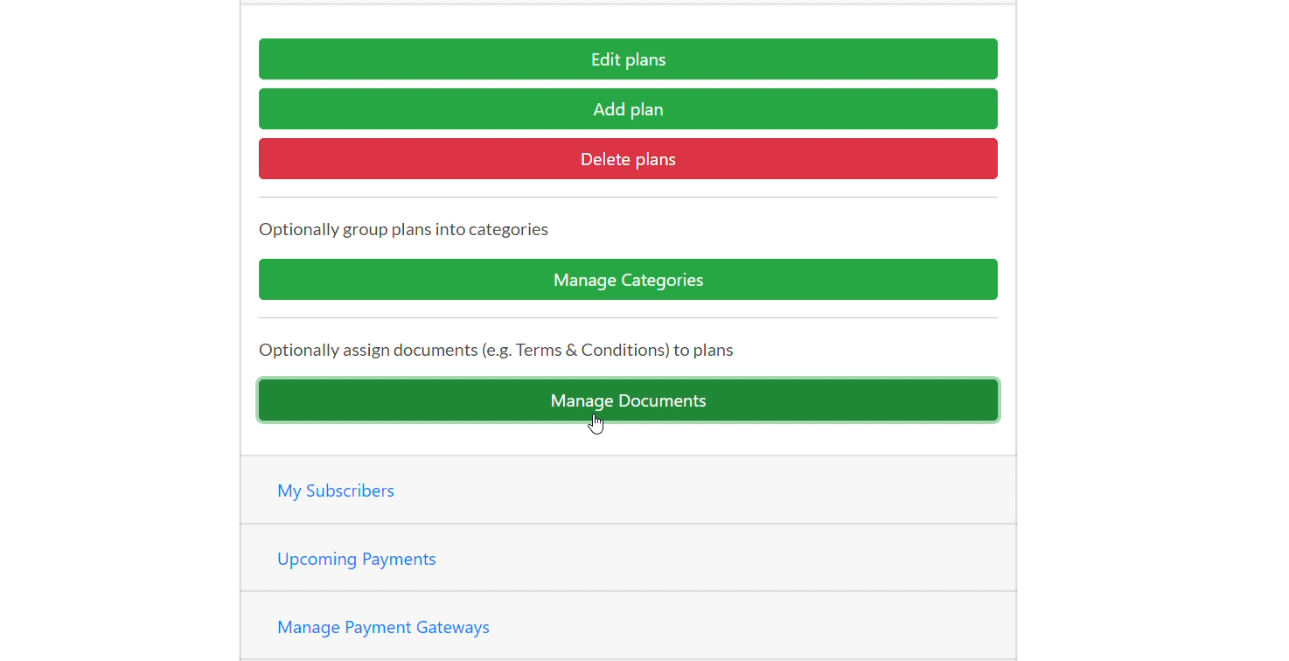
Step 2: Click Add Document.
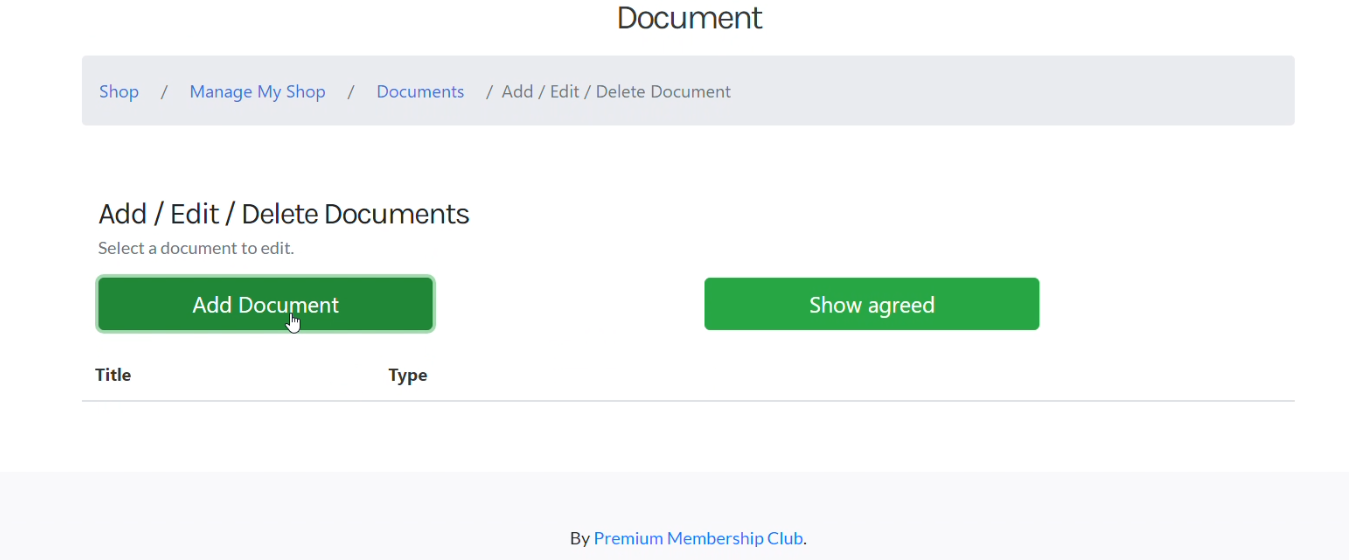
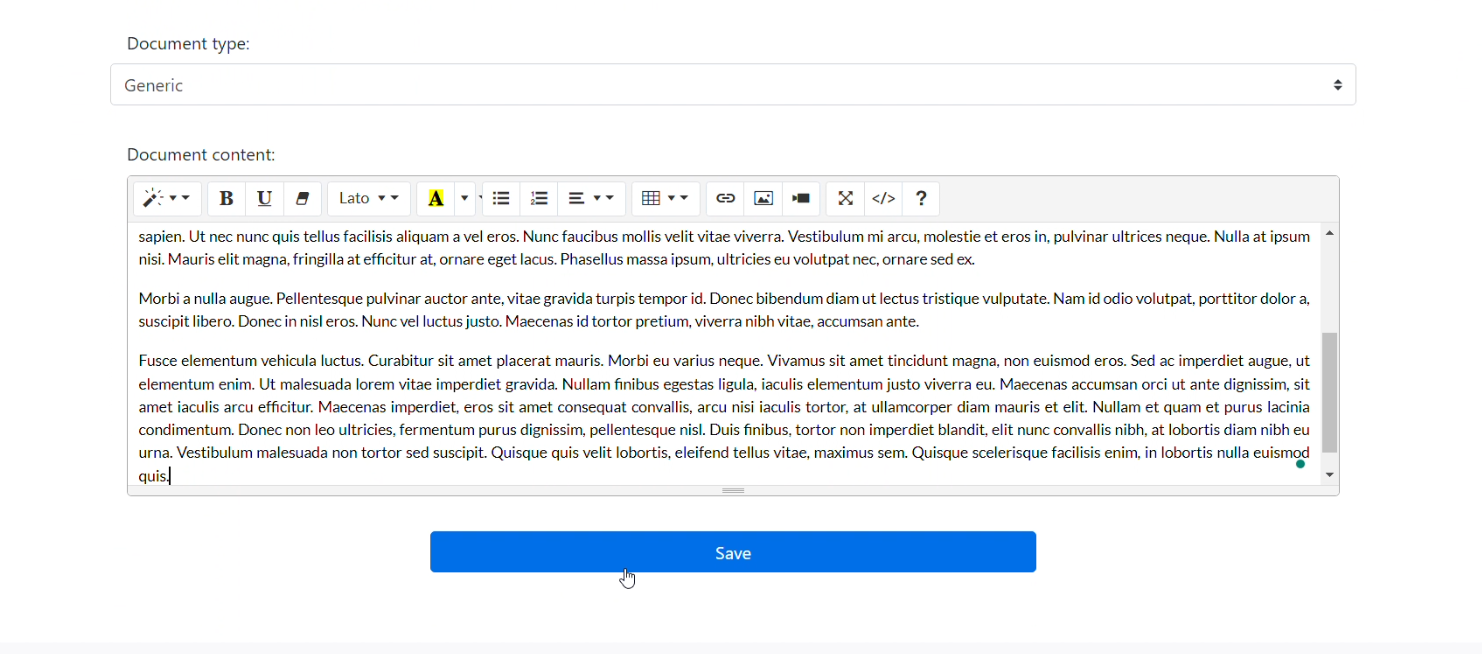
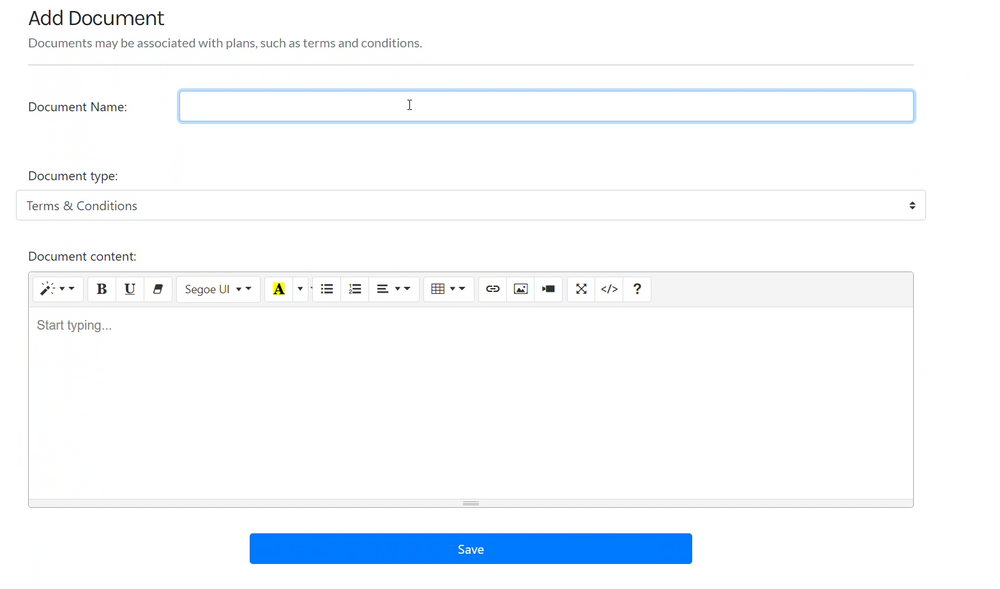
Step 3: Enter the Document Name and select the type of document you would like to add.
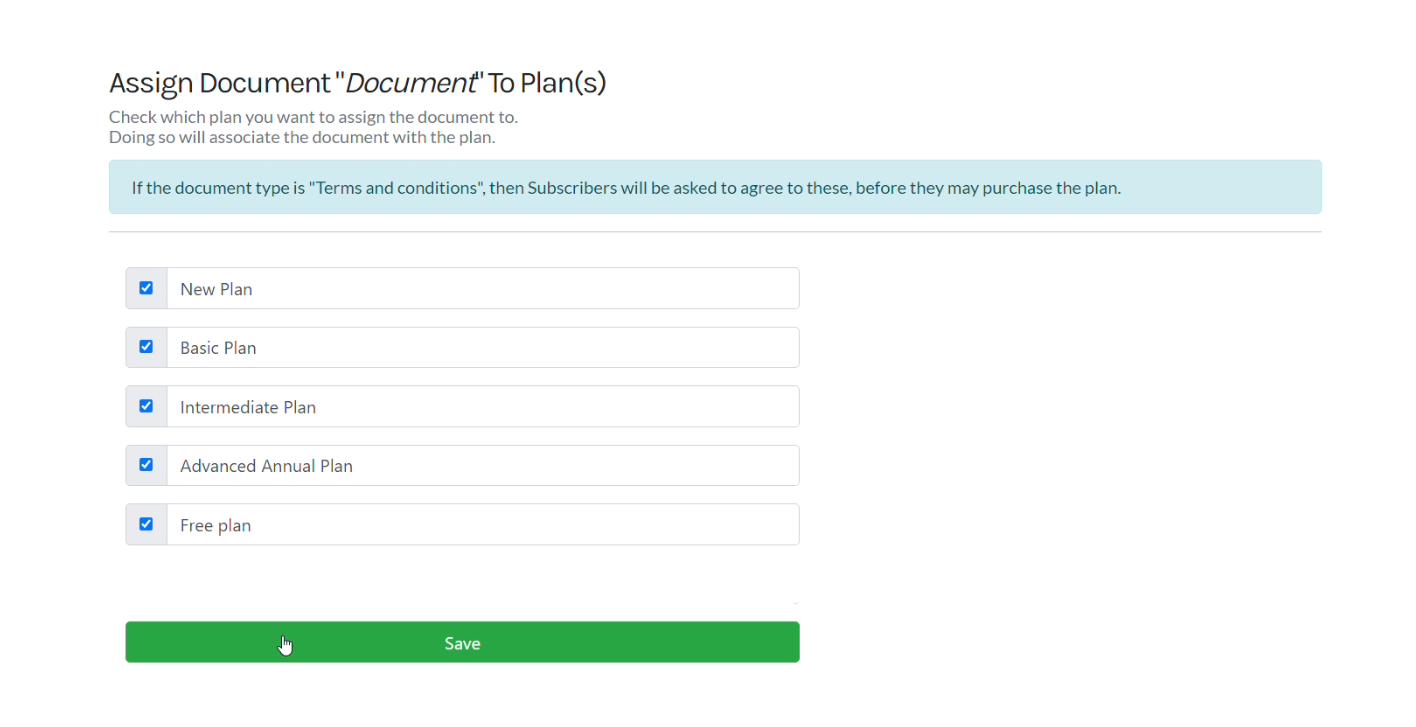
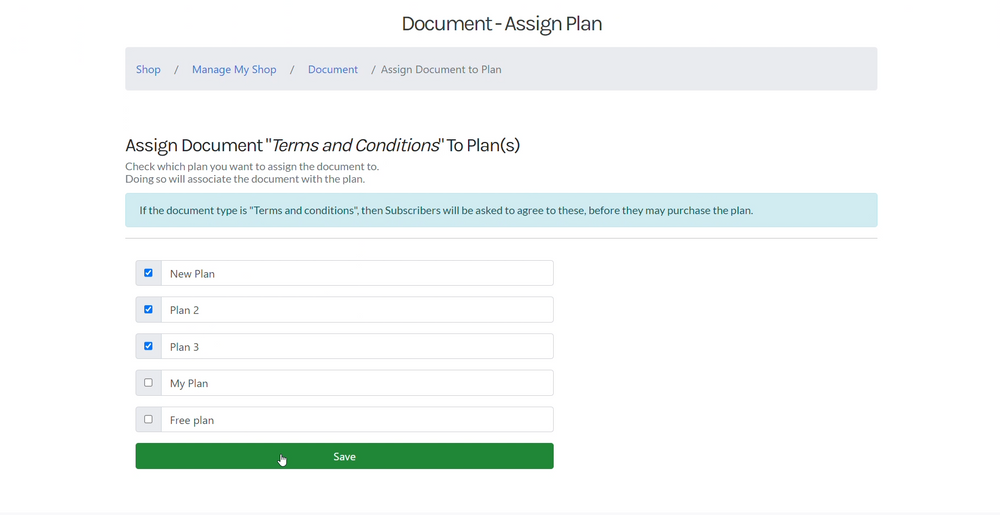
If the document type is “Terms and conditions”, then Subscribers will be asked to agree to these, before they may purchase the plan.

Step 4: Enter your document contents and click Save.
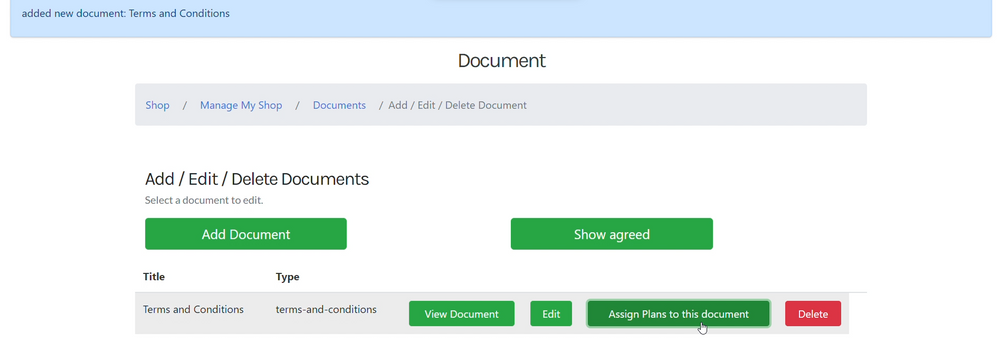
Step 5: To assign this document to your plans, click Assign Plans to this document.
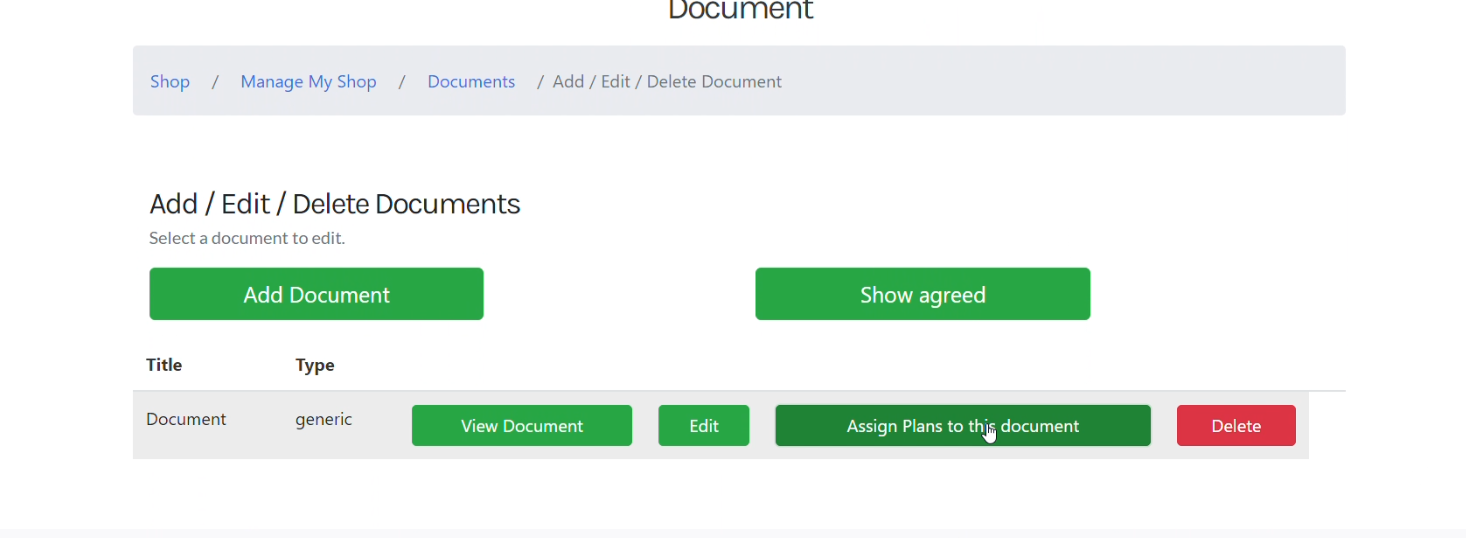
Step 6: Select the subscription plans you would like to add the document to and click Save.
You have now added documents to the desired plans.
Note: Changing your shop name also changes your shop web address.
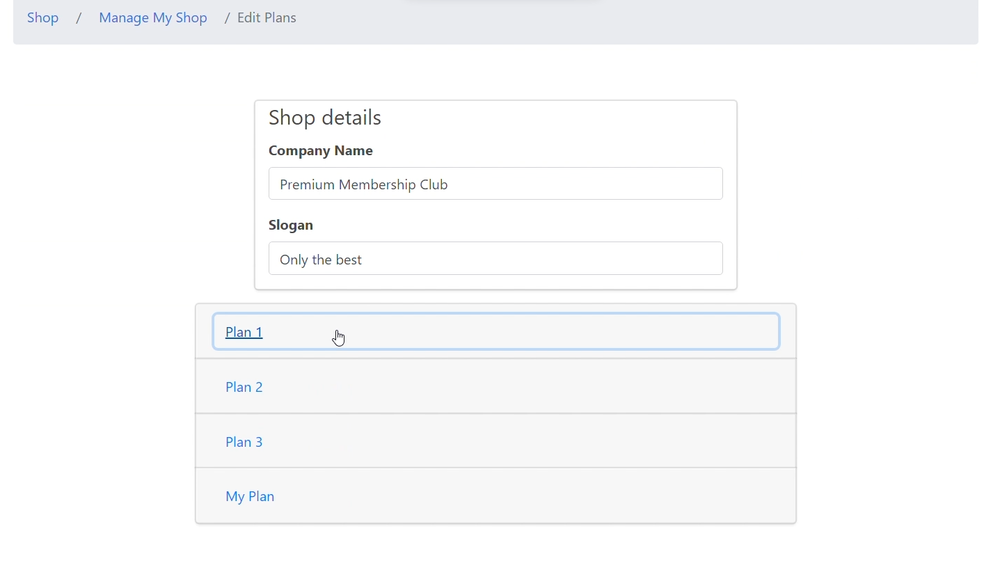
Step 1: Go to Edit Plans under Edit/Add Plans

Step 2: In the Company name text box under Shop Details, enter the name you want to change your shop.
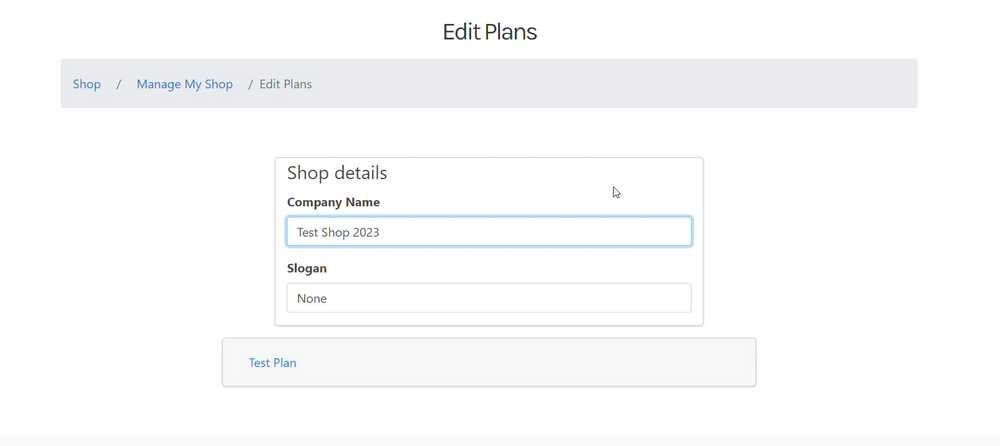
Step 3: Once you have entered the new name, scroll down and click Save
Please wait a short while whilst the shop name is changes.
Congratulations! You have successfully changed your shop name.
Remember your shop web address will also have changed to the new name you have chosen.
For more customisation, learn how to add a slogan, add a logo and change your shop’s website address URL link
Step 1: Scroll to the bottom of your dashboard and click Rename shop web address, this is under the Shop Settings (Tax & rename shop) tab.
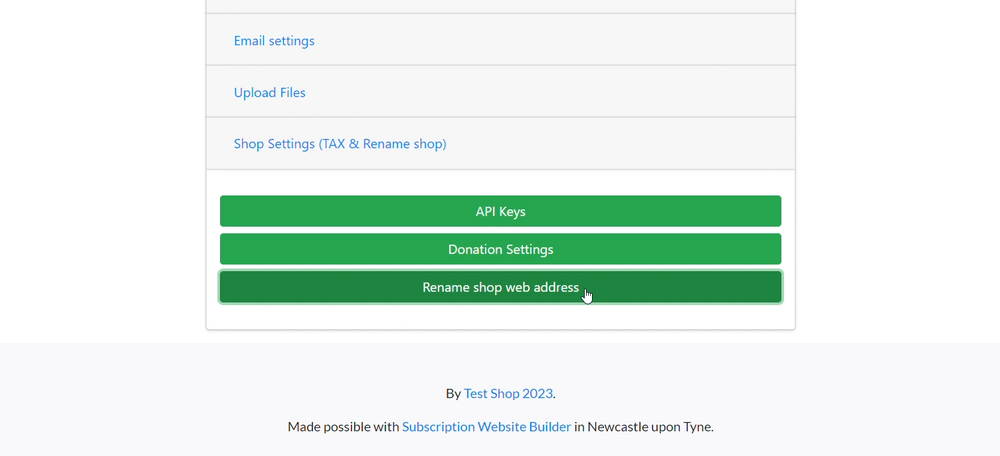
Step 2: Here, enter the address you would like to rename the shop to.
When changing your shop’s address, make sure you add “.subscriby.shop” after your desired name. For example: test.subscriby.shop
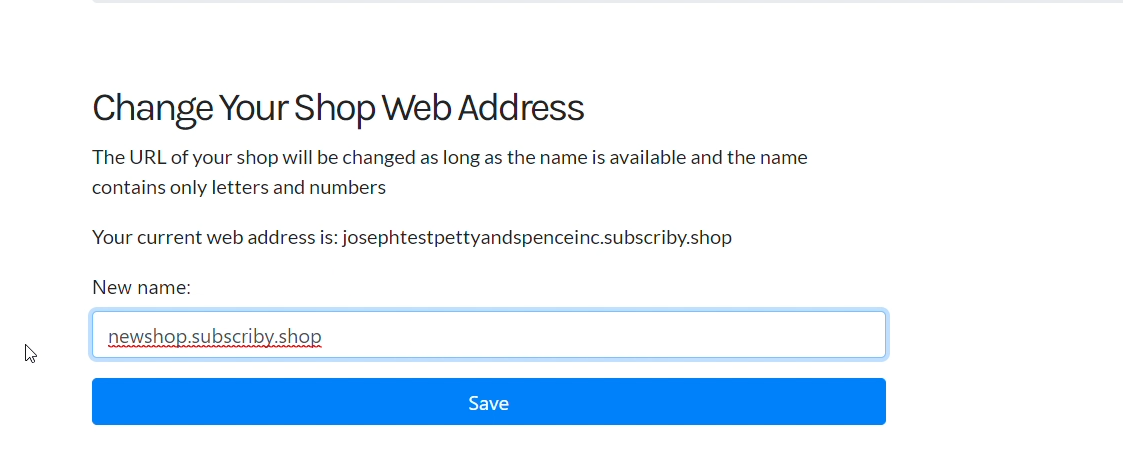
Step 3: Now click save.
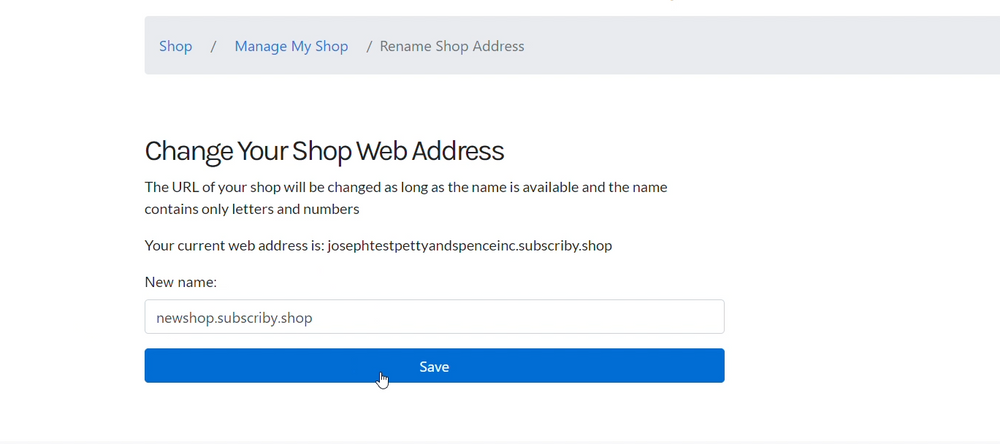
Now your new web address will reflect in your subscription shop!
For more customisation, learn how to add a slogan, add a logo and change the name of your shop
Step 1: Go to Edit Plans, under the Edit/Add Plans tab.
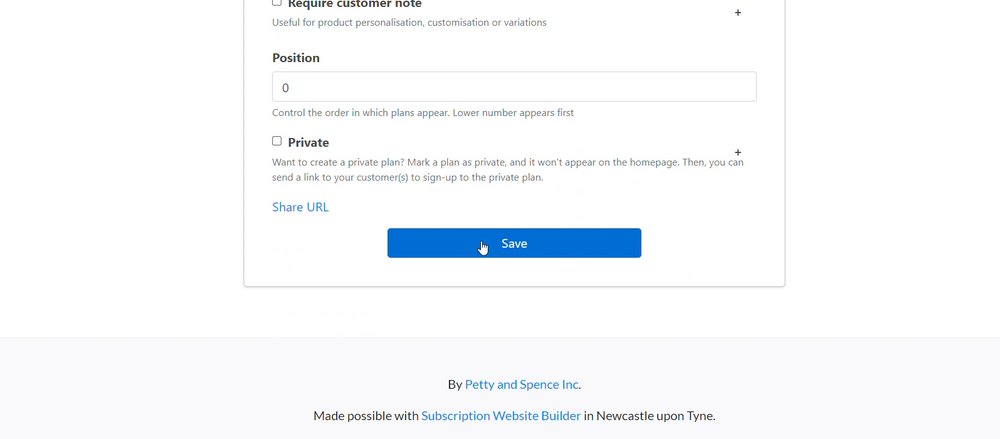
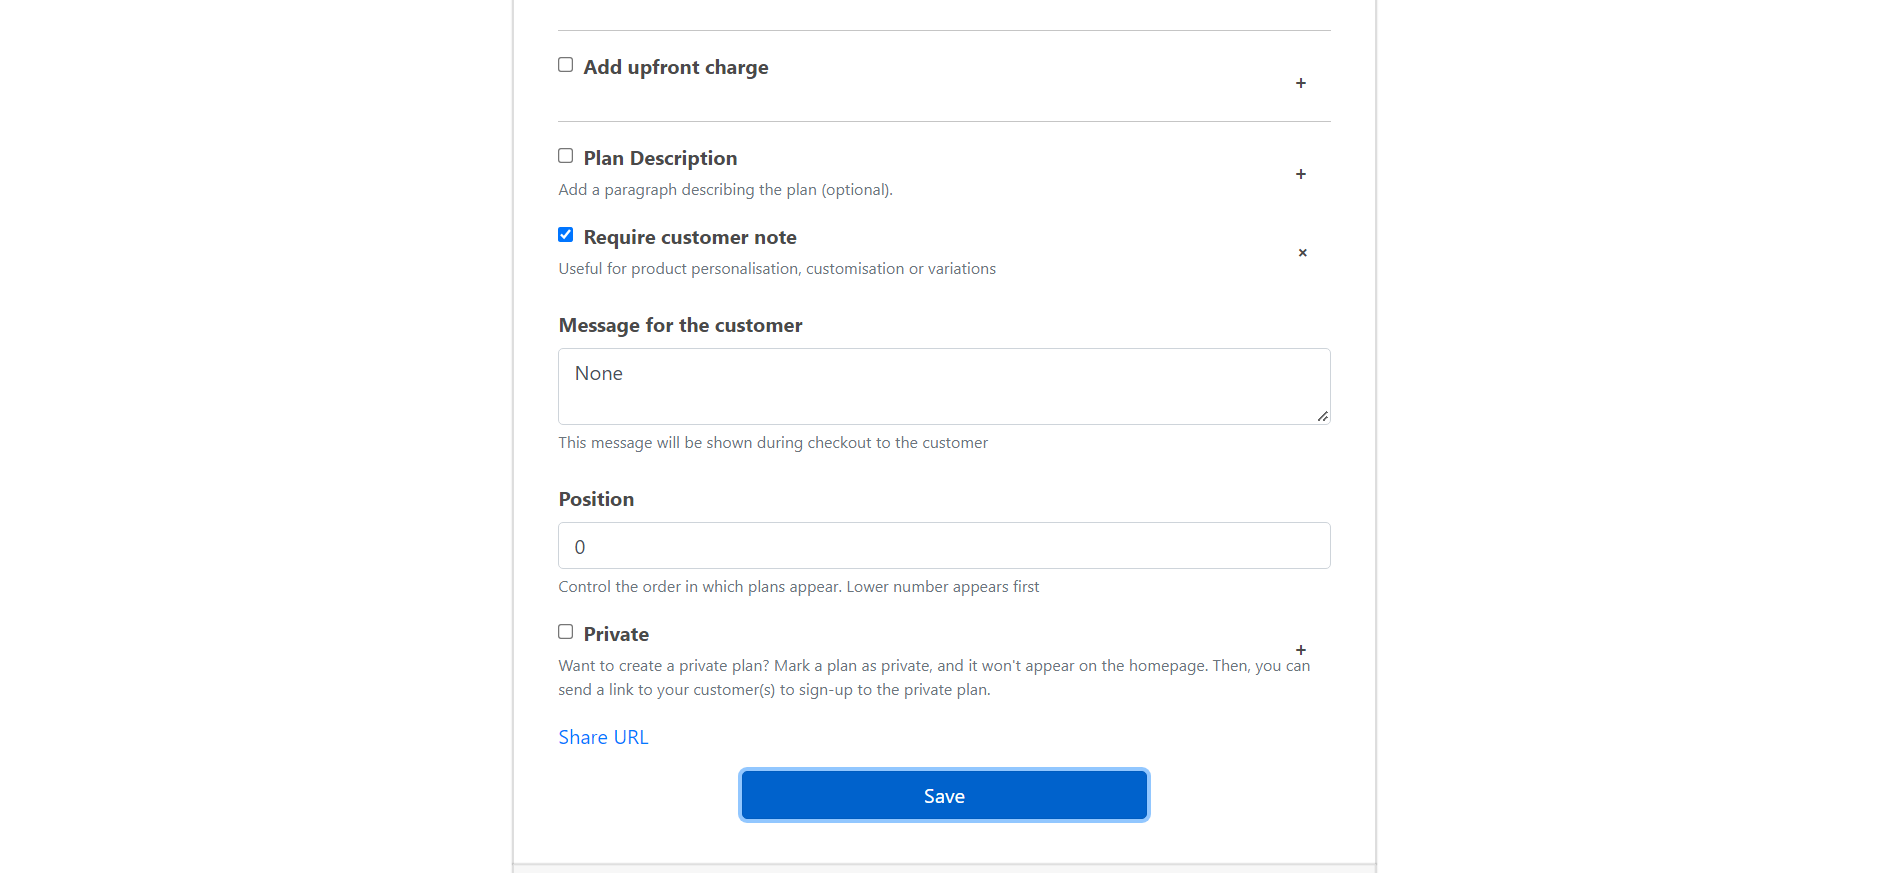
Step 2: Under the plan, you would like to add a custom note to, enable “Require Customer Note”.

Step 3: Enter instructions on what you would like your customers to fill out in the notes section in the “Message to customer” box
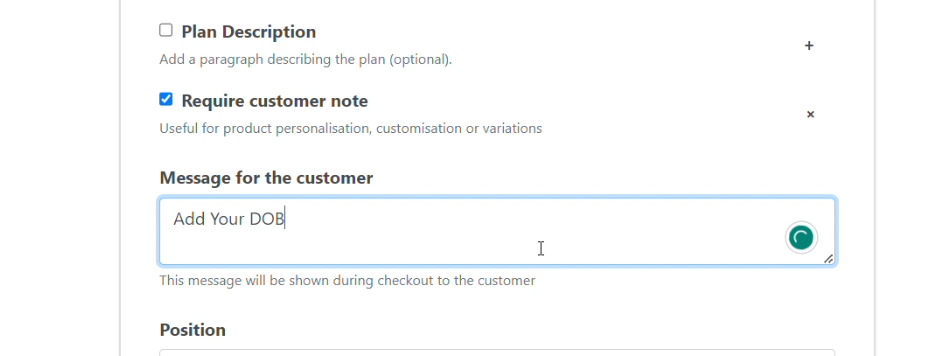
Step 4: Now, scroll down and Click Save
You subscribers can now add notes during sign-up to your plan.
How to set a cooling-off period for Plans. For example, a 14 day cooling-off period where there are no charges.
In a free trial period, you charge less (because you give away some days ‘free’, compared to a cooling-off period, where you may want to delay taking payment until after the cooling period has completed.
Some shop owners prefer to delay taking payments until after the cooling-off period. They do this to reduce the time spent dealing with refunds should they occur during the cooling-off period.
Step 1: To create a cool off period on Subscribie, Log into your store and navigate to your Shop Dashboard.

Step 2: Under the “Edit/Add Plans” section, click “Add Plan”.
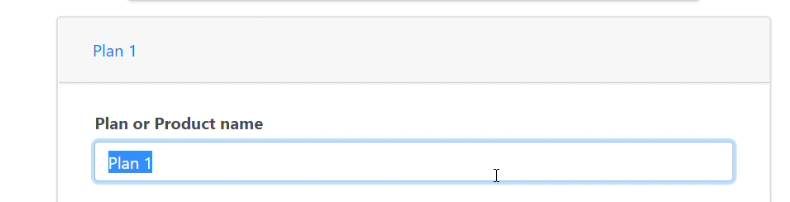
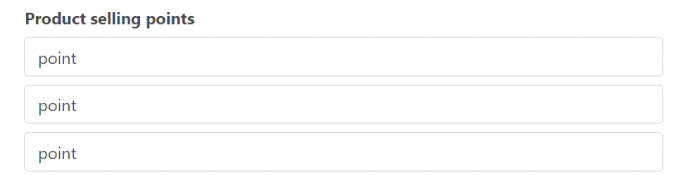
Step 3: Add the details of the plan such as the Plan or Product Name and Selling Points.
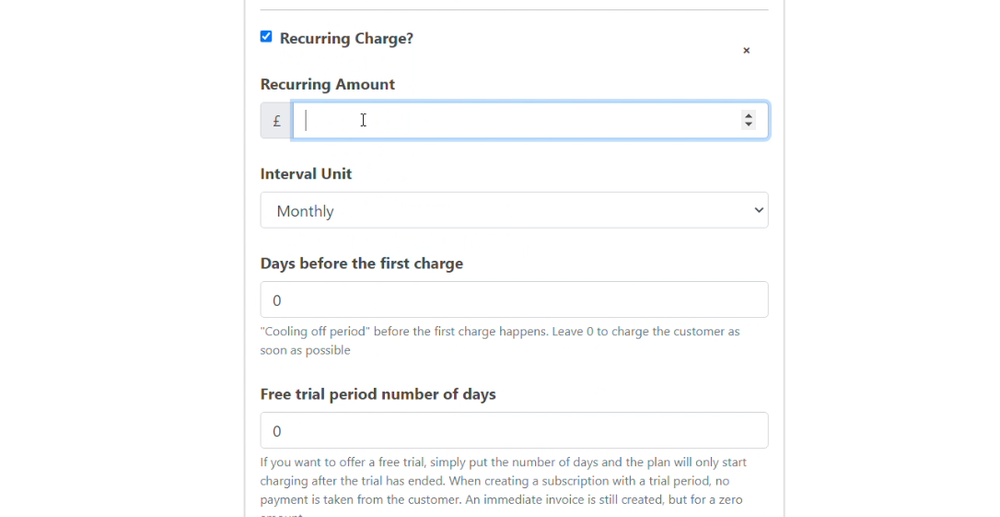
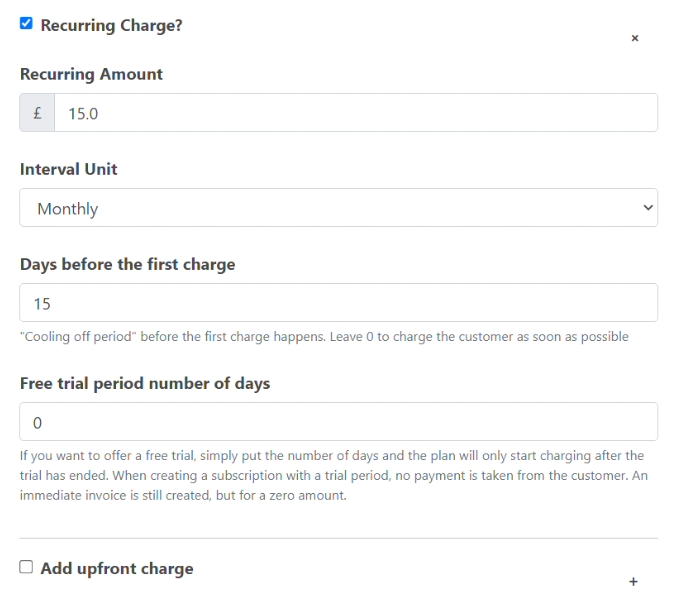
Step 4: If this is a recurring charge, select “Recurring Charge” and input the number of days you would like to have as your cooling-off period before charging your customer in “Days before the first charge”.
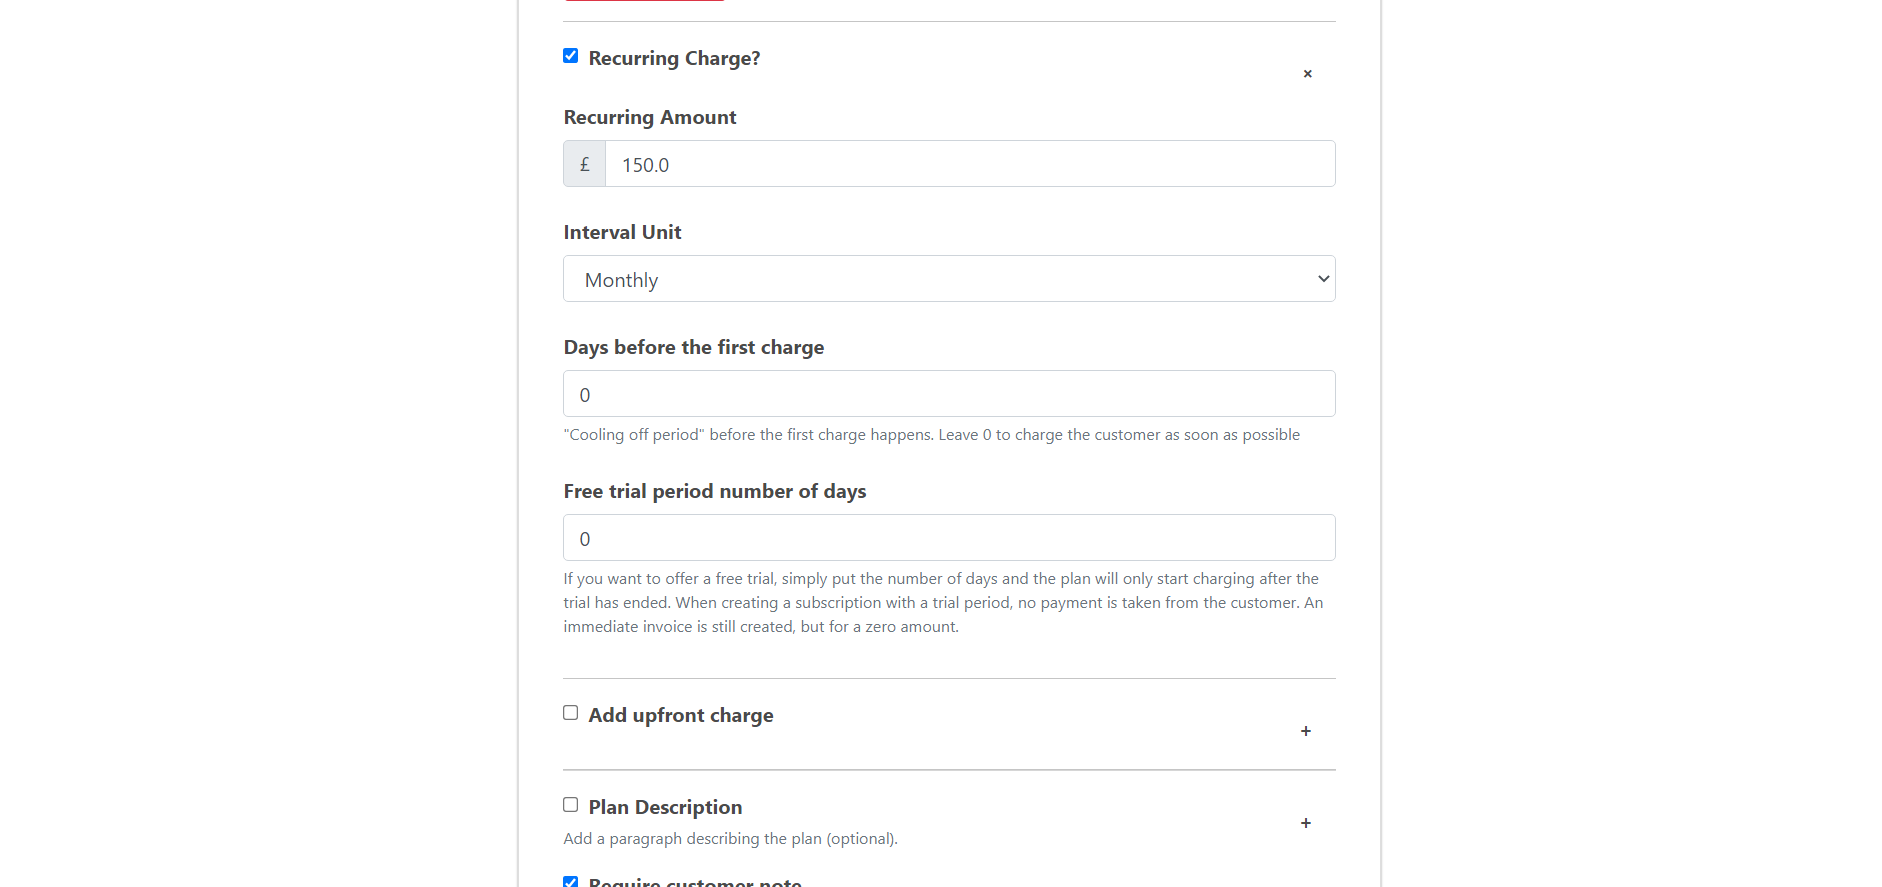
Step 5: Once you have input the number of days, click Save to save the new plan.
And that’s it! You’ve created your first plan with a cool off period of your choosing!
Want to create a free trial instead? Check out our guide to creating a free trial!
In a free trial period, you charge less (because you give away some days ‘free’, compared to a cooling-off period, where you may want to delay taking payment until after the cooling period has completed.
Some shop owners prefer to delay taking payments until after the cooling-off period. They do this to reduce the time spent dealing with refunds should they occur during the cooling-off period.
Step 1: Go to the “Edit / Add Plans” section in your Subscribie dashboard and choose Edit Plan.
If you are creating a plan for the first time and want to add a free trial to it, click Add Plan
Step 2: Open the plan you would like to add a free trial to.
Step 3: Set the number of days you would like to have under “Free trial period number of days”. For our example, we are setting the number of free trial days to 15. You can set it to how many days you would like to offer.
If you clicked add plan, don’t forget to fill out the information about your plan and set the number of days for the free trial.
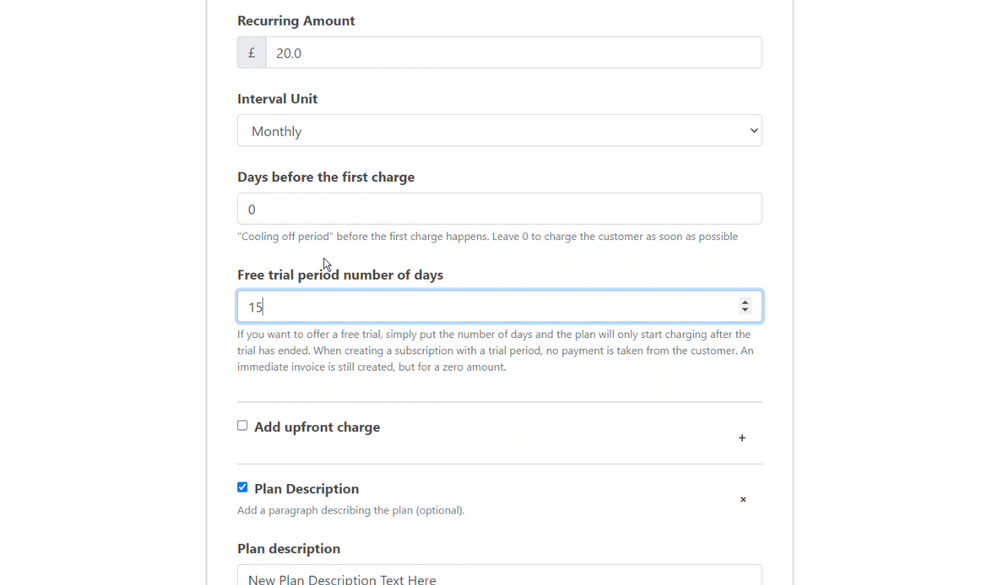
Step 4: Once you’ve set the number of days for your free trial, click on “Save”.
Now, your subscription plan offers a free trial to your subscribers.
Want to create a cool off period instead? Check out our guide to creating a cooling off period for plans!
Subscribie sends a ‘welcome’ email to your Subscribers to confirm their plan subscription.
By default, this is from a ’noreply’ email address. However, you can change the reply-to address to be an email account you control to better support your customers.
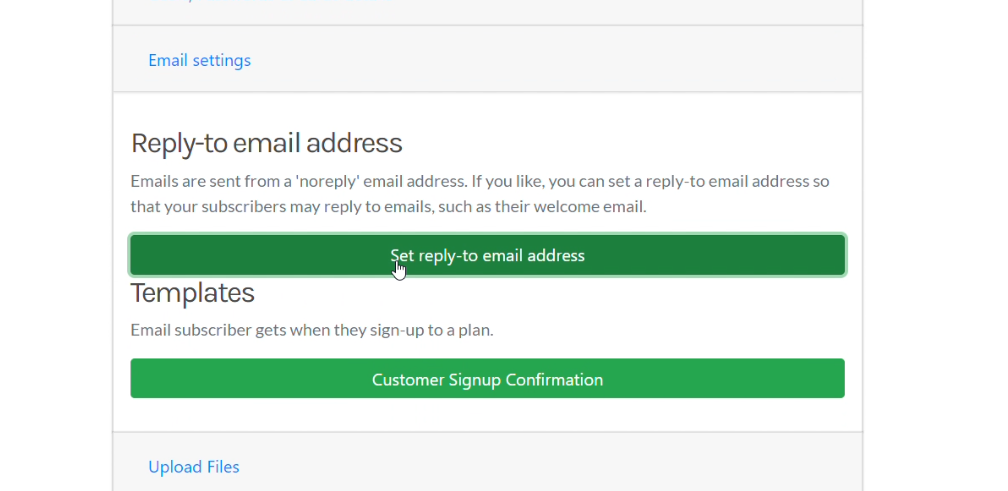
Step 1: Go to your shop dashboard and click on E-mail settings. Then, choose Set reply-to email address from the menu.
Step 2: Type in the email address that you want your customers to reply to if they choose to reply to confirmation email(s)
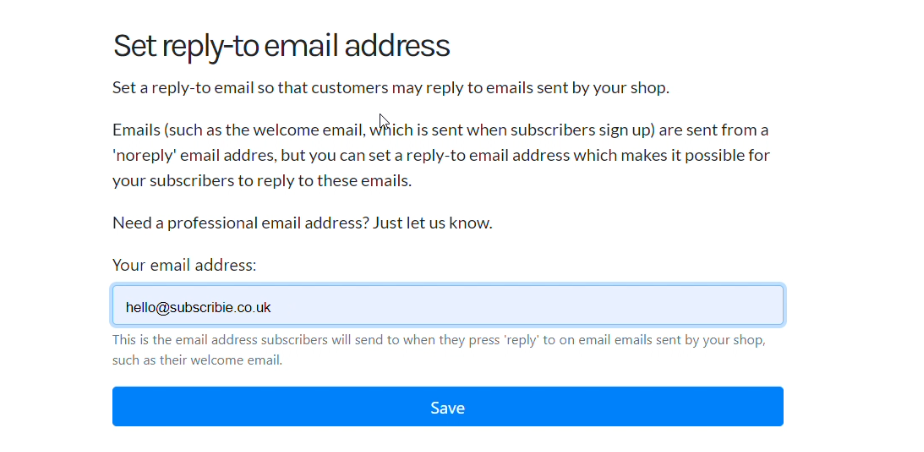
Step 3: Now click Save to enable replies to your email
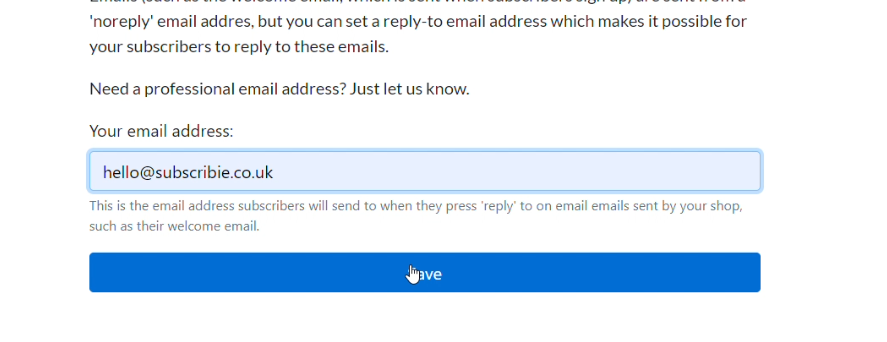
That’s it! You have successfully configured the reply-to email address.
Want to customise your email? Learn how you can customise your automated emails
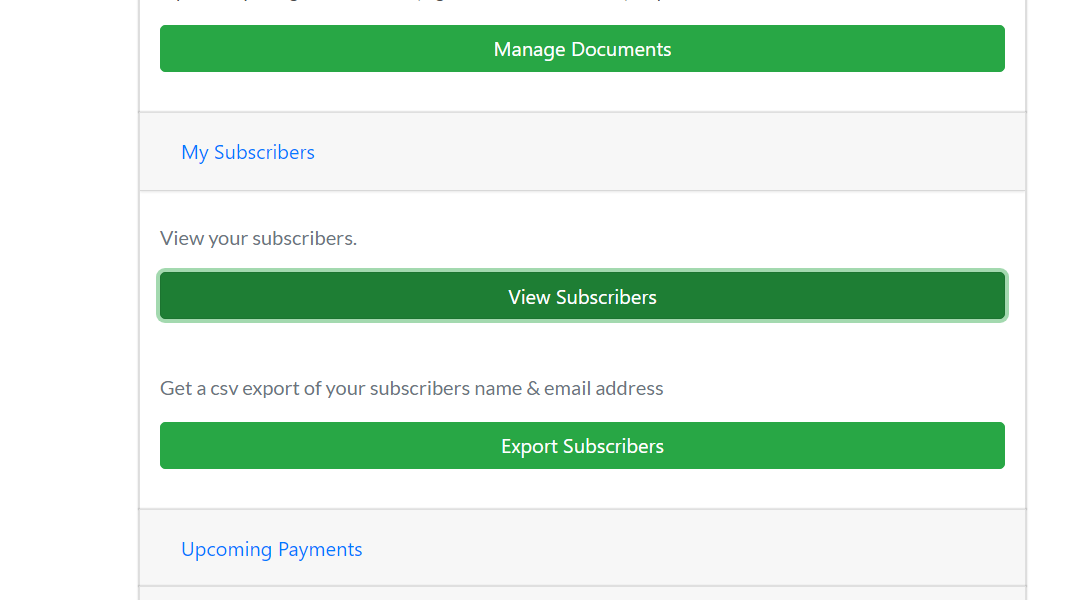
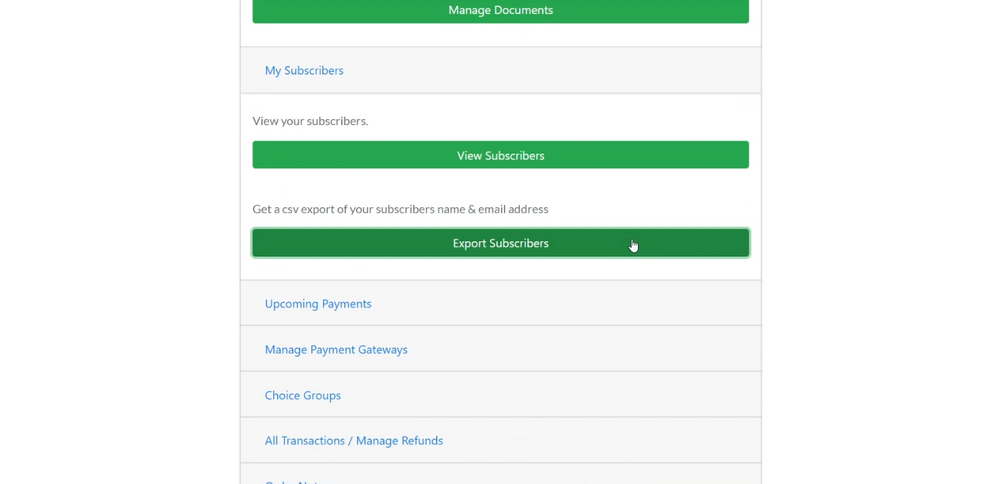
Subscribie allows you to export your subscriber list as a CSV file.
Step 1: Log into your Shop
Step 2: Click Export Subscribers under My Subscribers.

Step 3: Review the csv export
The file will contain your subscriber information, in the CSV file format.
Step 1: In your dashboard, go to View Transactions / Manage Refunds under the All Transactions / Manage Refunds tab.
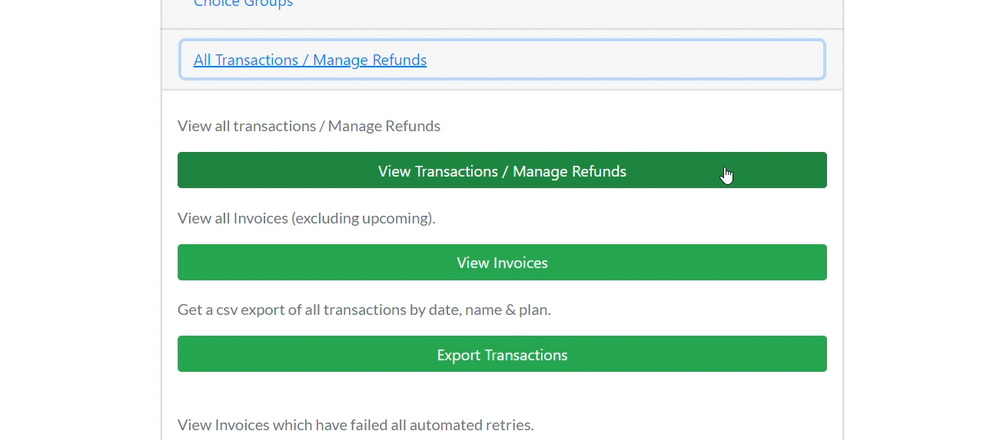
Step 2: View the transaction you would like to refund and click Refund.
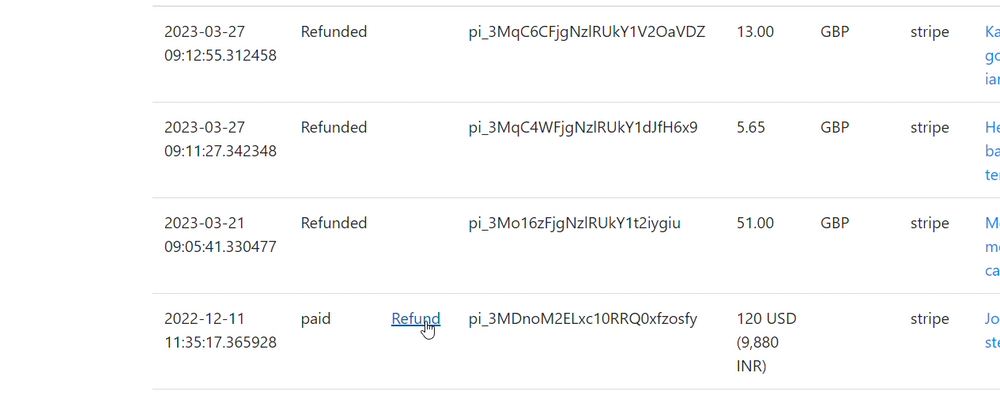
Step 3: You will now be prompted with a box asking if you are sure you want to refund, so choose Yes.
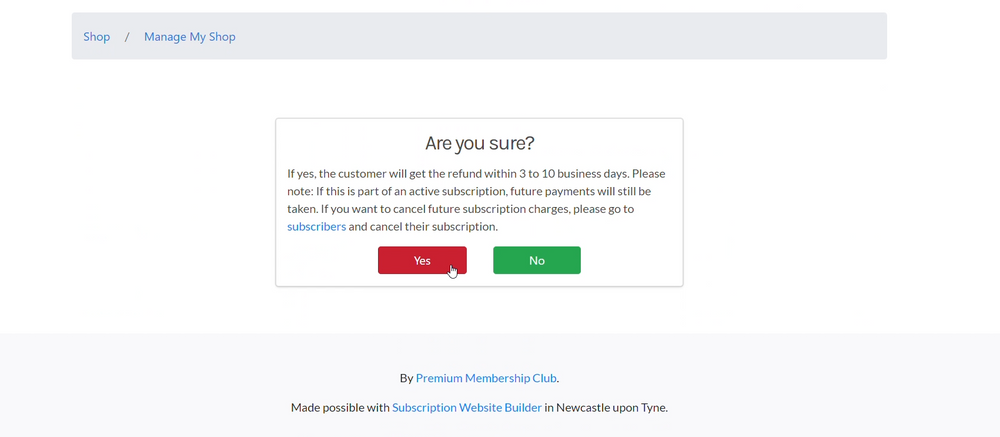
You have now successfully initiated your refund, you can rest assured that your customer will receive their refund within 3 to 10 business days.
Note: If this is part of an active subscription, future payments will still be taken. If you want to cancel future subscription charges, see how to pause or cancel a subscription
Step 1: Log into your Shop Dashboard.

Step 2: Go to Donation Settings under Shop Settings at the bottom of the dashboard.

Step 3: Enable Donations and click Save.


You can find the Donate option on the right side of your shop’s header/banner.
Need a way to see your donations and filter them? Check out our guide to viewing and exporting your donation transactions.
Learn how to View and export Transactions and Donations.
Step 1:* Log into your Shop Dashboard.
Step 2:* Go to View Transactions / Manage Refunds under the All Transactions / Manage Refunds tab.


Click Export transactions under the All Transactions / Manage Refunds tab to export all your transactions including donations received as a CSV file.

Need to view and export your subscribers? Here is our guide to exporting subscribier list and pausing a subscriber.
Team members who are added can help manage your shop through the dashboard easily.
Step 1:** Log into your Shop Dashboard.
Step 2:** Under “Users, Passwords & Cards details” Tab choose “Add Admin Shop”.
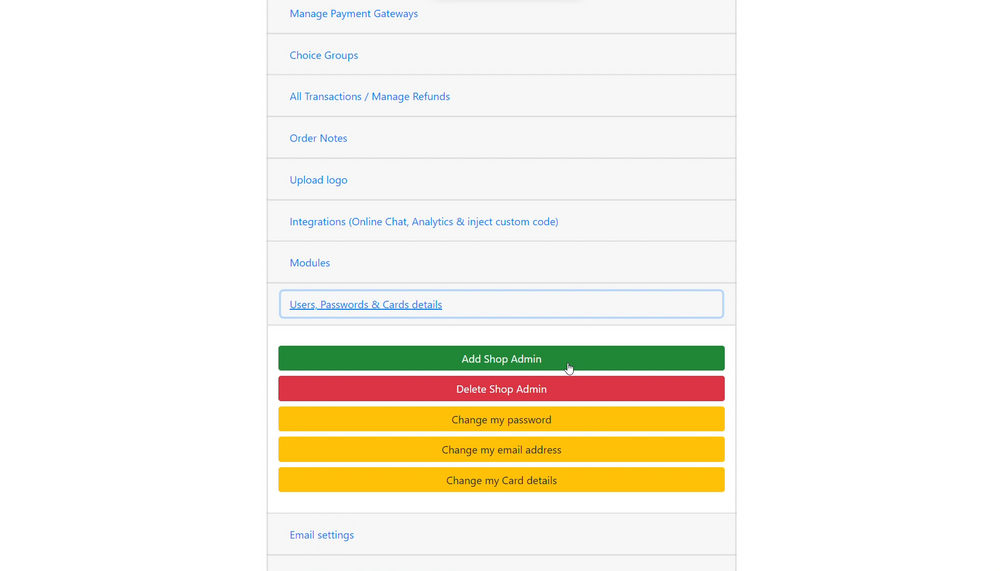
Step 3:** Enter the Email of your teammate and create a password.
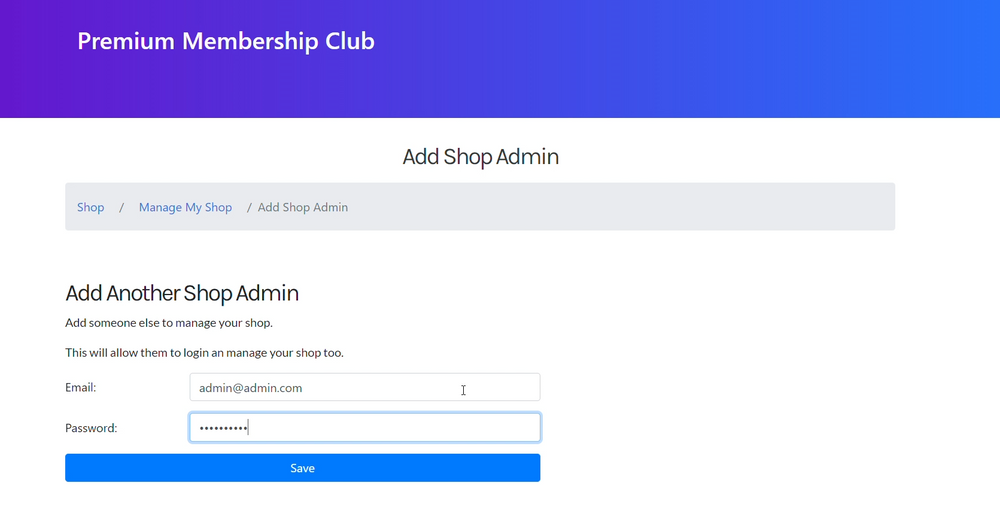
Step 4:** Click Save.
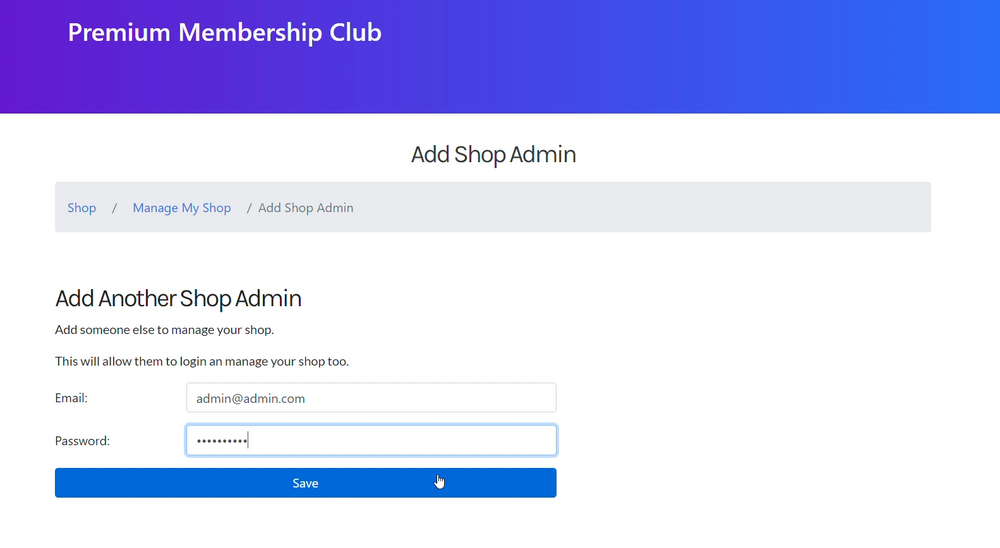
Now you have added a team member to your shop!
Adding Terms and Conditions to your plans allows you to clearly set out the details of your plans terms. This can be viewed by the subsciber when signing up to your subscription.
Terms and Conditions helpful documents to fall back on should disputes arise.
Step 1: In your Shop’s Dashboard, select “Manage Documents” under Edit / Add Plans

Step 2: Click Add Documents.
Step 3: Add the Name and Contents for your Terms and Conditions. Then click Save.
Choose Terms and Conditions as the Document Type
Step 4: Now, click “Assign Plans to this document”
Step 5: Choose the plans you would like to add the Terms and Conditions to and click Save.
You have now added terms and conditions to your plans!
Are you looking for a way to add documents to your subscription instead? Check out our guide to adding documents to your subscription plans.
Learn how to add a video from video platforms like YouTube and Vimeo to your page in your shop.
You first need to create a page on your Subscribie shop.
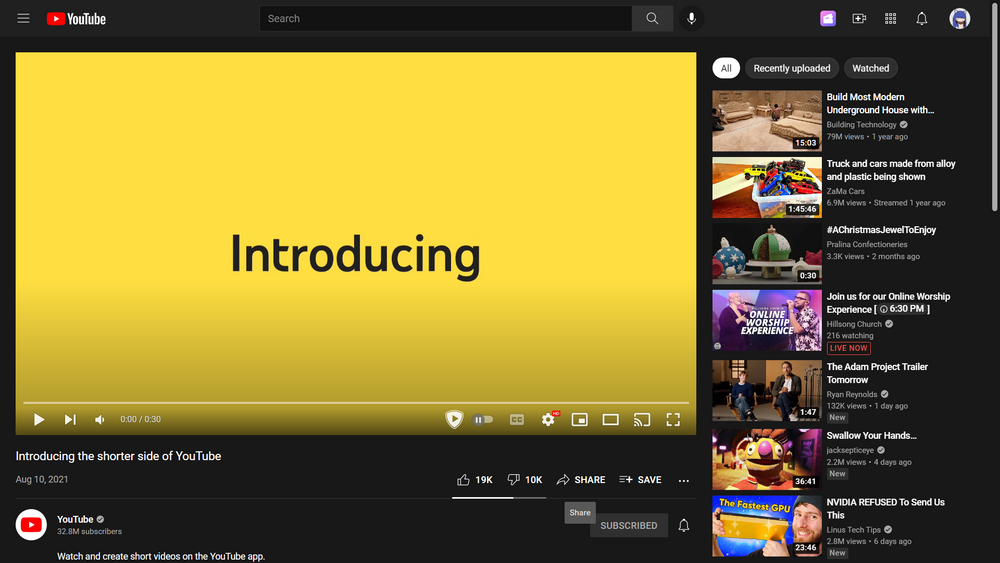
Step 1: Go to the youtube video that you would like to add to your Subscribie Store and click the share button that is below the video.
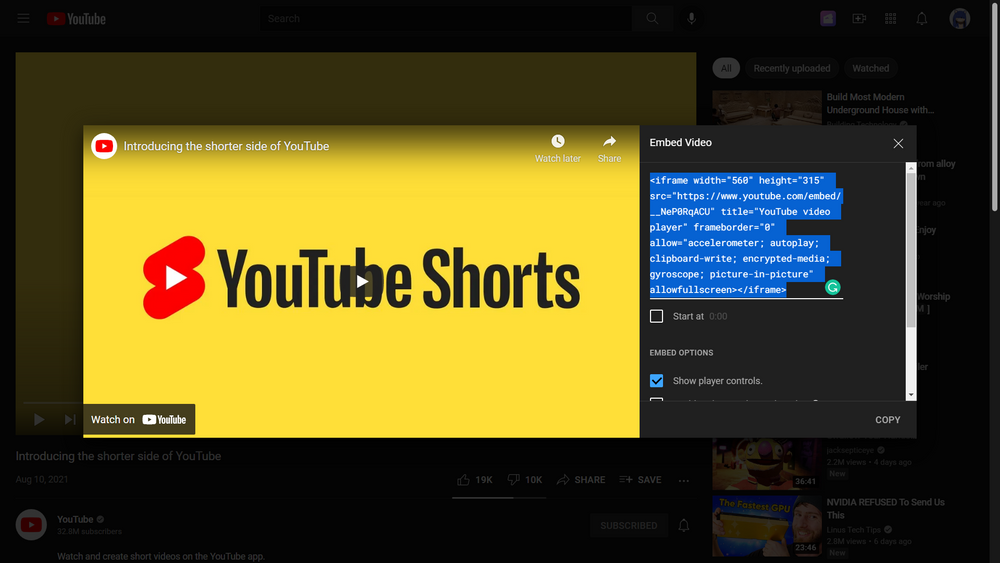
Step 2: Select “Embed” and copy the text that is shown in the “Embed Video” box.
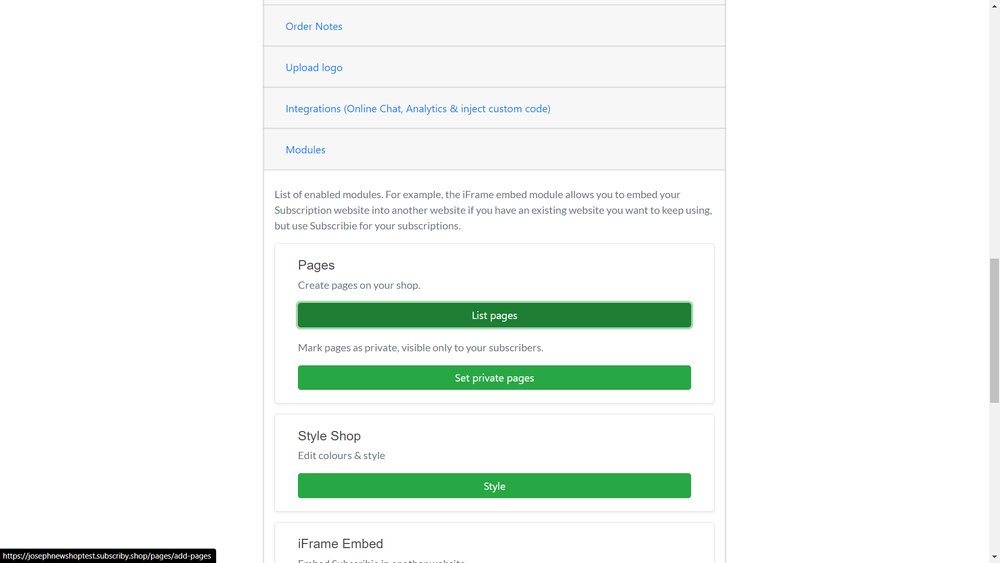
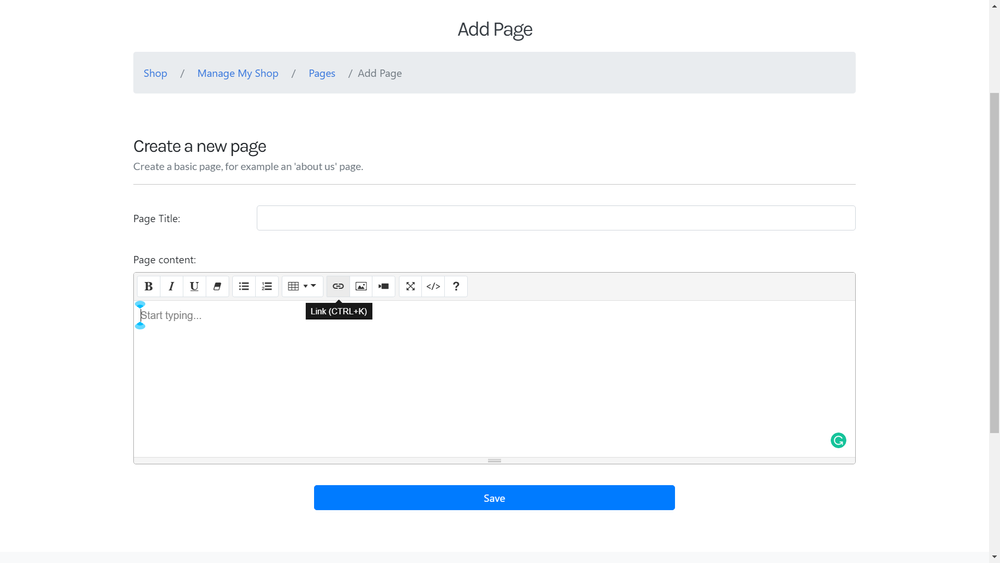
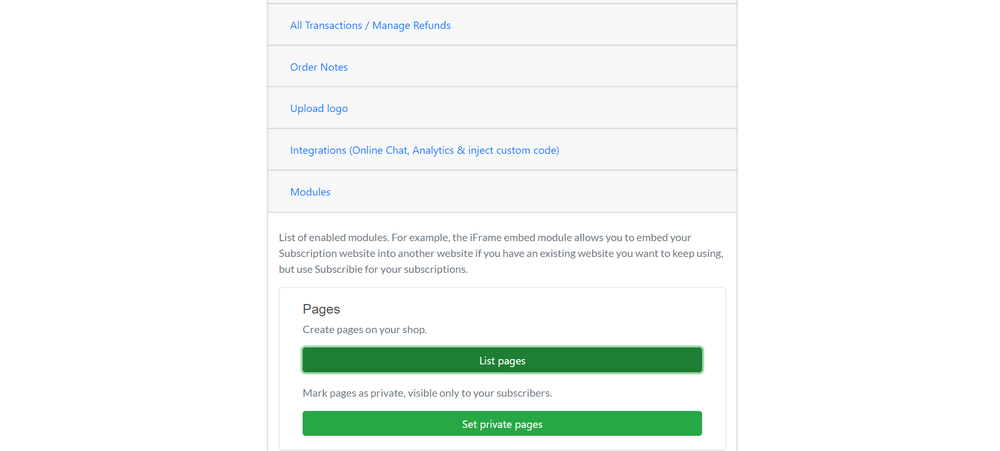
Step 3: Go to the “modules” section on your Subscribie Store Dashboard and select “List Pages.”

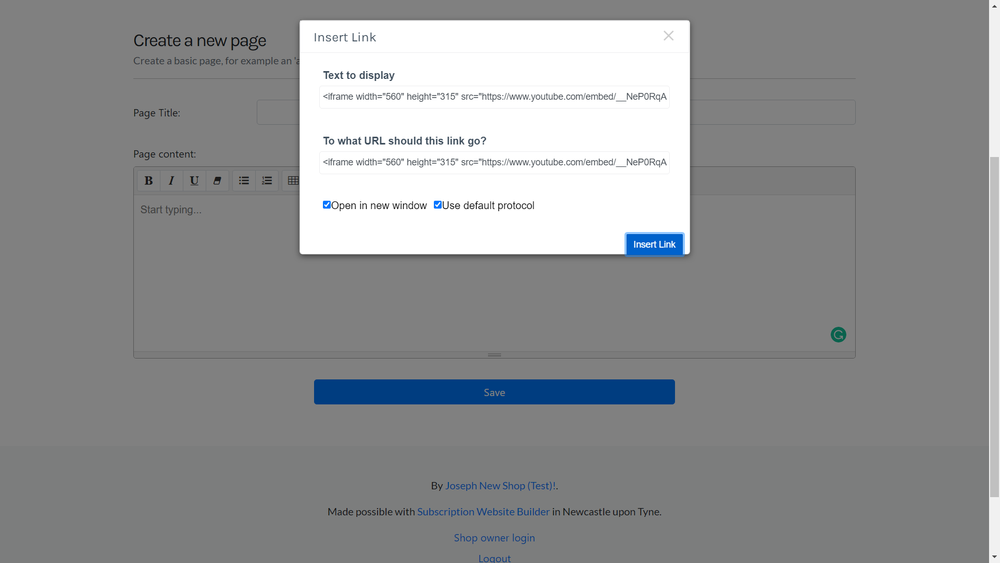
Step 4: Go to the desired page in Subscribie’s Dashboard and select the “Link” icon 🔗

Step 5: Paste the text you copied in the “To what URL should this link go?” box.
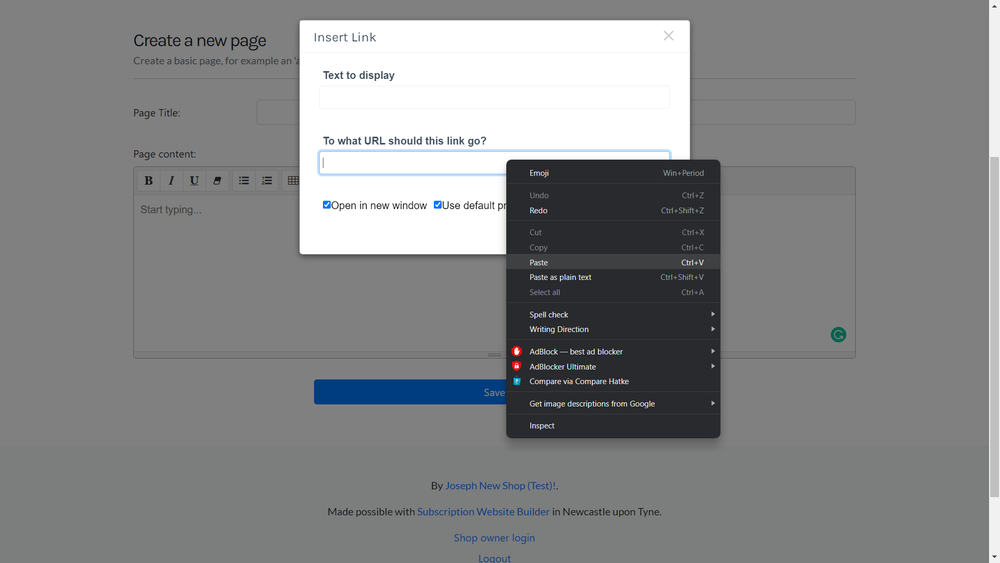
Step 6: Click “Insert Link”

Is there any way to stop YouTube from recommending other videos at the end of my video?
Yes! To remove all recommended videos from showing at the end of your video, add ?rel=0 after the video URL in the code copied from the embed box. For example:
<iframe width="560" height="315" src="https://www.youtube.com/embed/nPSa946m2C8?rel=0" frameborder="0" allow="autoplay; encrypted-media" allowfullscreen></iframe>
Step 1: Go to the Vimeo video that you would like to add to your Subscribie Store and click the share button that is below the video.
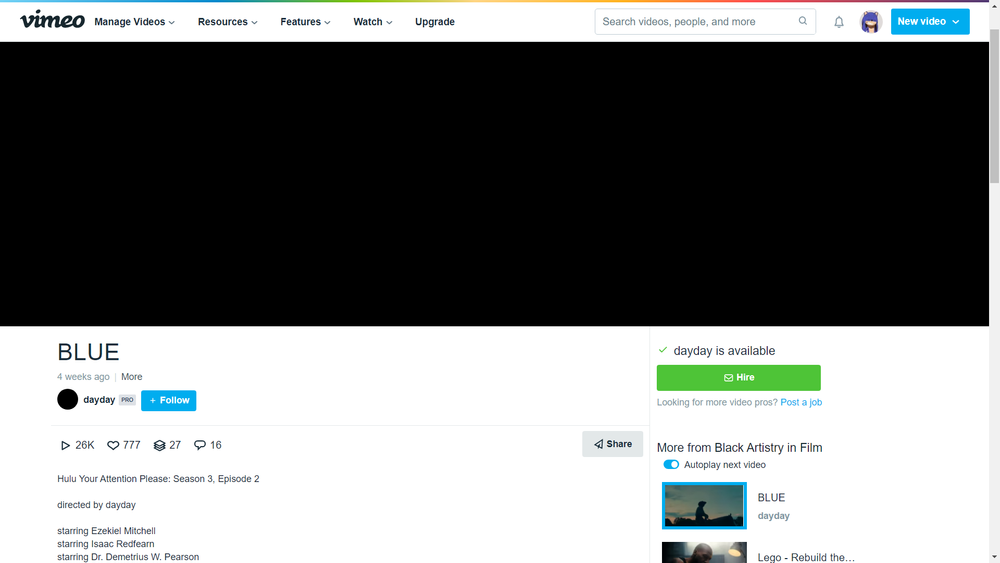
Step 2: Select the text shown in the “Embed” box.
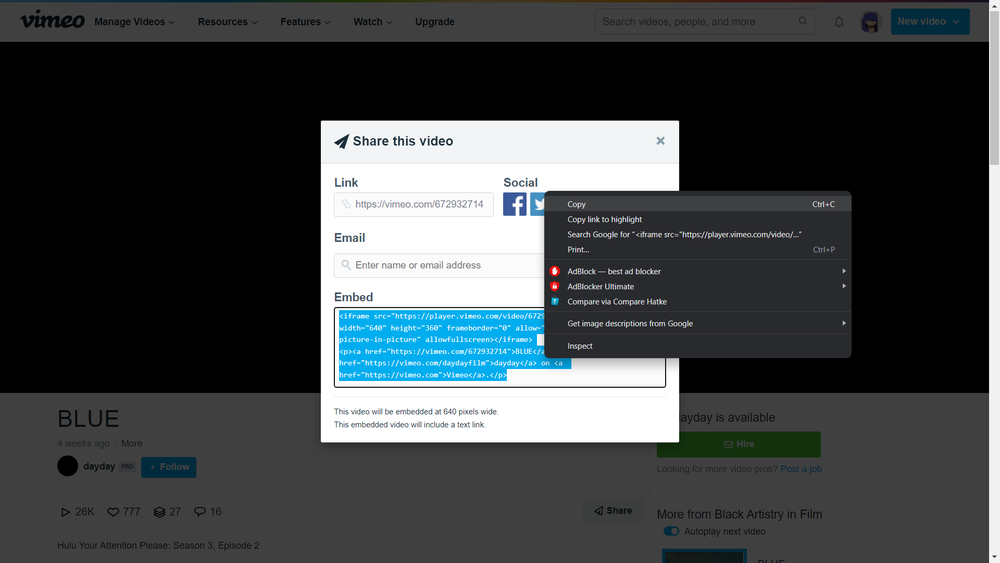
Step 3: Go to the “modules” section on your Subscribie Store Dashboard and select “List Pages”
Step 4: Go to your desired page in Subscribie’s Dashboard and select the “Link” icon 🔗
Step 5: Paste the text you copied in the “To what URL should this link go?” box.

Step 6: Click “Insert Link”.
Now you have a working video embeded in your shop page!
If you’d like, you can make these pages private.
Step 1: Go to Subscribie.co.uk, click Home and navigate to the “Subscriber Revenue Calculator” from the drop-down box.

Step 2: Choose the number of subscribers you have using the slider under the number of subscribers.
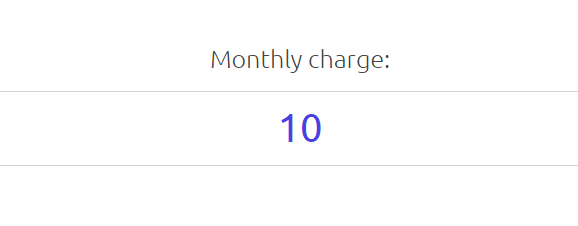
Step 3: Enter the monthly price you would like to charge your subscribers for your subscription plan.
Step 4: Now, you should see the potential monthly revenue/profit with a breakdown of the costs incurred and the final revenue earned by you.
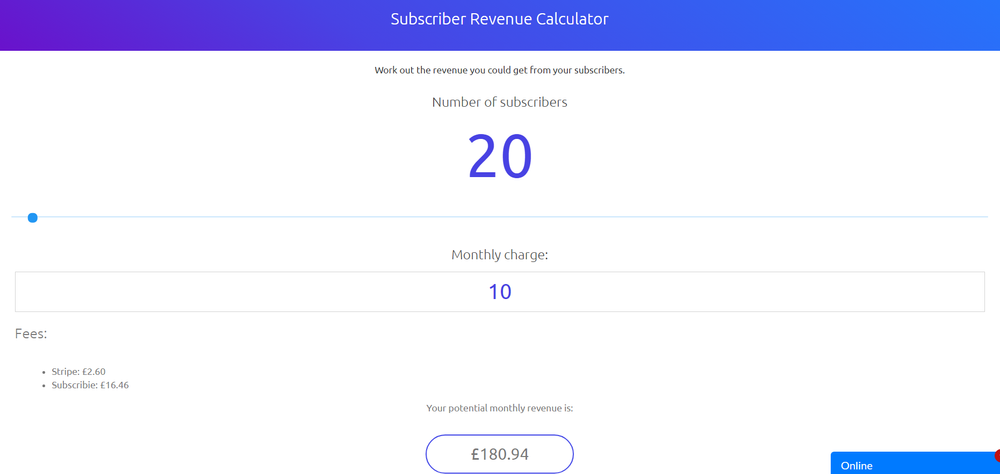
You have successfully calculated your potential subscription revenue.
You learnt how to add files to your shop, but what you uploaded the wrong file? Dont worry, we’ll show you how to delete a file from your shop with these steps!
Be sure you are deleting the correct files, you can not recover deleted files once they are deleted.
Step 1: Log into your Shop Dashboard.
Step 2: Click “List Files”

Step 3: Click “Delete” to remove the file you would like to delete.
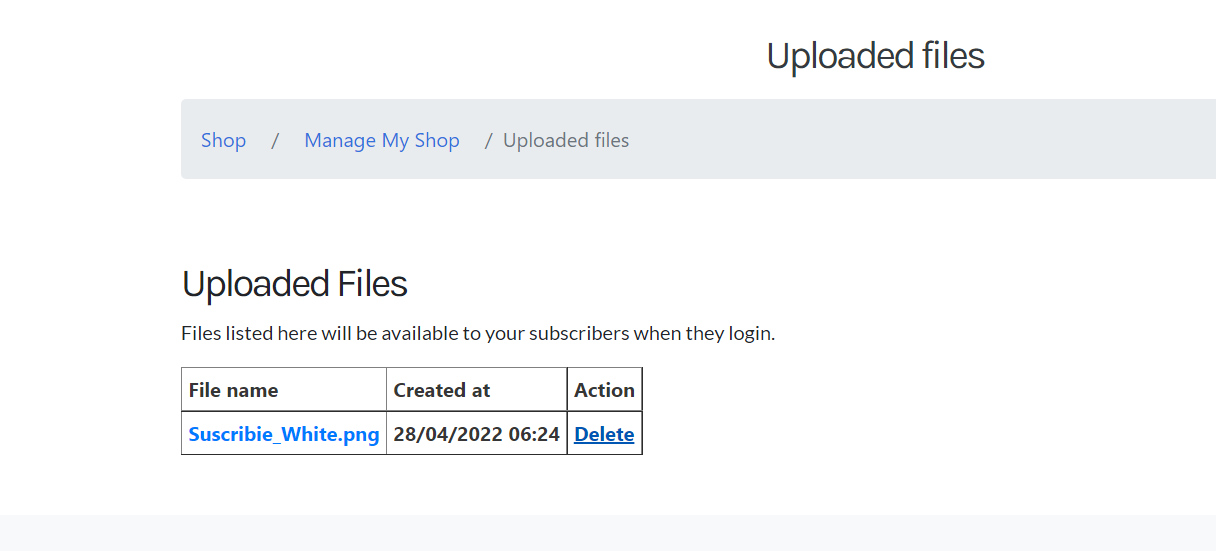
You have now successfully deleted the file.
Step 1: Log into your Dashboard.
Step 2: Go to Modules and choose Get Embed Code under iFrame Embed.
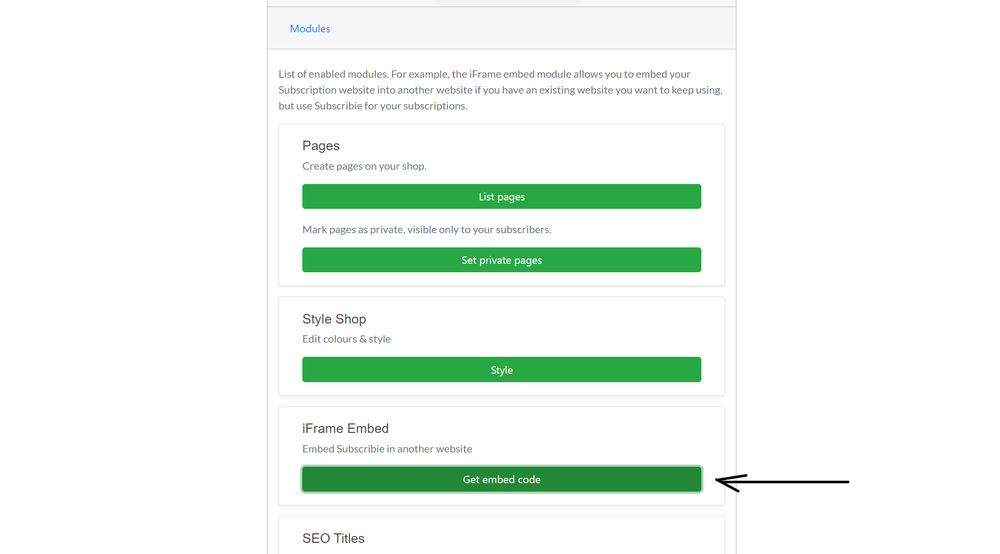
Step 3: Copy the text under “Copy the embed code into your website”.
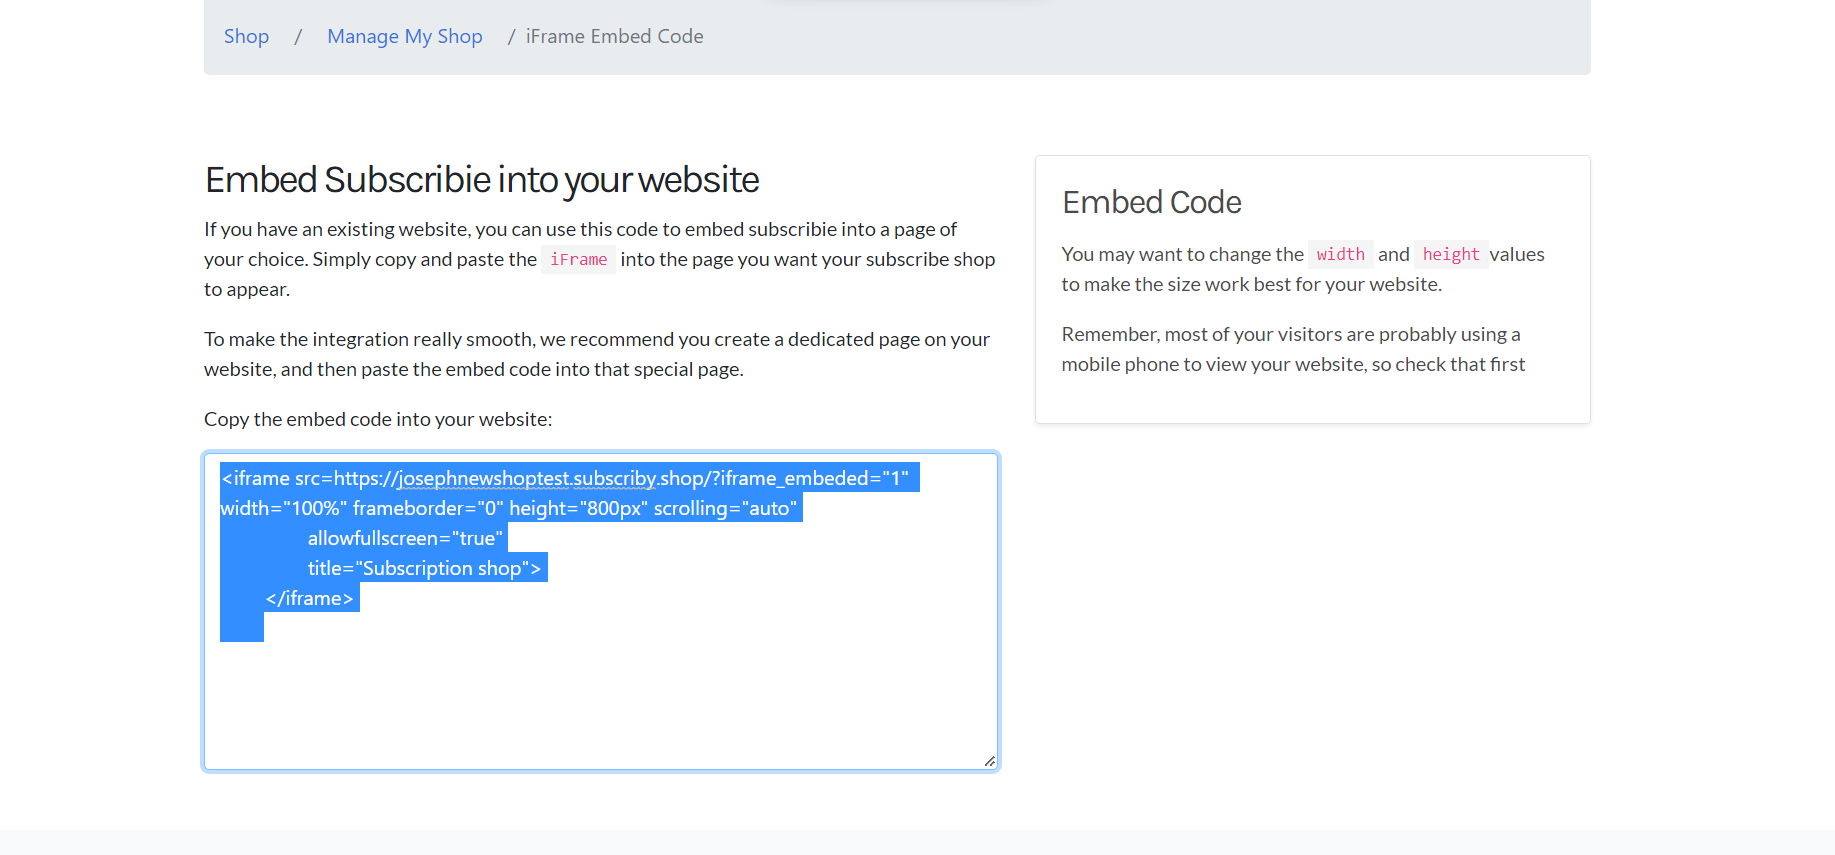
Step 4: Paste the copied text to your page.
If you would like a simpler option, simply create a link to your subscription plans from your website to Subscribie. To set that up, create an account on Subscribie, and then add a link in your website menu to your subscription plans. That is the easiest least complicated approach.
Subscribie offers the facility to filter transactions, learn how to with these easy steps.
This can be done by filtering with the subscriber’s name or the plan’s title.
Step 1: Log into your Shop Dashboard.
Step 2: Click “View Transactions / Manage Funds” under “All transactions / Manage Refunds”.
Step 3: Here, you can search for the Subscriber Name or Plan Title.
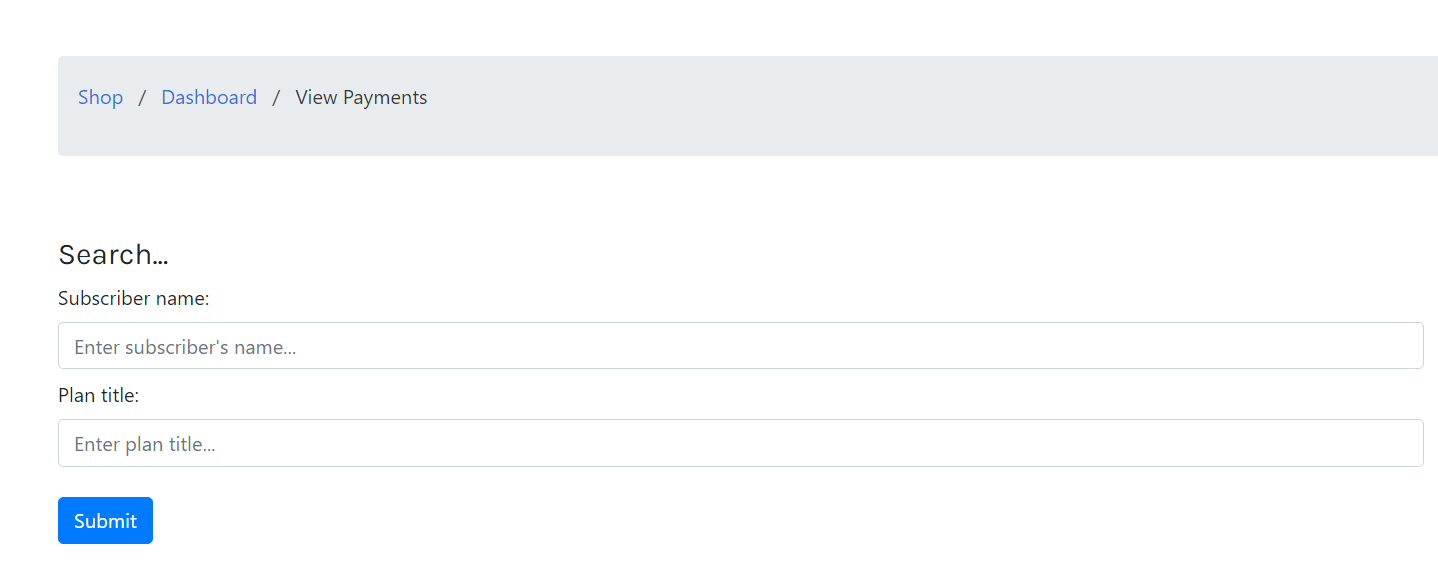
Now you can view the Filtered Transactions.
Learn how to add a slogan, this will be displayed in your shop’s banner below your shop’s name.
Step 1: Go to the Upload Logo section in your Subscribie dashboard.
![]()
Step 2: Click on “Choose File” and select your logo from your computer.
![]()
Step 3: Once you’ve chosen your logo, click on “Save”.
![]()
Now, your logo will now be visible on your Subscribie subscription shop. Customers will see your logo when they visit your shop.
You can also add a slogan and change the color of your shop.
Learn how to add a slogan, this will be displayed in your shop’s banner below your shop’s name.
Step 1: Log into your Shop Dashboard.
Step 2: Under the “Edit/Add Plans” section, click “Edit Plan”.

Step 3: Here type your Slogan in the “Slogan” Text box.
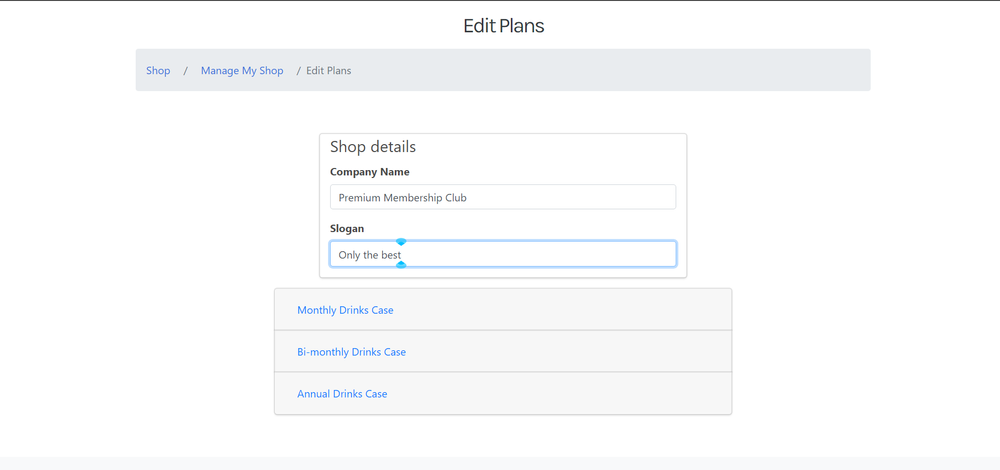
Now, your slogan will reflect on your shop page!
You can also add a logo and change the color of your shop.
Subscribie offers you the option to change the colour of your shop. This can be done with the following steps.
Step 1: Log into your Dashboard.
Step 2: Click the “Modules” tab and select “Style” under “Style Shop”.
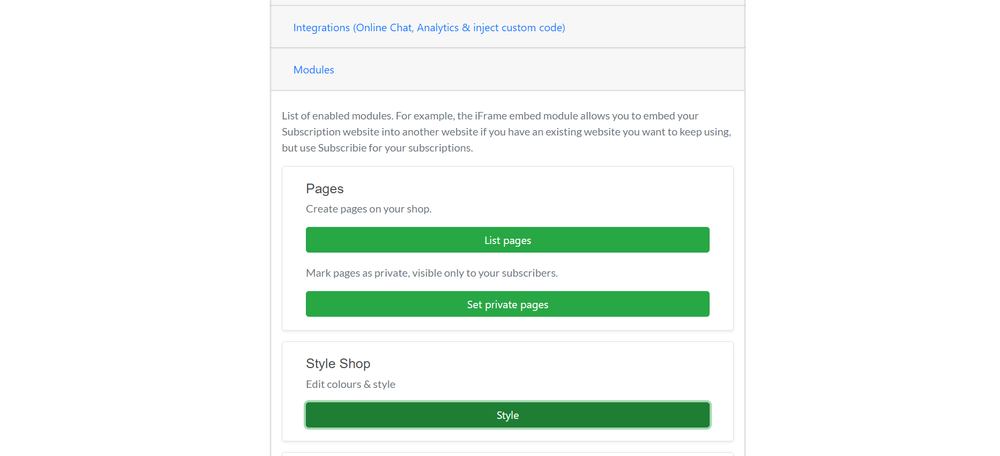
Step 3: Select the background and font colour (Blue, Green, etc) for your shop.
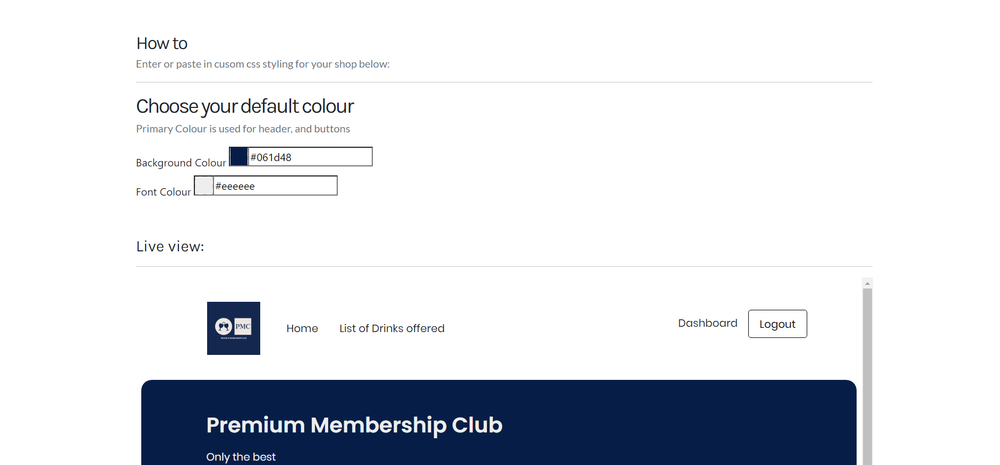
Step 4: Click “Save”.
Now you have successfully changed the colour of your shop!
For more customisation, learn how to add a slogan, add a logo and change your shop’s website address URL link
Step 1: Log into your Dashboard.
Step 2: Click the “Modules” tab and select “List Pages” under the “pages” category.
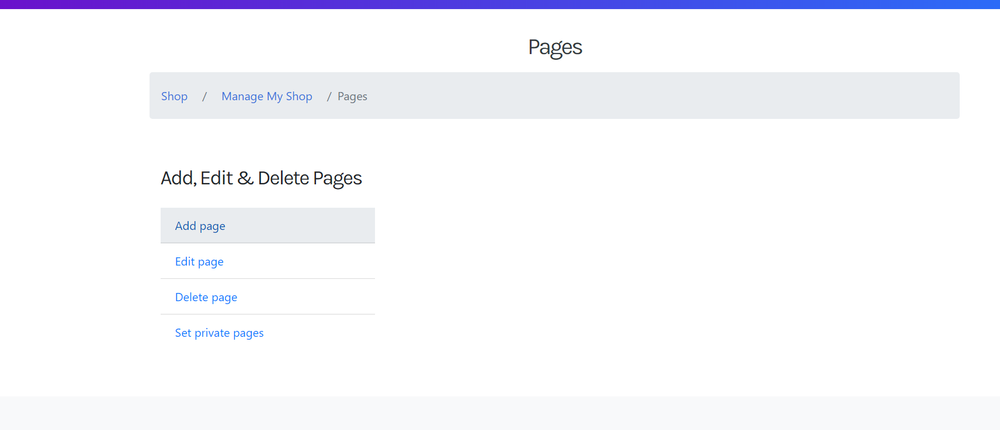
Step 3: To add a Public Page, click “Add Page”
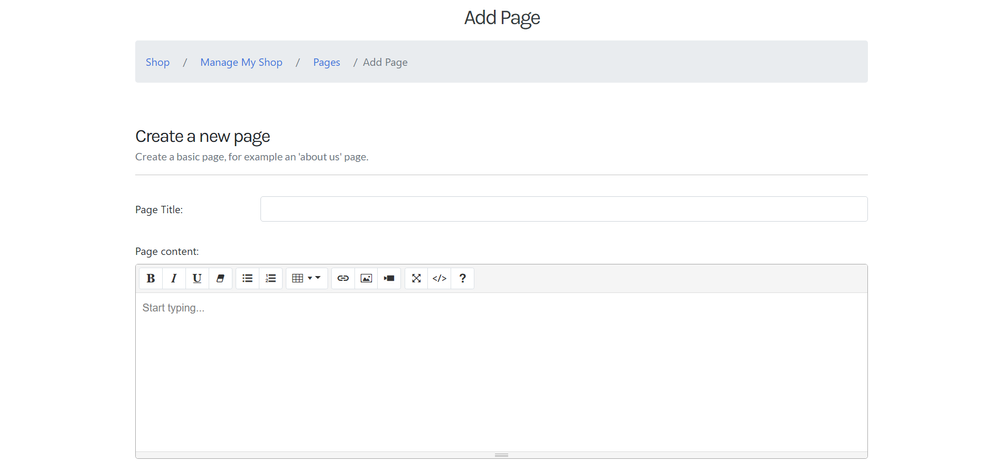
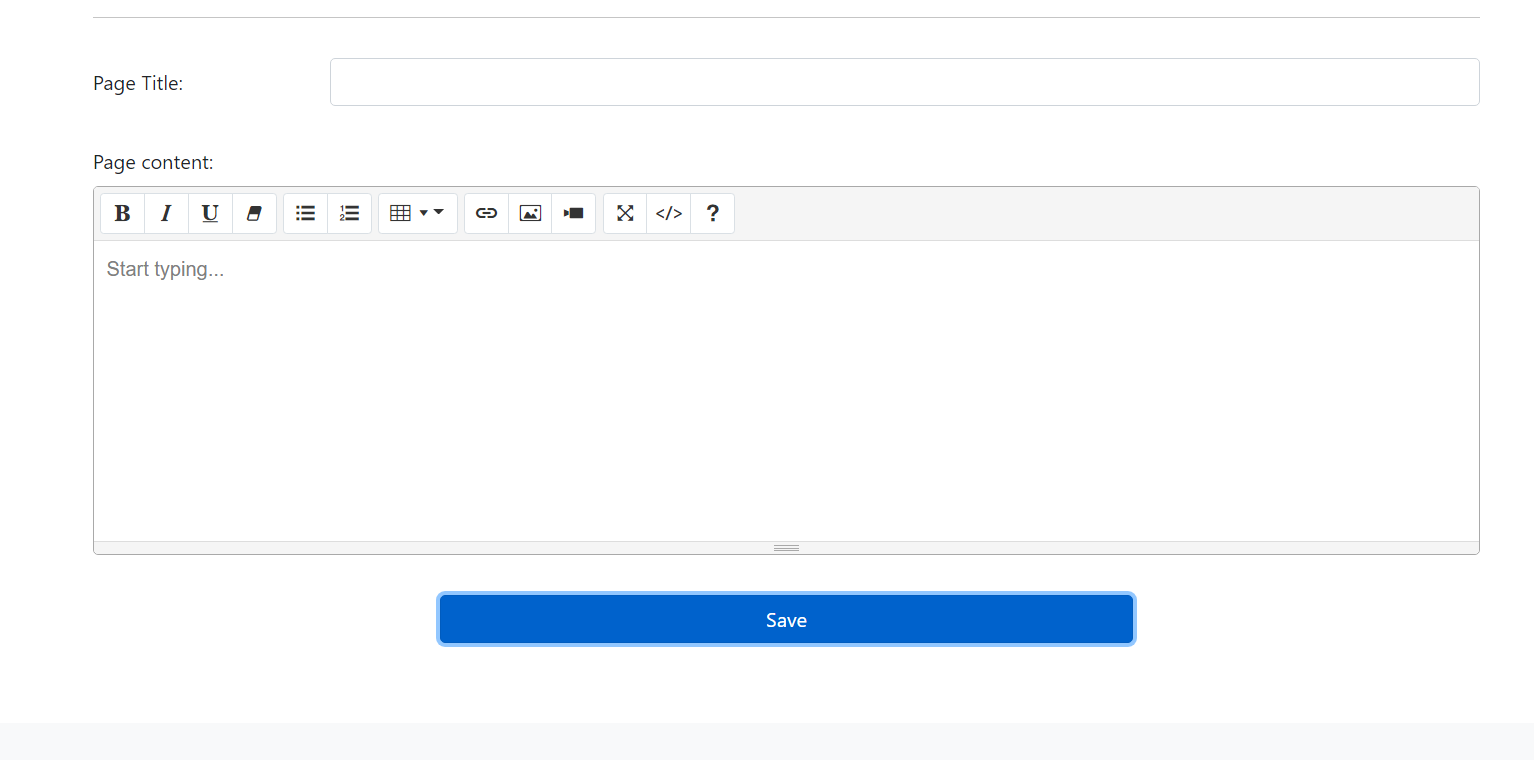
Step 4: Now add a title and contents to your new page.
Step 5: Click “Save”.
Repeat these steps to add more pages to your shop.
If you’d like to make some of your pages only visible to your subscribers, check out our guide to creating a private page.
Learn to pause a customers subscription, this is useful if you only want to temperarly stop charging them.
Step 1:* Log into your Shop Dashboard.
Step 2:* Click on “Subscribers with Active Subscriptions” in the “Stats” section at the top of the dashboard.
Step 3:* Here, Navigate to the customer you would like to pause and select “Pause”.
To Unpause the Customer’s Subscription, select “Resume”.
And that’s it! You can now Pause and Resume Subscriptions!
Need to provide a customer a refund? Check out our guide on refunding a customer.
Subscribie allows shop owners to upload simple files like documents, photos and short videos. These can be viewed and downloaded by customers in your shop webiste. To upload file, follow these steps.
Step 1: Log into your Dashboard.
Step 2: Click “Upload Files”
Step 3: Click “Choose Files” and upload the files needed and Click “Save”
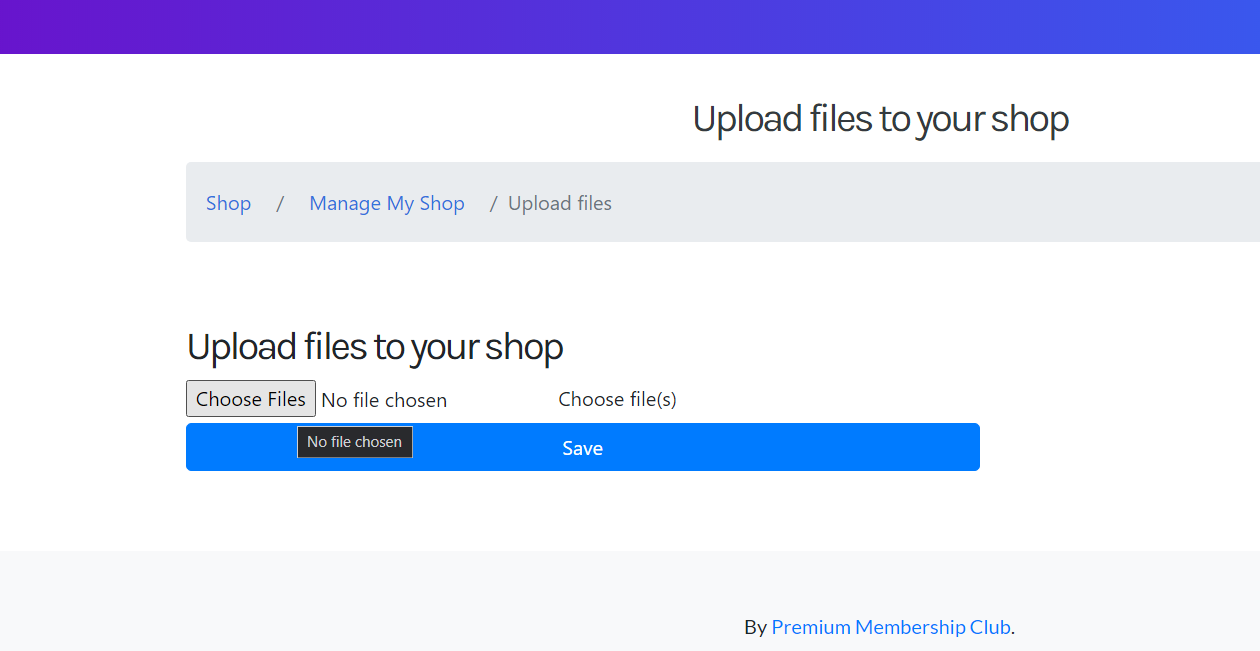
You have now successfully added Files that can only be accessed by subscribers through your shop.
Need to delete a file? Check out our guide on how to delete an uploaded file.
Step 1: Log into your Shop Dashboard.
Step 2: Select “Manage Catagories” under “Edit/Add Plans”
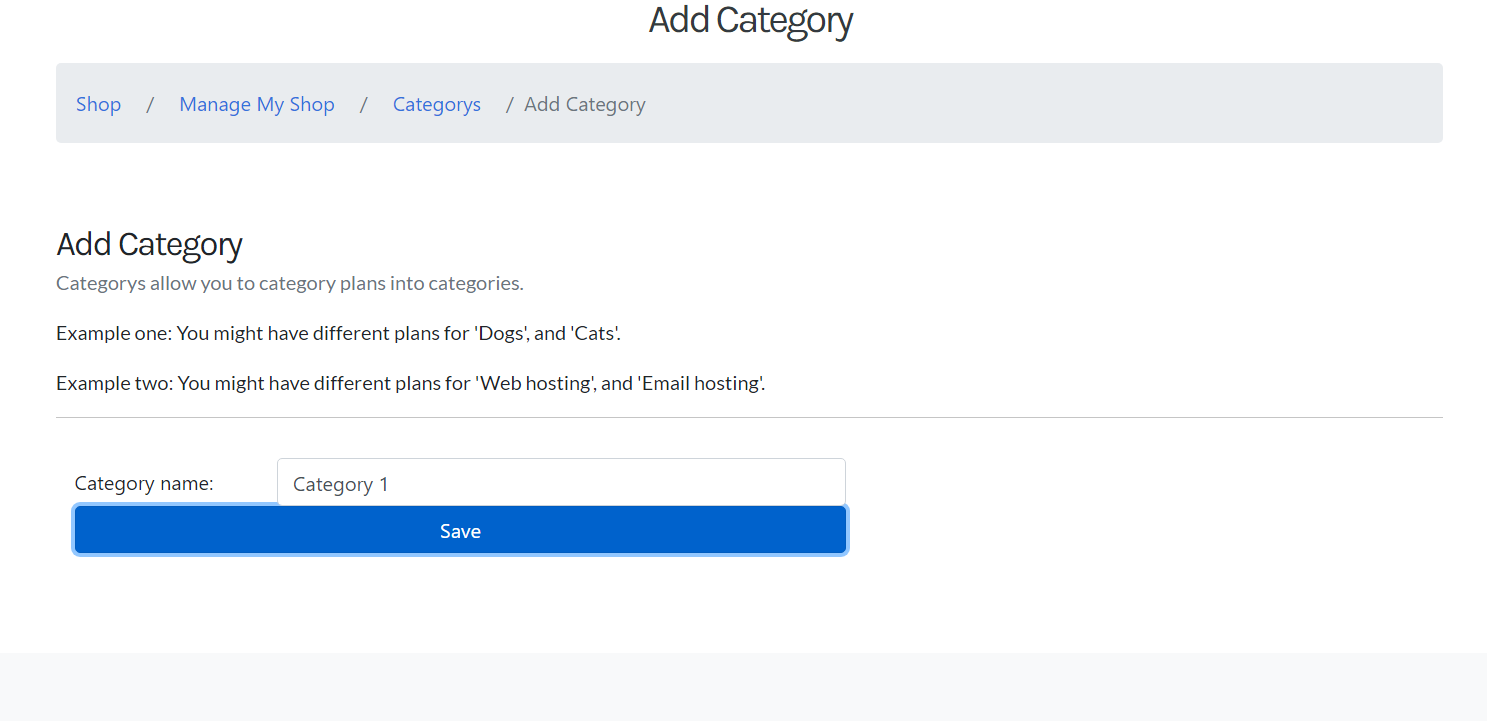
Step 3: Select “Add Catagory”
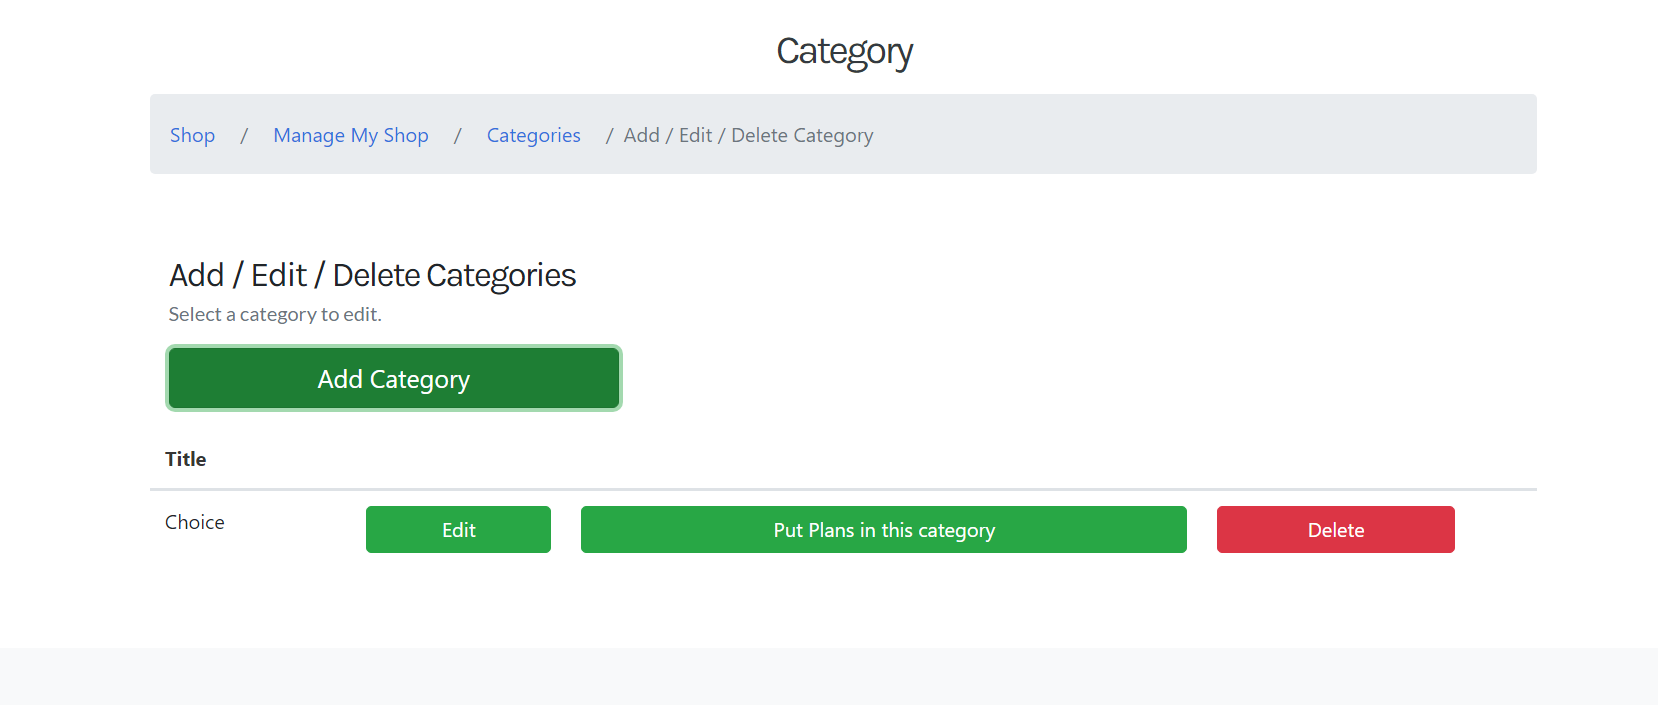
Step 4: Enter your category’s name in “Category Name” and save.
Step 5: Return back to “Add / Edit / Delete Categories” and click “Put Plans in this Catagory”
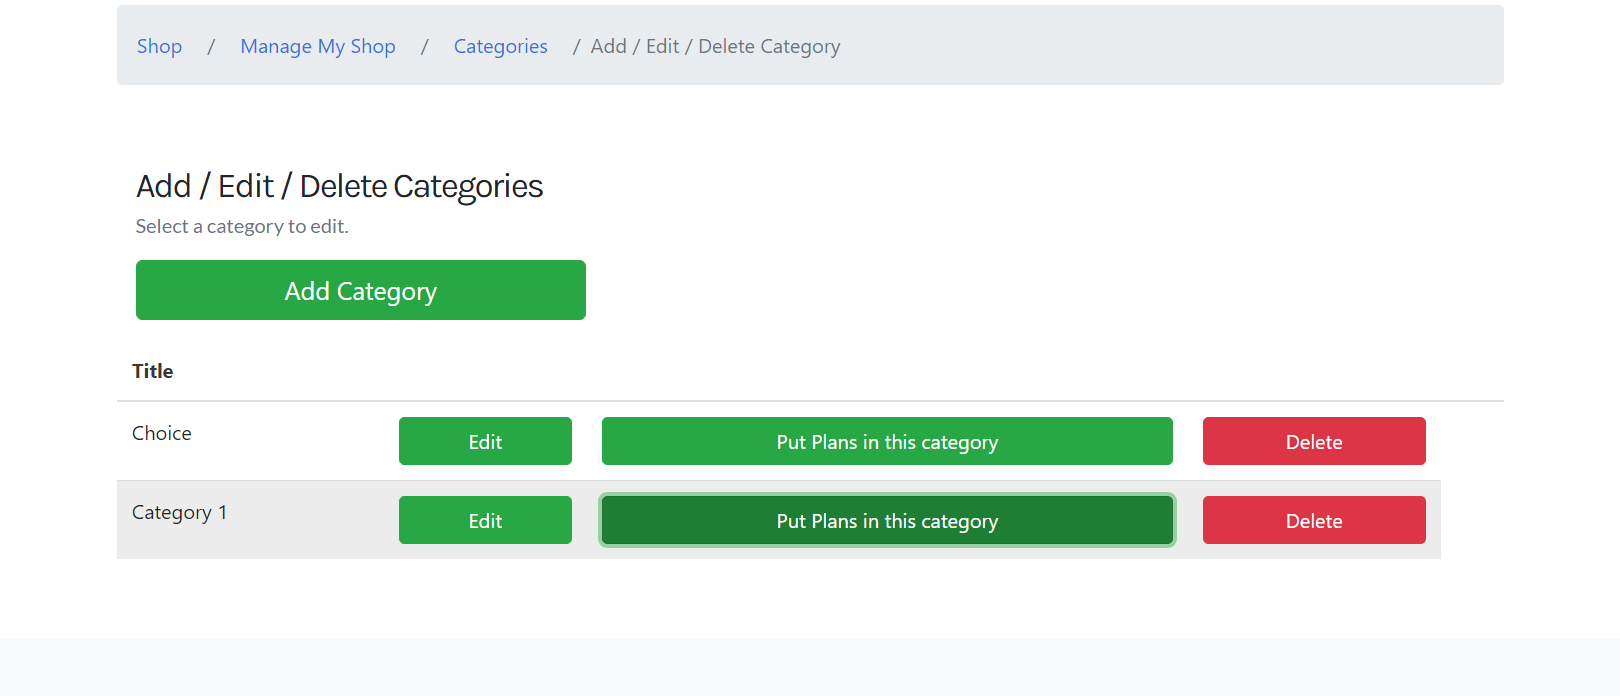
Step 6: Now select the plans that you would like to add to your category.
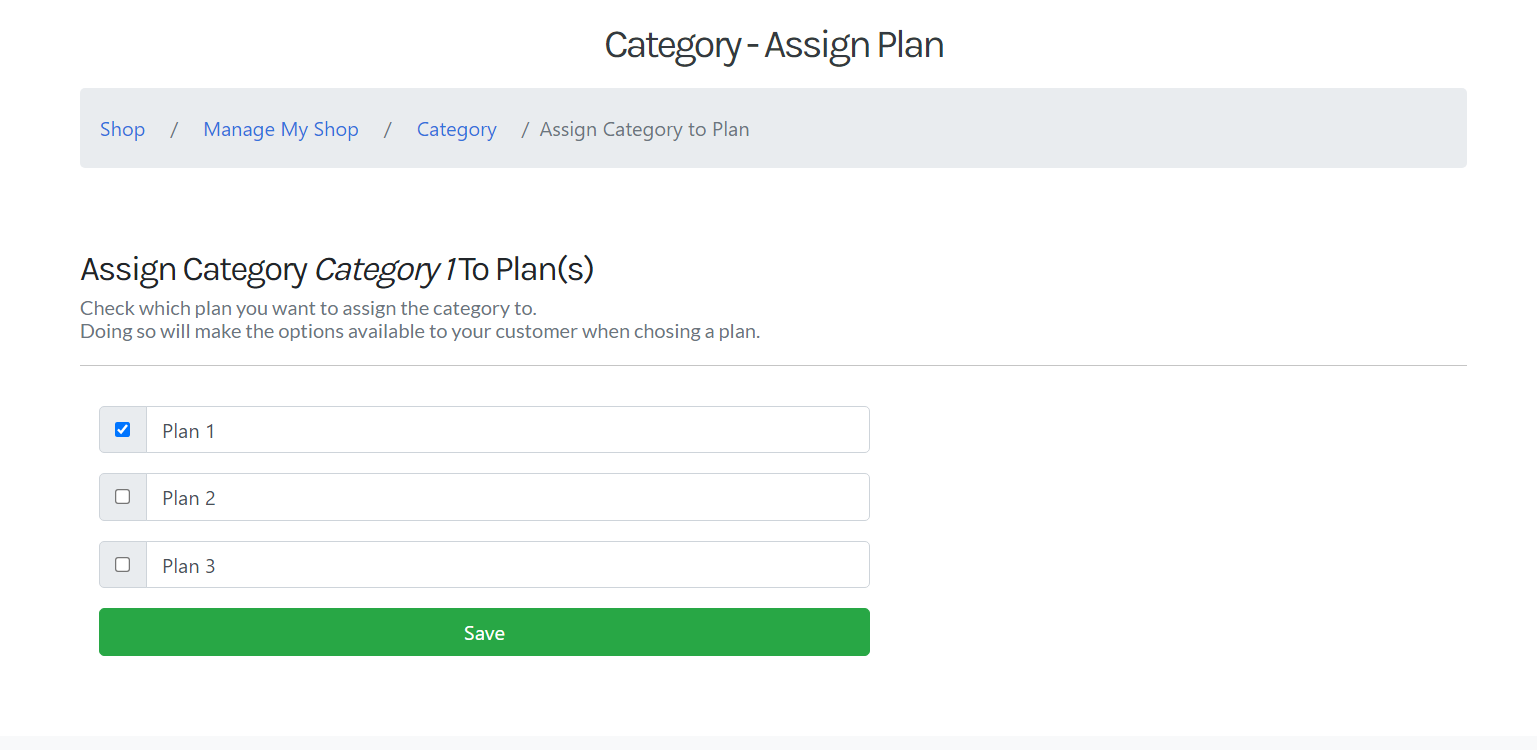
Now you have successfully created your category for your plans! The changes will refect on your shop’s page.
To reorder your subscription plans, check out our guide to reorder subscription plans.
A Plan link can be used to share a specific plan to your customers so that they can pay and sign up to the subscription plan.
This is useful for sharing private plans.
Step 1: Log into your Shop Dashboard.
Step 2: Under the “Edit/Add Plans” section, click “Edit Plan”.

Step 3: Here select the “Cancel at” checkbox, add the date and time you would like to end the subscription and click Save.
Now you have successfully created a limited-time Subscription Plan for your customers!
Follow these steps to create an account private plan, these private plans will not be visible on your shop’s signup page but can accessed through the plan’s link. Learn how to create a subscription plan link here.
Step 1: Log into your Dashboard.
Step 2: Under the “Edit/Add Plans” section, click “Edit Plan”.

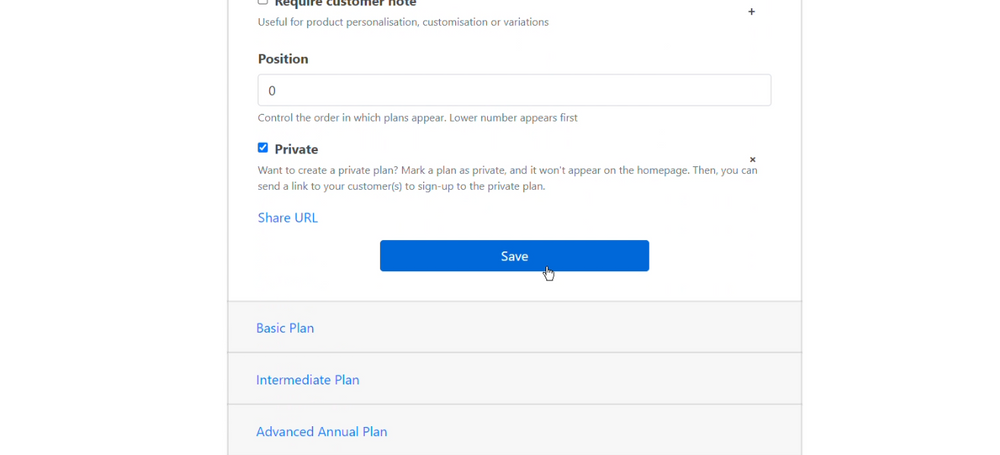
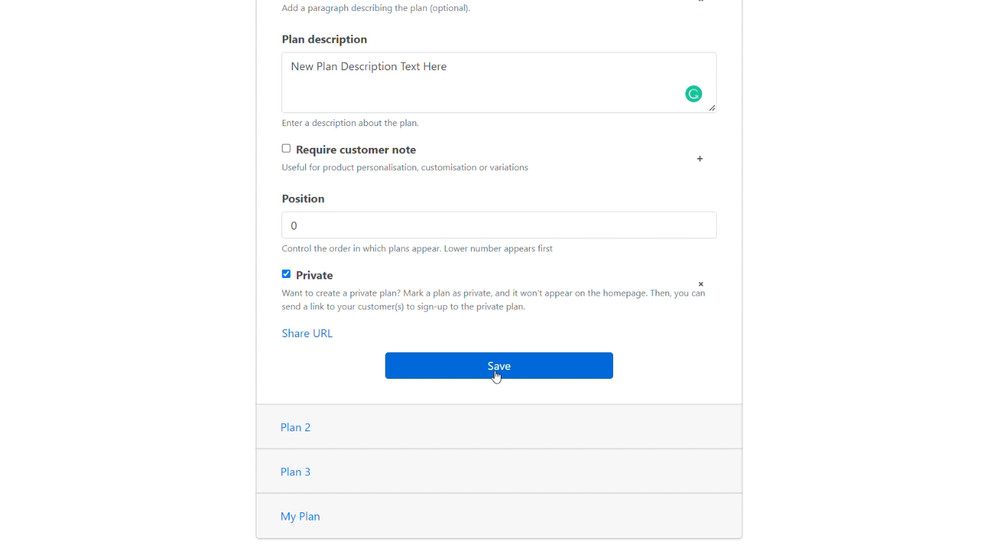
Step 3: Here select the “Private” checkbox and click Save.
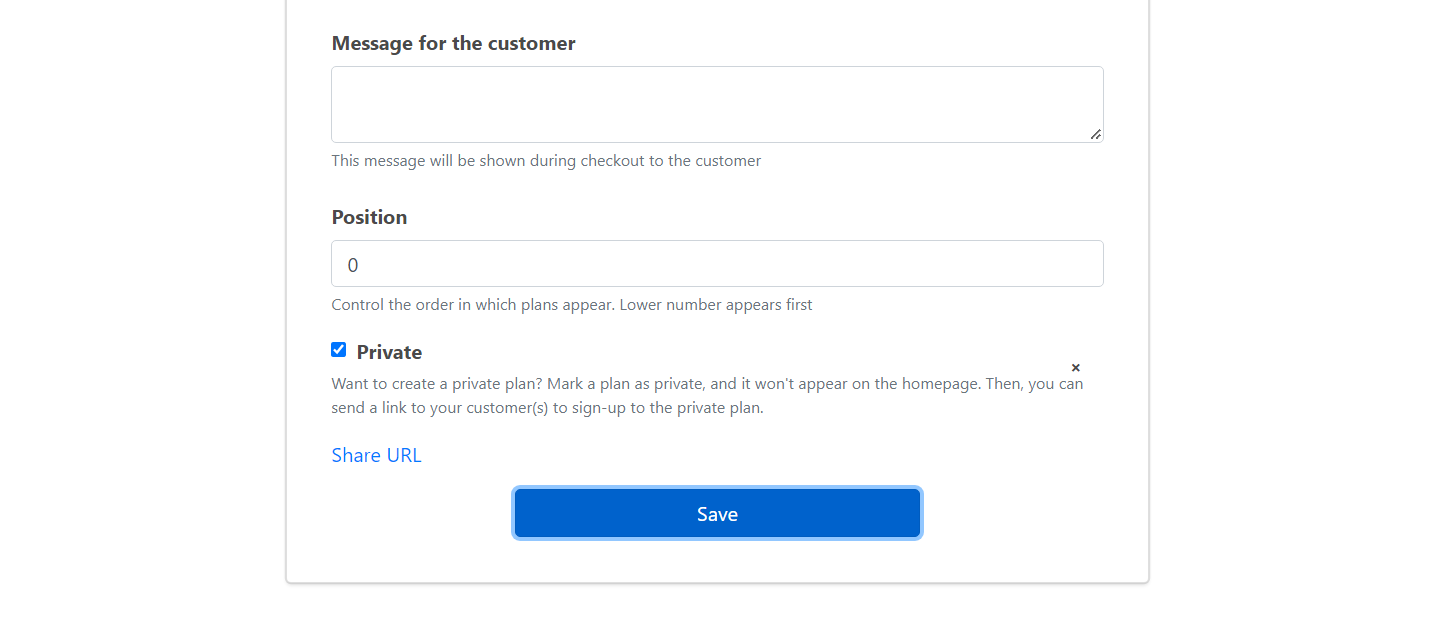
You have successfully created a private plan! Now, it will not be visable on your shop page, it can be shared through the subscription plan link.
A Sesonal Plan, which is also known as a Limited Plan, stops collecting payments after a specified date. To set up a seasonal plan that auto cancels, follow these steps.
Step 1: Log into your Shop Dashboard.
Step 2: Under the “Edit/Add Plans” section, click “Edit Plan”.
Step 3: Here select the “Cancel at” checkbox, add the date and time you would like to end the subscription and click Save.
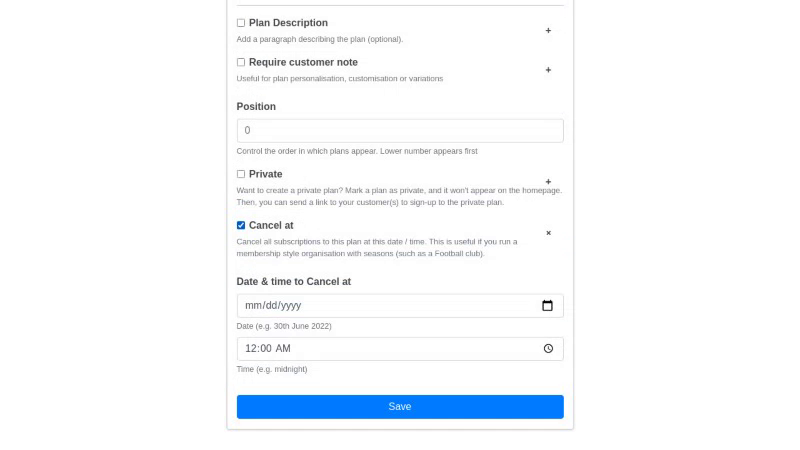
Now you have successfully created a limited-time Subscription Plan for your customers and potential Subscribers! Learn how you can share your seasonal plans with a link.
Plans are visible on your Shop’s home page. There are no limits to the number of subscription plans that can be created.
If you are looking for how to edit/modify a plan, check out our guide on how you can edit an existing subscription plan.
Step 1: Log into your Shop Dashboard.

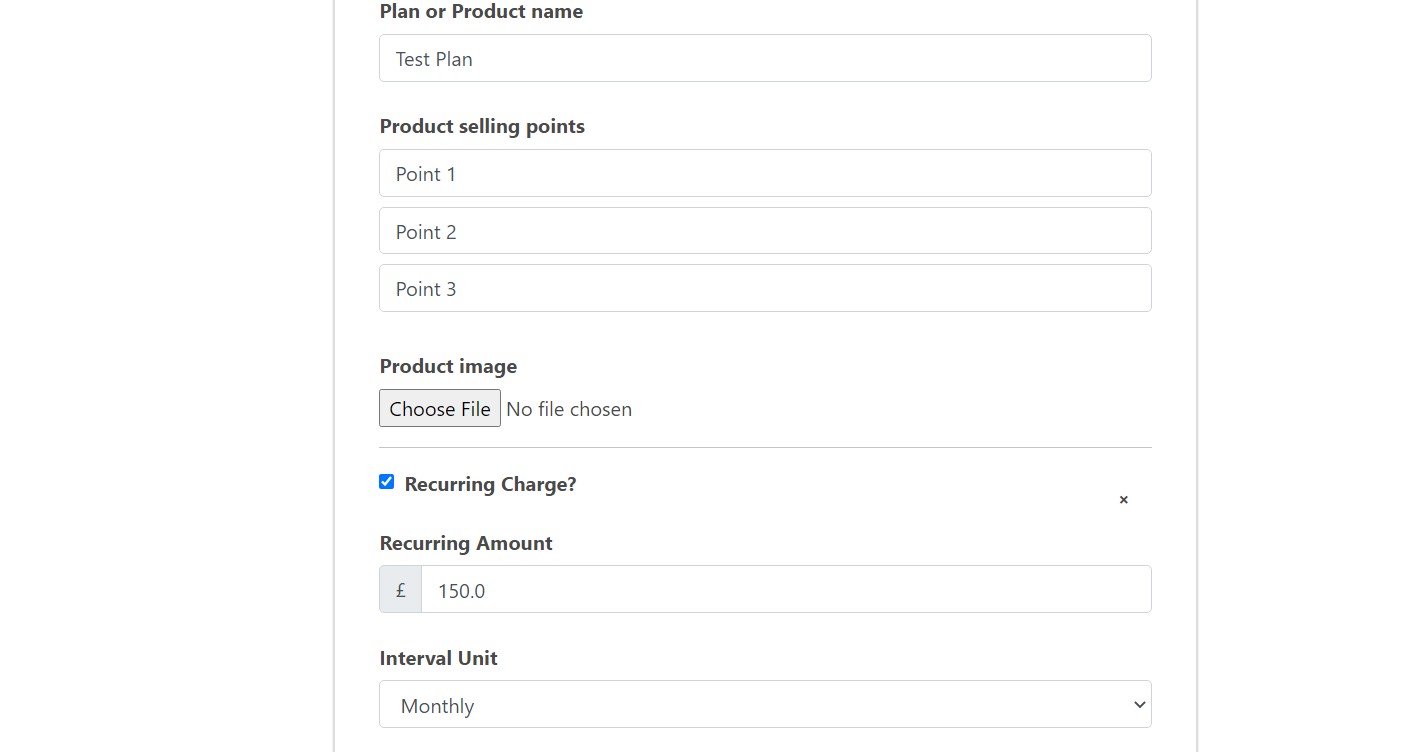
Step 2: Under the Edit/Add Plans section, click Add Plan.
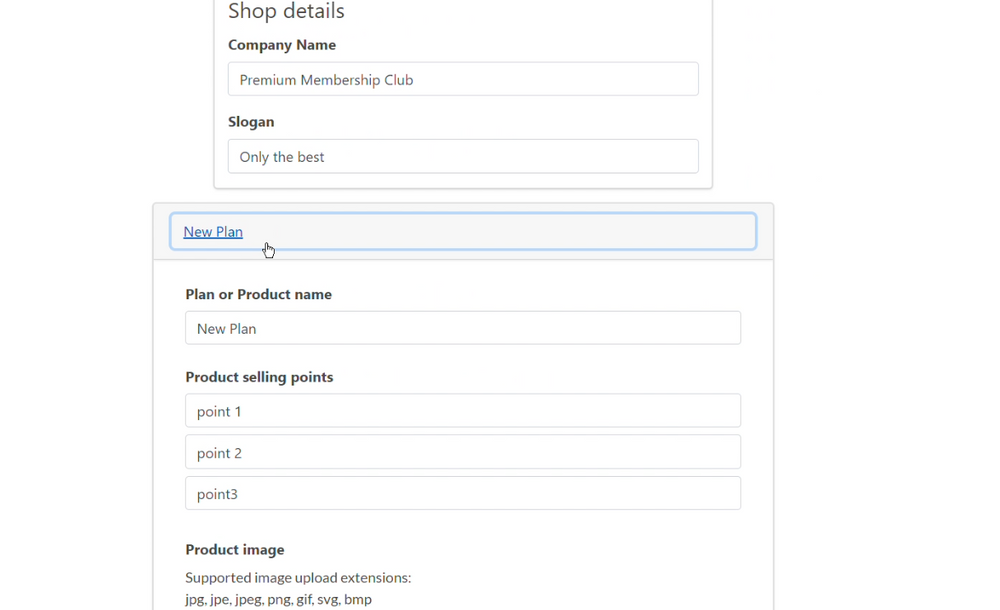
Step 3: Here, enter your Plan Name & Selling Points.
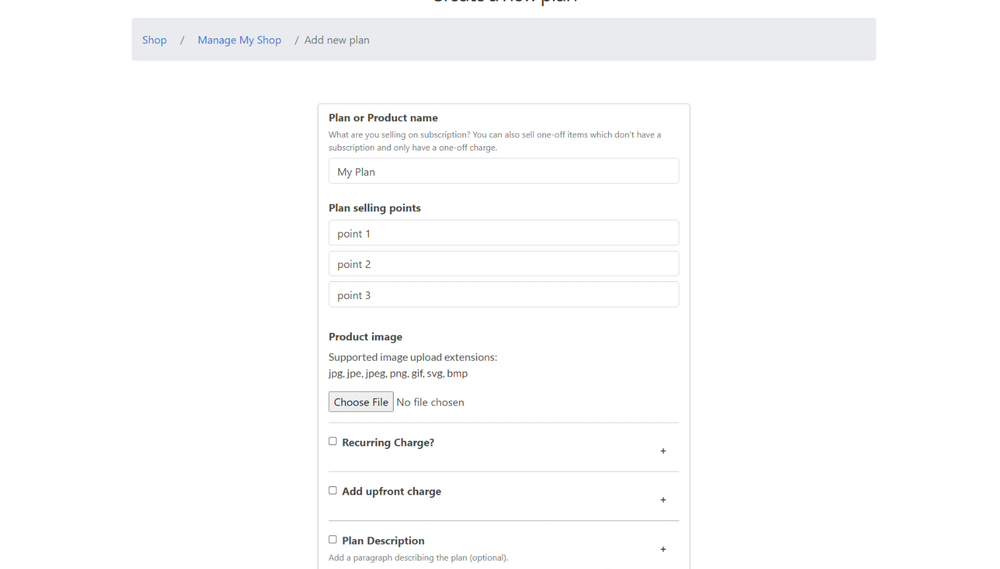
Step 4: Choose whether you would like to set up your plan as a Recurring Charge by checking the checkbox and enter the amount.
If you plan to Recurring, then choose if it should be charged weekly, monthly or yearly.
Step 5: Now Click Save
You have now successfully added a new plan to your shop.
You can now edit your subscription plan at any time or make it a private plan. Do note, seasonal plans can not be applied to existing subscription shops.
Learn how to add options to a subscription plan, this will be shown when customers are signing up to your subscription plan. These are simple options that you can use to offer some verirty in your subscription plans.
Step 1: Log into your Shop Dashboard.

Step 2: In the Shop Dashboard, Go to the “Choice Group” Section and Click “Add / Edit / Delete Choice Group”.
Step 3: Here, Click “Add Choice Group” and add a Title for your Options then Click “Save”.

Step 4: Now, Go back to the Choice Group page and Select “Options”. Here you can add the choices your subscribers can use when Subscribing to your plans.
Step 5: Now select “Assign” in the Choice Group page to add it to your preferred plans.
And that’s it, you have successfully added Choice Options to your Subscription Plan!
This does not affect other subscribers in the existing subscription.
Step 1: Log into your Dashboard.

Step 2: Under the “Edit/Add Plans” section, click “Edit Plan”.

Step 3: Now, choose the plan you would like to edit.
Step 4: Here, you will be able to:
Edit the name of the plan
You can change the name of your plan, remove the existing name and add the name you would like to change to
Edit the points of the plan
Points are an important part of plans and if you messed up or feel like changing your plan points, you can alter them here
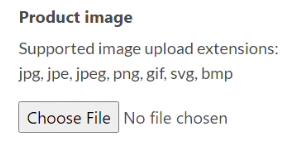
Add an image to your plan
Sometimes an image can say more than a thousand words, so feel free to add an image to the plan that best represents it!
Change the price
Input the wrong price during the set-up process or feel like changing it up a bit? Then feel free to edit the price of the plan. Here you can also add an upfront cost, the interval (weekly, monthly or yearly) and an option to add a free trial.
Add a plan description
In this description field, write up what your plan is about and let your customers know why your plan is the best!
Add the option for a customer note
Sometimes you need notes from customers, fear not! enable this option if you want to receive notes from customers regarding your product or service.

Private Plan
A private plan helps you to keep it hidden from the public and can not be viewed on your shop’s main page, it can be accessed through the plan link (learn more here)

Step 5: Now Click Save.
Now, you have successfully edited your plan! Your changes will reflect in your shop.
If you do not have an existing plan and want to create a new one, check out our guide on creating a subscription plan.
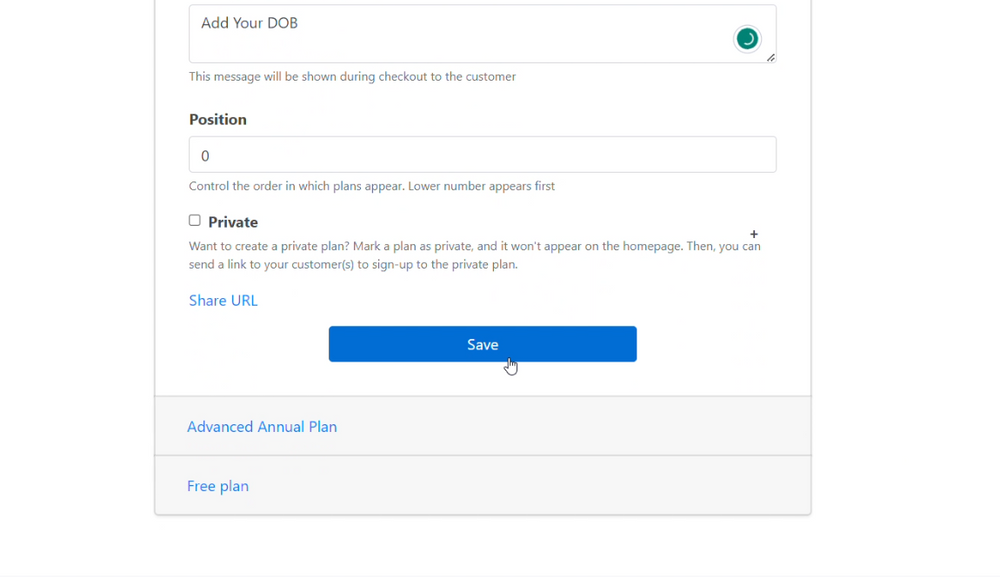
Step 1: Log into your Shop Dashboard.

Step 2: Under the “Edit/Add Plans” section, click “Edit Plans”.

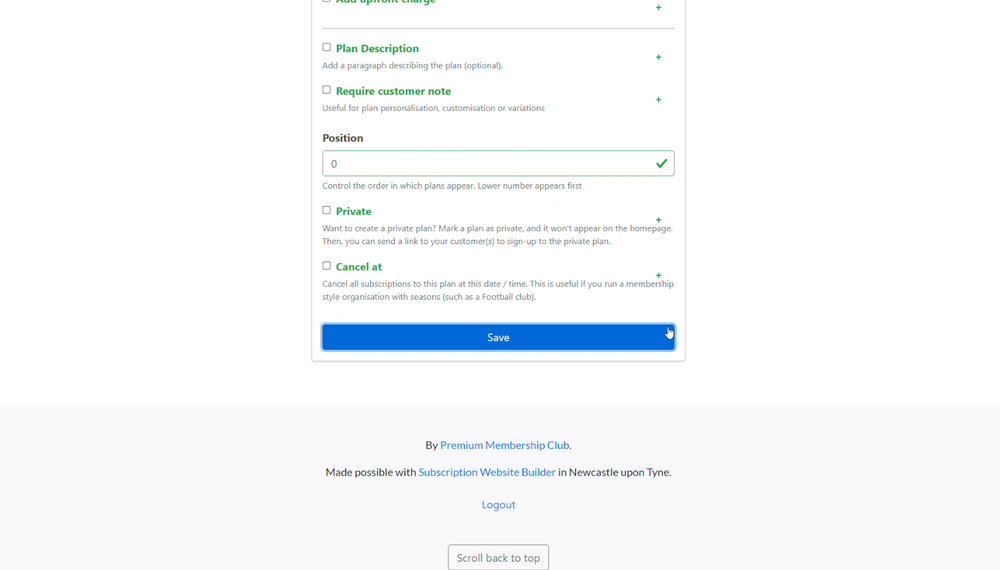
Step 3: Here, select the plan, scroll down to “Position”, and set the value that changes the position of the plan.
“0 (zero)” denotes the first position and so on.
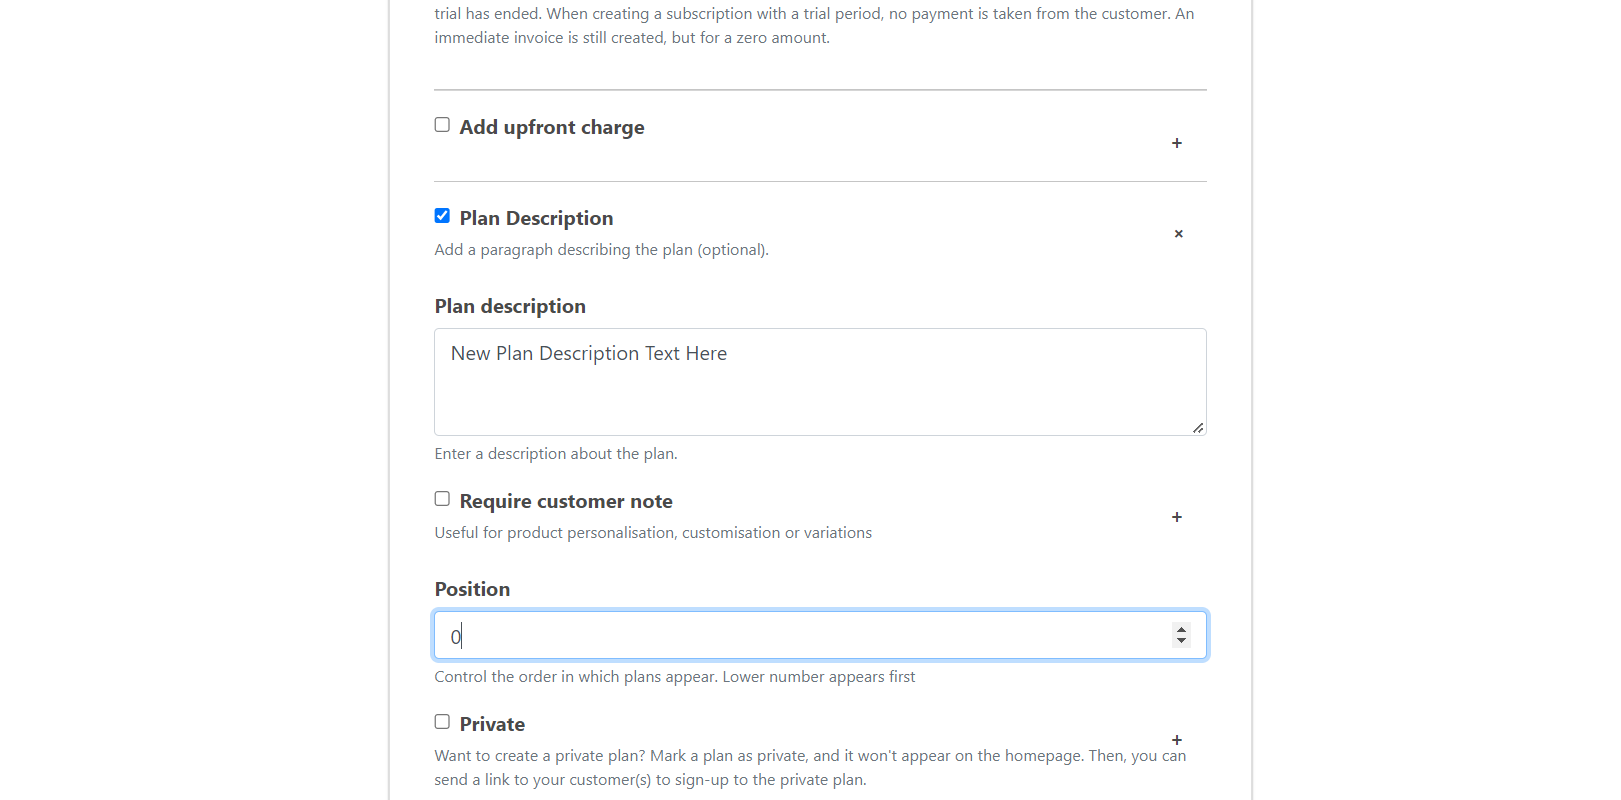
Step 4: Click “save”.
Now you have successfully rearranged your plans in your shop!
Want to make your subscription shop more organised? Learn how you can categorise your subscription plans.
#Step 1:
#Step 2:
Note: If you can’t remember your Subscribie credentials, use the forgotten password link on the login page.
#Step 3:
#Step 4:
#Step 5:
Step 1: Log into your store and navigate to your Shop Dashboard.
Step 2: Under the “Edit/Add Plans” section, choose “Edit Plans”.
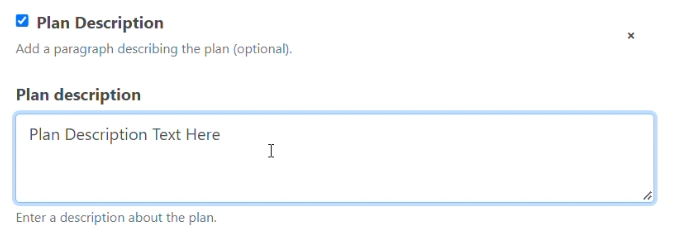
Step 3: Choose the plan you would like to add a description to and scroll down and add a checkmark to Plan Description.
Step 4: After adding the checkmark to Plan Description, a text box will appear. In the text box, write a description for your subscription plan.
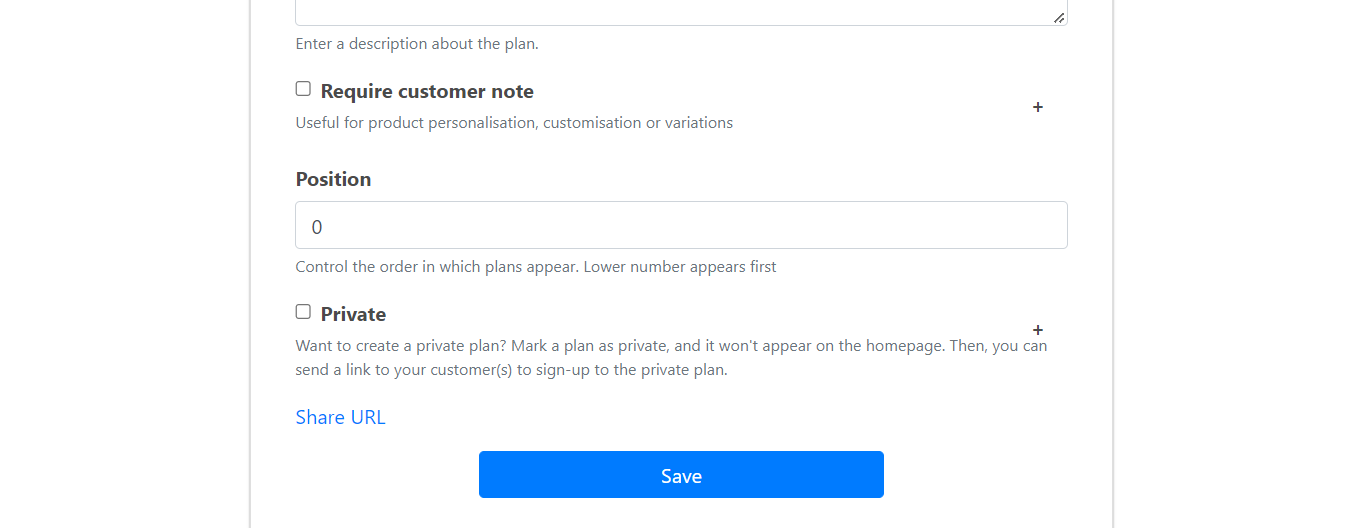
Step 5: Now scroll down and click Save.
Learn how to add a private page that is only accessable by your subscribers by following these steps.
Step 1: Log into your store and navigate to your Shop Dashboard.
Step 2: Click the “Modules” tab and select “List Pages” under the “Pages” category.
Step 3: Select “Set Private Pages”
Step 4: Choose the Page and click Submit.
Select all the pages you wish to private in this step.
Now you have created a private page.
Does your shop need to charge VAT for your products and services? You can enable the option to auto-calculate VAT with these steps.
VAT is not enabled by default for shops.
Step 1: On your Dashboard go to “Manage My Shop”.
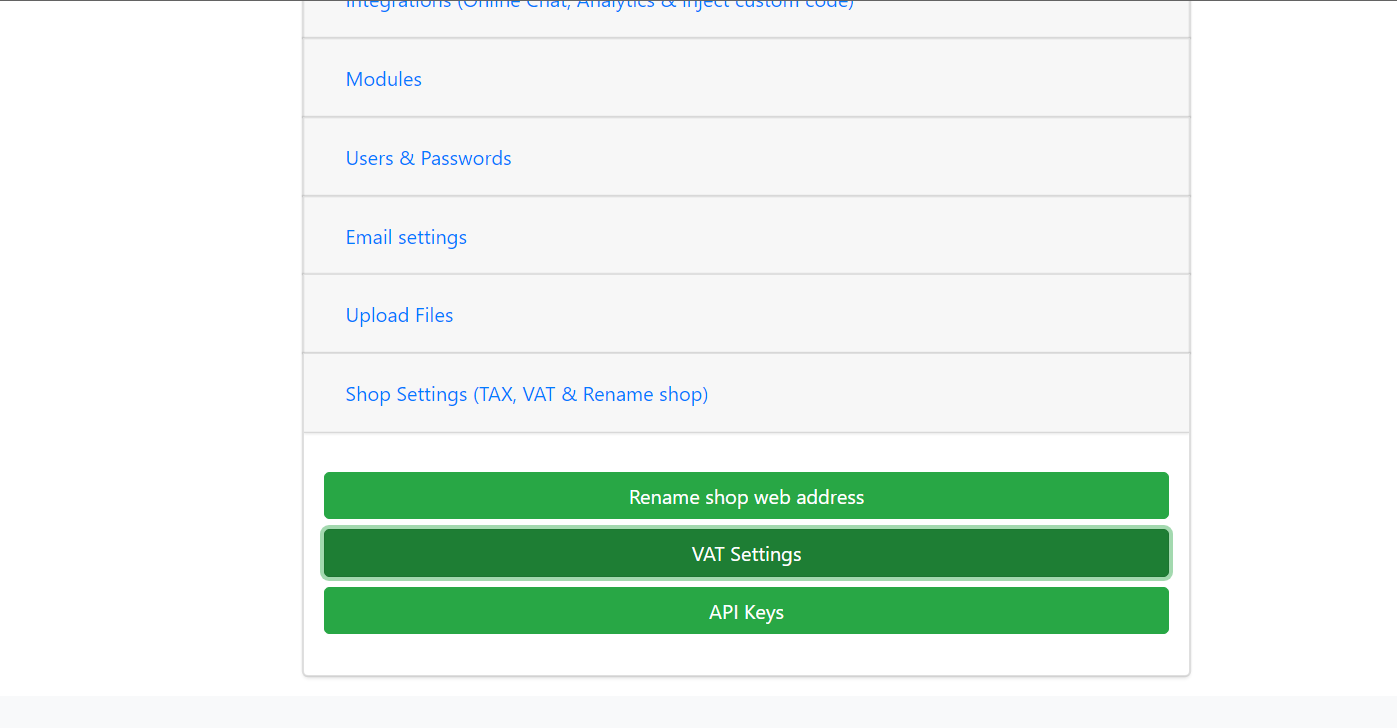
Step 2: Scroll to the bottom of the list and under “Shop Settings” choose “VAT Settings”.
Step 3: To activate VAT choose “Yes. Charge VAT at 20%” and click “Save”
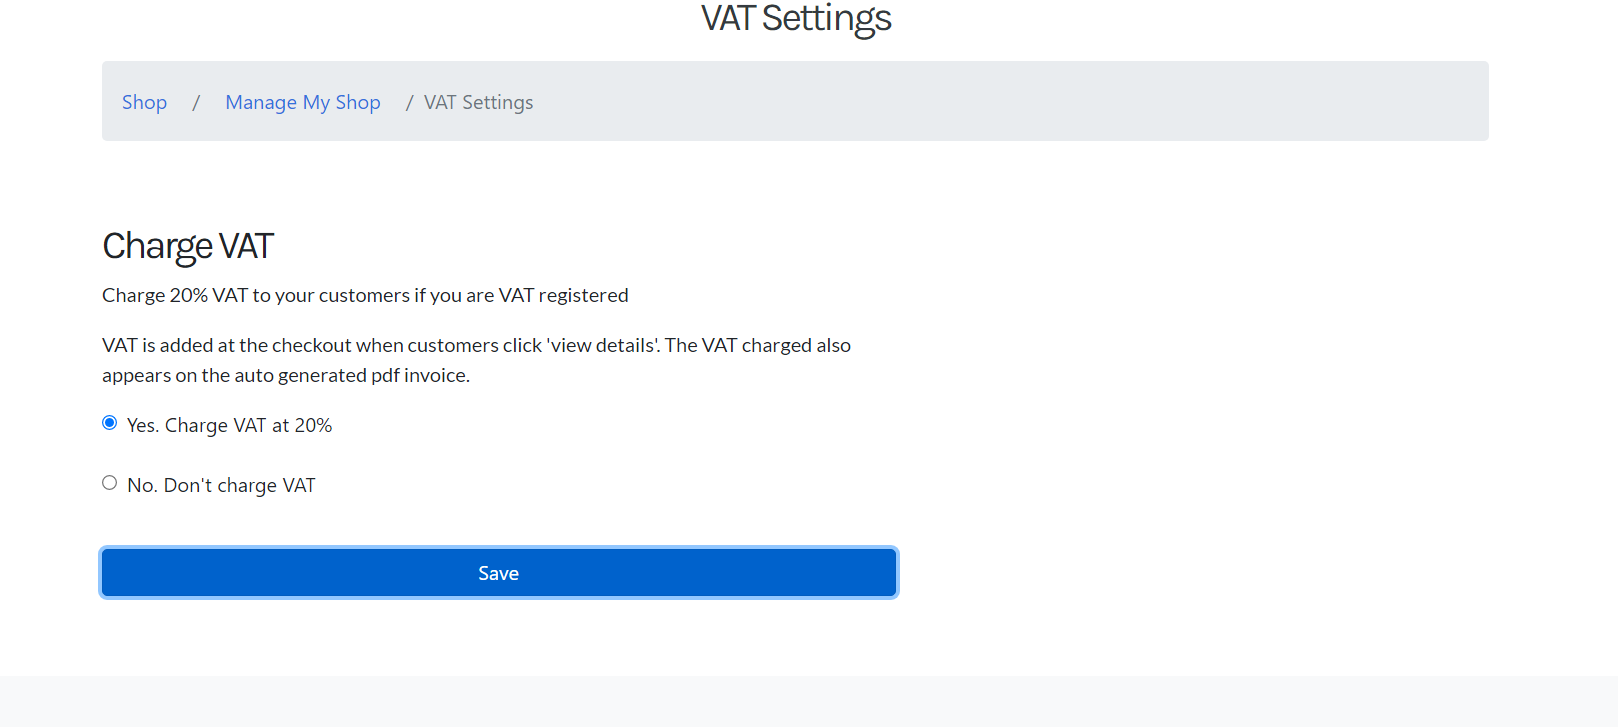
Now your shop is ready to charge VAT to your customers who sign up to your shop on Subscribie! Invoices generated will automatically have vat added during checkout and subsequent automaic charges.
Please Note, An ad hoc charge only applies to Subscribers who have Subscribed to at least one of your plans, which can be a regular plan (e.g. £10 a month) or a free trial. This is because Subscribie needs to obtain payment authorisation, which is done when they sign up for a plan. Free Plans do not require payment authorisation, so they cannot be used for ad hoc charges.
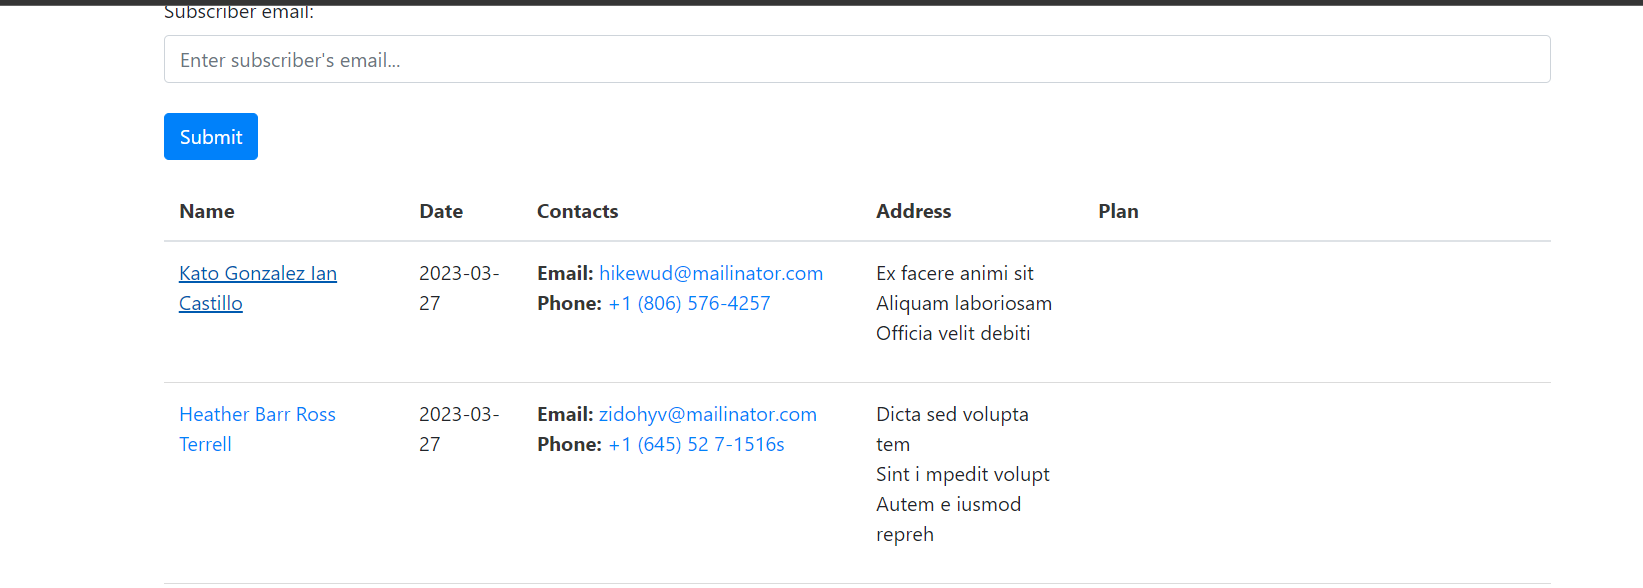
Step 1: In your dashboard go to View Subscribers under My Subscribers.

Step 2: Select the Subscriber you would like to add an Ad Hoc charge to. Please note, An Ad Hoc Charge can only be charged to a customer that is subscribed to at least one of your plans.
Ad Hoc charges can not be charged to Free Subscribers (Subscribers who have subscribed to a free plan.)
Step 3: Click Charge Subscriber.

Step 4: Enter the amount you would like to charge the customer under Amount and add a description in the Description text box and click Charge Subscriber Now.
When Charging a customer, always add two extra Zeros at the end of the value. For instance, 2000 means 20.00, not 2000.00. This is a precautionary measure to prevent overcharging a customer.
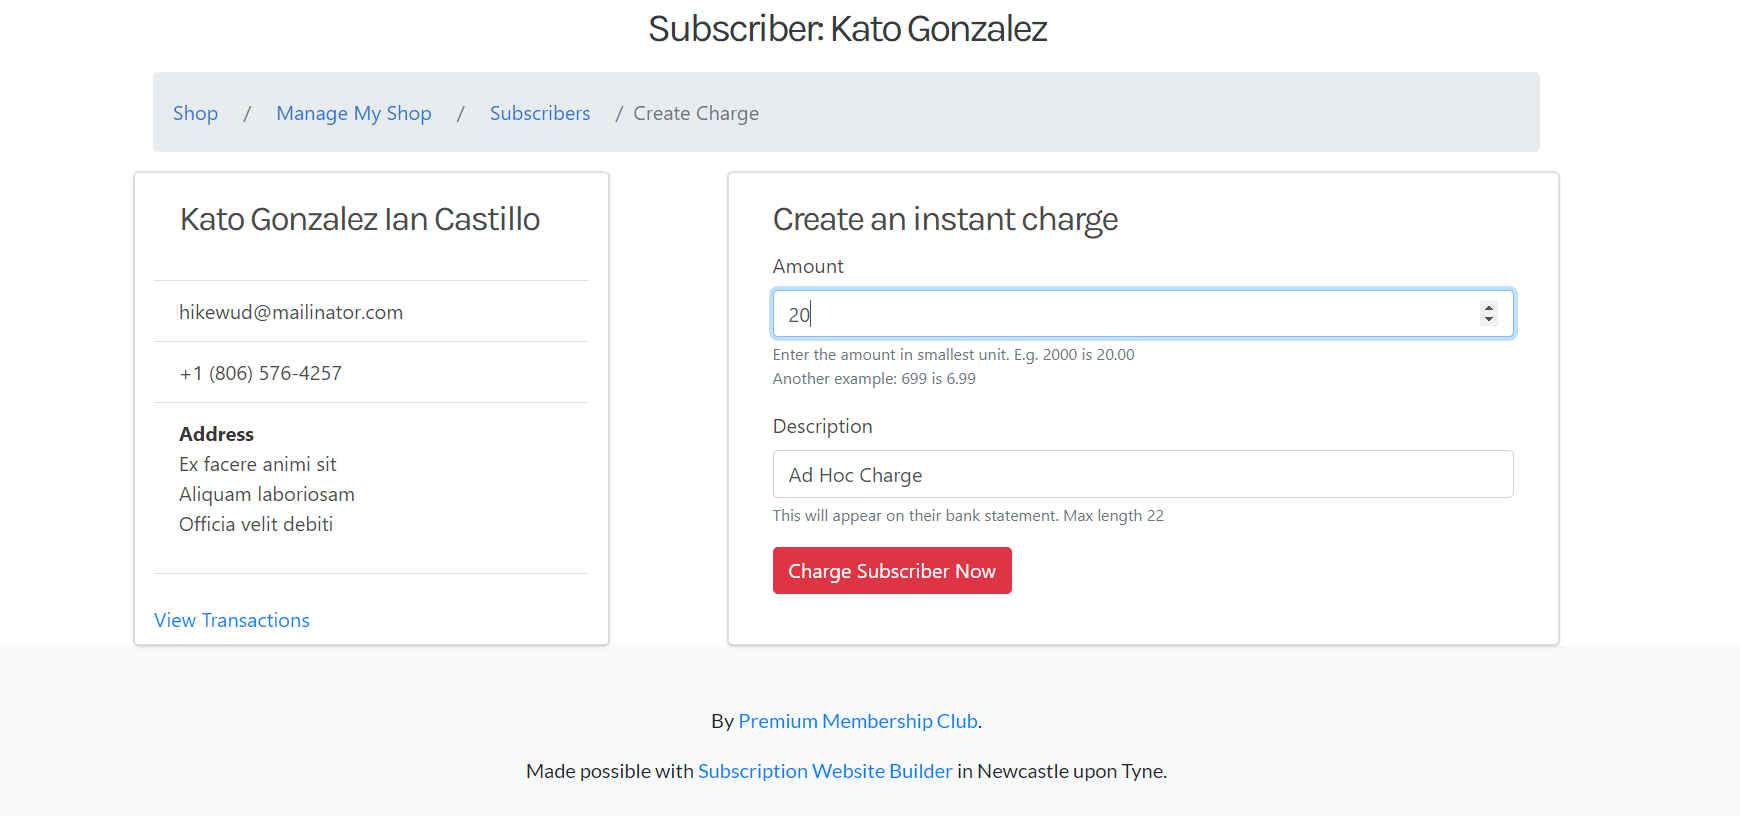
You have now successfully created an Ad Hoc charge to your customer.
Need to refund a customer? Check out our guide on refunding a customer and pausing a customers subscription.
This is a placeholder page that shows you how to use this template site.
For many projects, users may not need much information beyond the information in the Overview, so this section is optional. However if there are areas where your users will need a more detailed understanding of a given term or feature in order to do anything useful with your project (or to not make mistakes when using it) put that information in this section. For example, you may want to add some conceptual pages if you have a large project with many components and a complex architecture.
Remember to focus on what the user needs to know, not just what you think is interesting about your project! If they don’t need to understand your original design decisions to use or contribute to the project, don’t put them in, or include your design docs in your repo and link to them. Similarly, most users will probably need to know more about how features work when in use rather than how they are implemented. Consider a separate architecture page for more detailed implementation and system design information that potential project contributors can consult.
Admin dashboard -> Edit Plans screen, you can configure a Plan to either “Do not prorate” or “Prorate”.“Do not prorate” means to charge subscribers the full amount of the subscription, even if it ends before the period is over.
Prorate (on) means in the event that a Subscription is cancelled before the subscription period is over, then don’t charge the subscriber of this Plan the full amount, instead charge only the used amount of the current period.
For example, if a monthly subscription ends partway through the month, the final charge will be less since it is prorated based on the time used.
Not all Plans have a recurring charge: for example a free Plan. However, all Plans have a Subscriber. When thinking about Subscriptions, it’s helpful to think about Subscriptions and Payments as different things.
This is a placeholder page that shows you how to use this template site.
Information in this section helps your user try your project themselves.
What do your users need to do to start using your project? This could include downloading/installation instructions, including any prerequisites or system requirements.
Introductory “Hello World” example, if appropriate. More complex tutorials should live in the Tutorials section.
Consider using the headings below for your getting started page. You can delete any that are not applicable to your project.
Are there any system requirements for using your project? What languages are supported (if any)? Do users need to already have any software or tools installed?
Where can your user find your project code? How can they install it (binaries, installable package, build from source)? Are there multiple options/versions they can install and how should they choose the right one for them?
Is there any initial setup users need to do after installation to try your project?
Can your users test their installation, for example by running a command or deploying a Hello World example?