Send Customised Emails to Customers
Need a quick way to make your automated emails feel more personal? Learn how to Send Customised Emails to Customers
Steps to Send Customised Emails to Customers
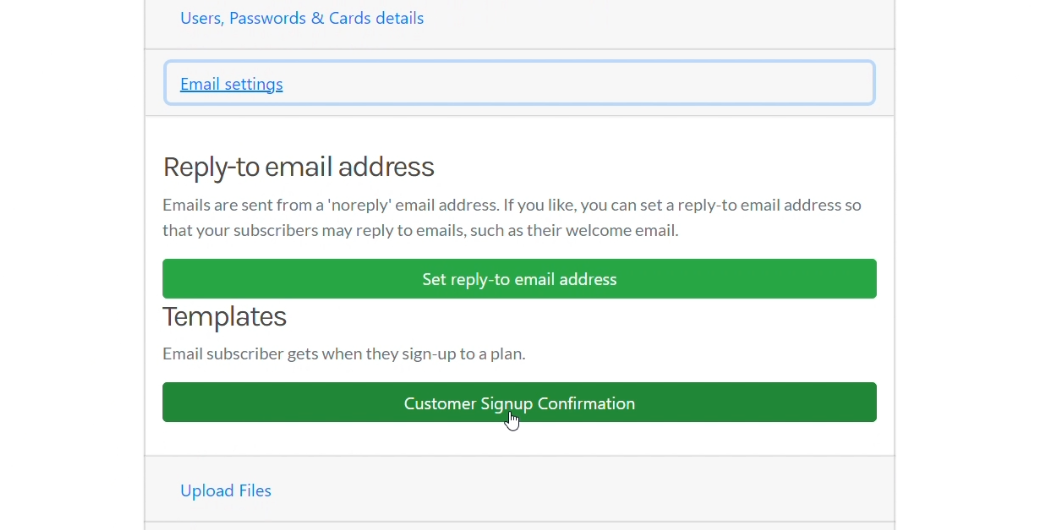
Step 1: In your dashboard go to Customer Signup Confirmation under Email settings.
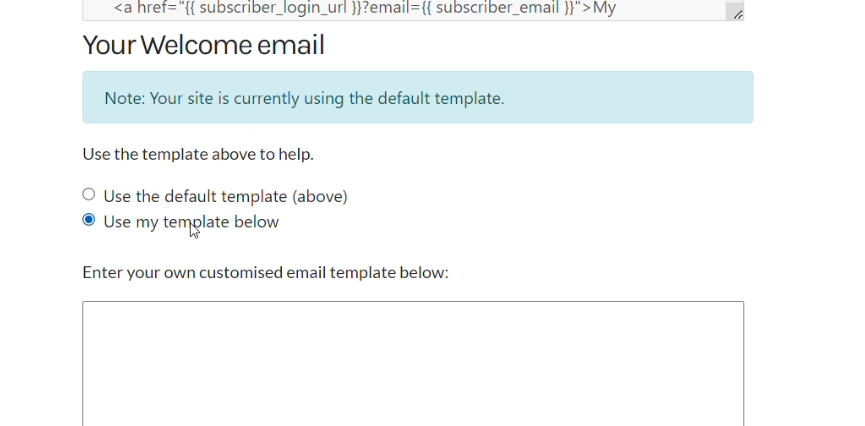
Step 2: Change the default setting from default to “use my template below” to set the customised signup confirmation to your customised email.
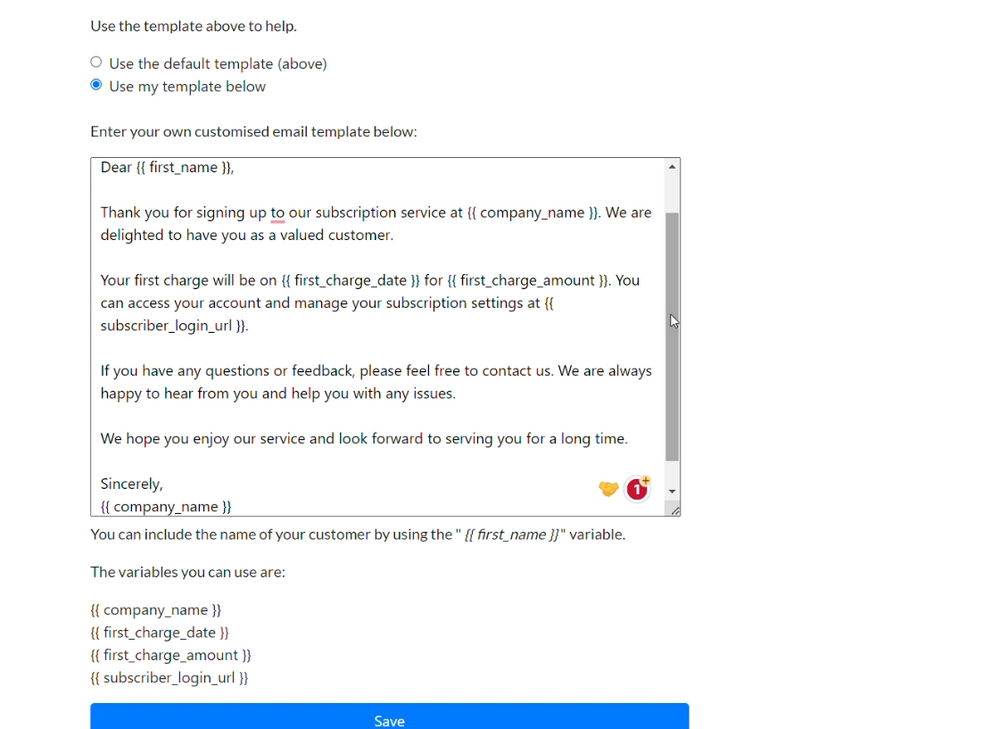
Step 3: Enter your new customised signup confirmation email in the text box. You can use the following variables to insert dynamic information about your customers and your service:
- {{ first_name }} - The first name of the customer.
- {{ company_name }} - The name of your company or service.
- {{ first_charge_date }} - The date of the first charge for the subscription.
- {{ first_charge_amount }} - The amount of the first charge for the subscription.
- {{ subscriber_login_url }} - The URL where the customer can log in to their account and manage their subscription.
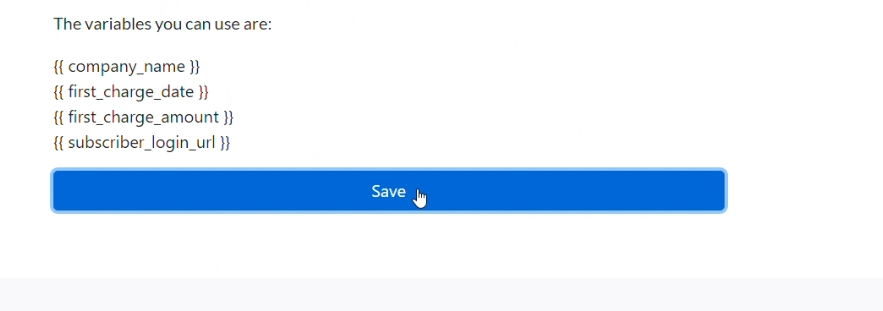
Step 4: Click save to save this new email format to send out to customers when they sign up.
That’s it! You have successfully customised your customer signup confirmation email for Subscribie.
Do you want to make emails even more personal? Learn how to add a reply to email to your automated emails.
Watch the Tutorial to Send Customised Emails to Customers
Last modified June 15, 2023: updating and optimising docs (6b83052b)