This is the multi-page printable view of this section.
Click here to print.
Return to the regular view of this page.
Core Tasks
What can your user do with your project?
This is page is being updated, please refer to Documentation
Think about your project’s features and use cases. Use these to choose your core tasks. Each granular use case (enable x, configure y) should have a corresponding tasks page or tasks page section. Users should be able to quickly refer to your core tasks when they need to find out how to do one specific thing, rather than having to look for the instructions in a bigger tutorial or example. Think of your tasks pages as a cookbook with different procedures your users can combine to create something more substantial.
You can give each task a page, or you can group related tasks together in a page, such as tasks related to a particular feature. As well as grouping related tasks in single pages, you can also group task pages in nested folders with an index page as an overview, as seen in this example site. Or if you have a small docset like the Subscribie User Guide with no Tutorials or Concepts pages, consider adding your feature-specific pages at the top level of your docs rather than in a Tasks section.
Each task should give the user
- The prerequisites for this task, if any (this can be specified at the top of a multi-task page if they’re the same for all the page’s tasks. “All these tasks assume that you understand….and that you have already….”).
- What this task accomplishes.
- Instructions for the task. If it involves editing a file, running a command, or writing code, provide code-formatted example snippets to show the user what to do! If there are multiple steps, provide them as a numbered list.
- If appropriate, links to related concept, tutorial, or example pages.
1 - View Failed Payments
Learn how you can view customer failed payments and the number of retry attempts.
Failed payments do not need to be manually managed. You automatically receive a notification of a failed payment and when it will be retried again. All failed payments are automatically retried for a maximum of 5 times. Please reach out to your subscriber and ask them to keep their payment accounts in order before the next payment attempt.
If you’d like to know how to get your customer’s information, check out our documentation on subscriber information.
How Subscribie Tackle Failed Payments?
When an attempted payment collection is unsuccessful, it is retried a set number of times to collect the payment. If the attempt falls during the next subscription payment cycle, both the attempted payment collection and the next subscription payment will be collected. Both payments are collected because time is constant and moving. So failed payments will be retried up to 5 times* and if it overlaps with future subscription payments, both payments will be deducted.
Steps to View Failed Payments
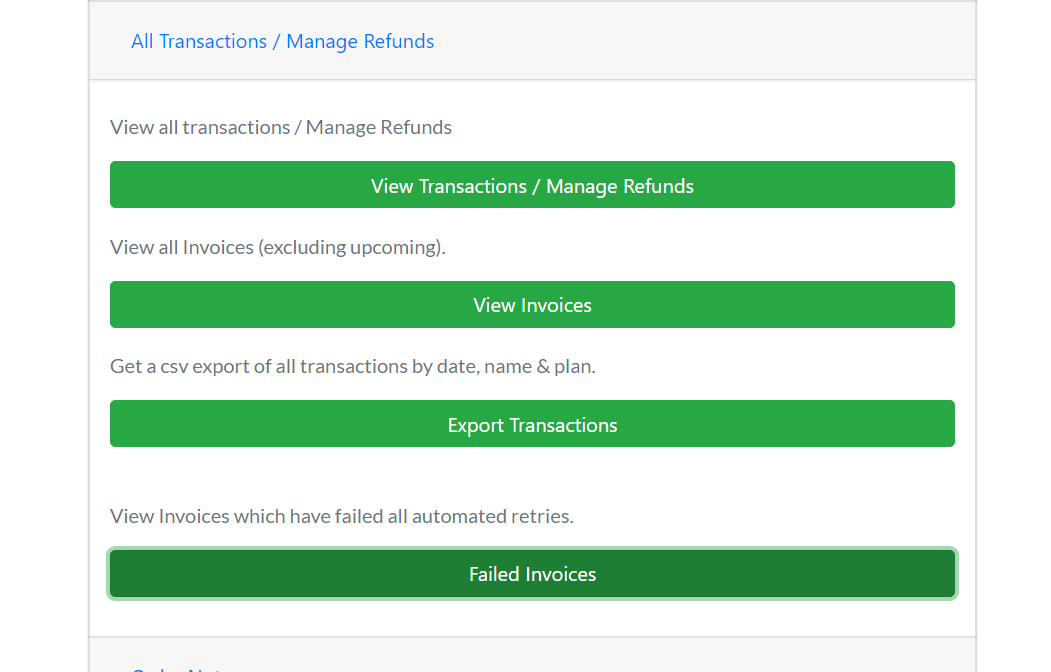
Step 1: In the Shop Dashboard, Look for All Transactions / Manage Refunds and click on Failed Invoices.
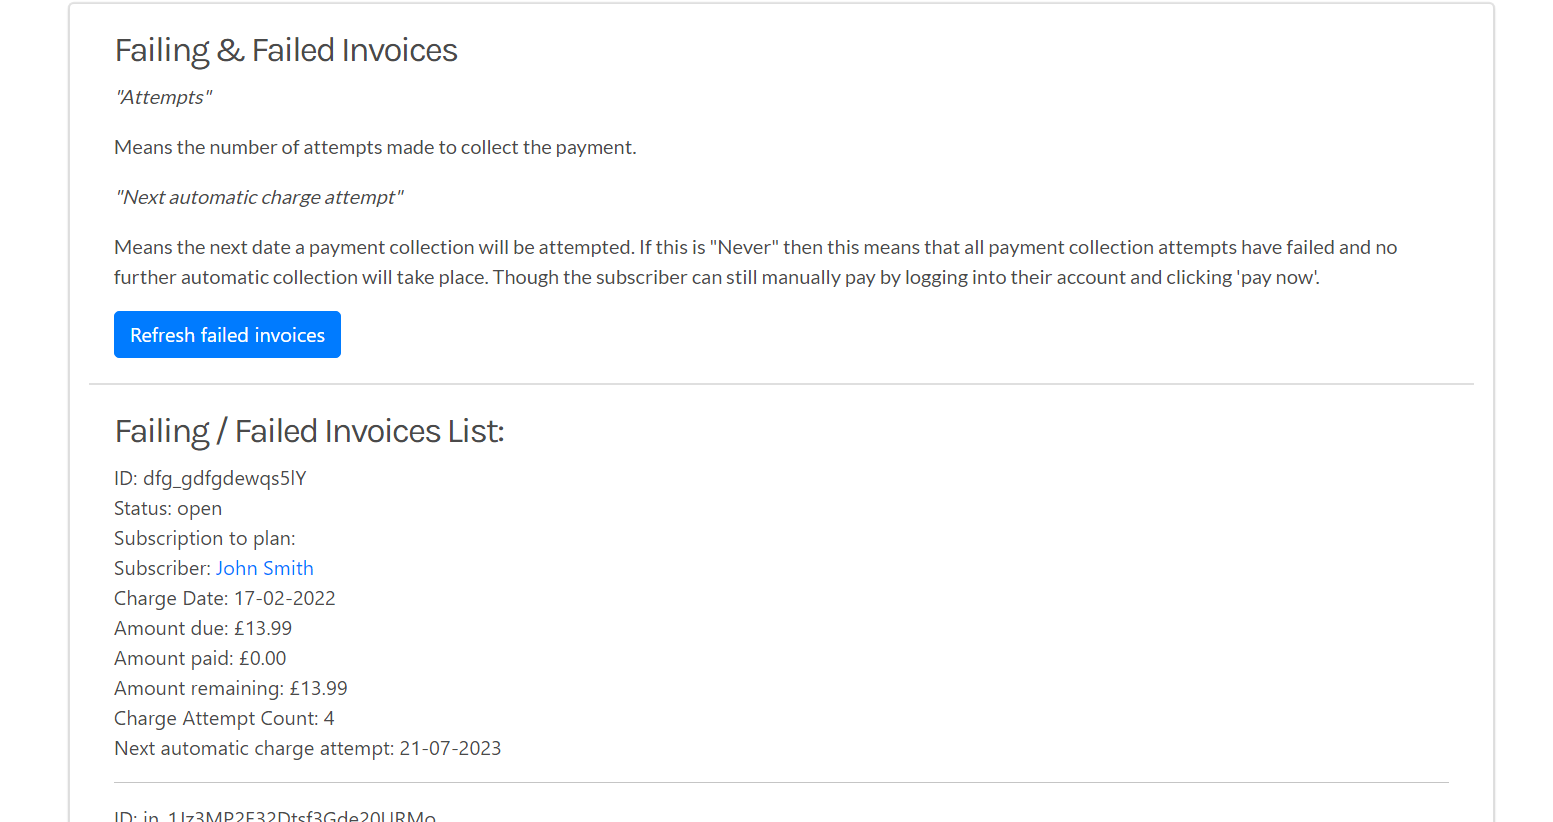
Step 2: Here you will see all of your attempted and failed invoices.
- Here, attempts denote the number of retries done, retries are capped at 5.
- To know which payments have completely failed and which payments are still ongoing, look at “Next automatic charge attempt”.
- The date mentioned here is the next attempt to collect payments. Please make sure your customer has their account in order before the next retry.
- If it says never, retries will not be attempted on that account.
2 - Send Customised Emails to Customers
Need a quick way to make your automated emails feel more personal? Learn how to Send Customised Emails to Customers
Steps to Send Customised Emails to Customers
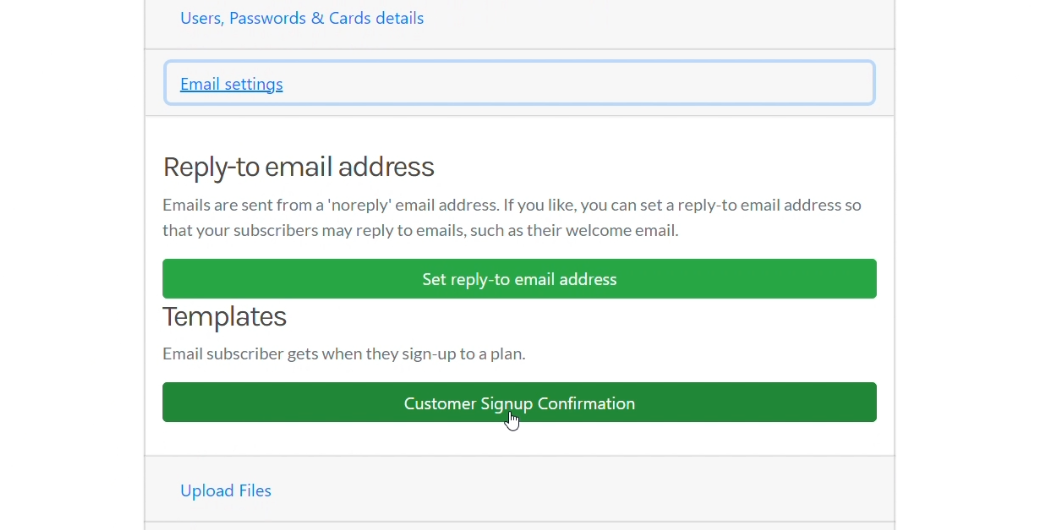
Step 1: In your dashboard go to Customer Signup Confirmation under Email settings.
Step 2: Change the default setting from default to “use my template below” to set the customised signup confirmation to your customised email.
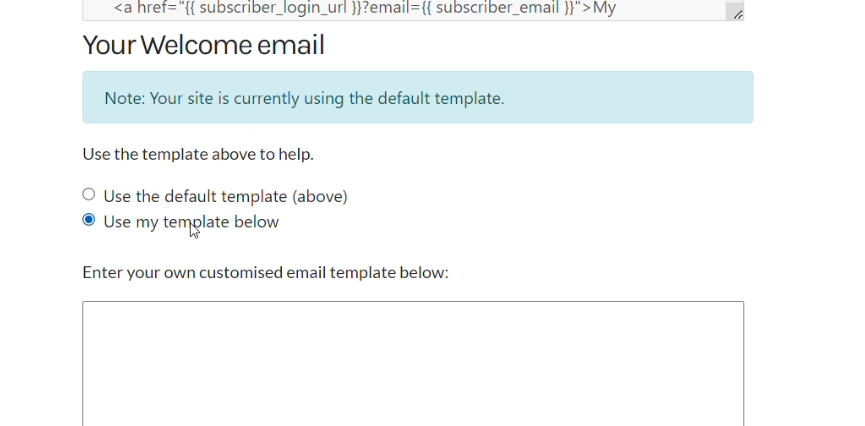
Step 3: Enter your new customised signup confirmation email in the text box. You can use the following variables to insert dynamic information about your customers and your service:
- {{ first_name }} - The first name of the customer.
- {{ company_name }} - The name of your company or service.
- {{ first_charge_date }} - The date of the first charge for the subscription.
- {{ first_charge_amount }} - The amount of the first charge for the subscription.
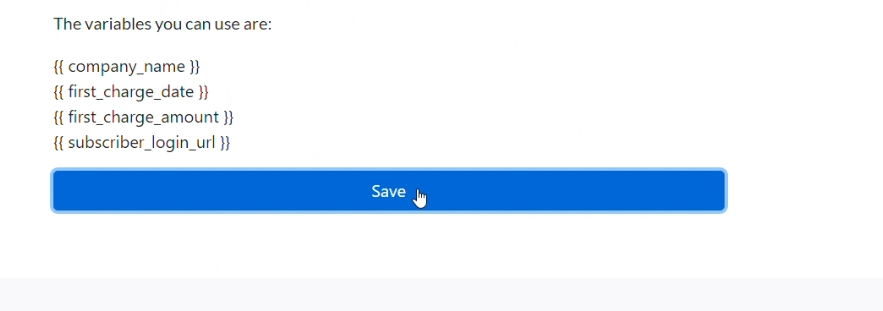
- {{ subscriber_login_url }} - The URL where the customer can log in to their account and manage their subscription.
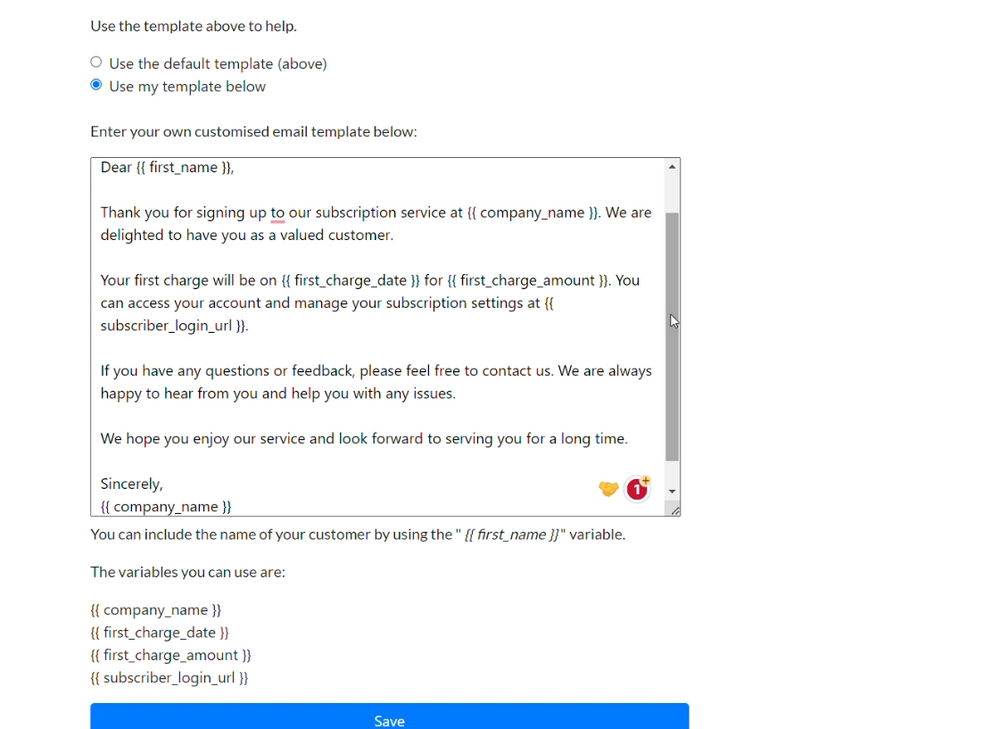
Step 4: Click save to save this new email format to send out to customers when they sign up.
That’s it! You have successfully customised your customer signup confirmation email for Subscribie.
Do you want to make emails even more personal? Learn how to add a reply to email to your automated emails.
Watch the Tutorial to Send Customised Emails to Customers

3 - Update/Change Subscription Card Details
Just changed your card and need to pay for your Subscribie subscription? Follow these steps to Update/Change Subscription Card Details
Steps to Update/Change Subscription Card Details
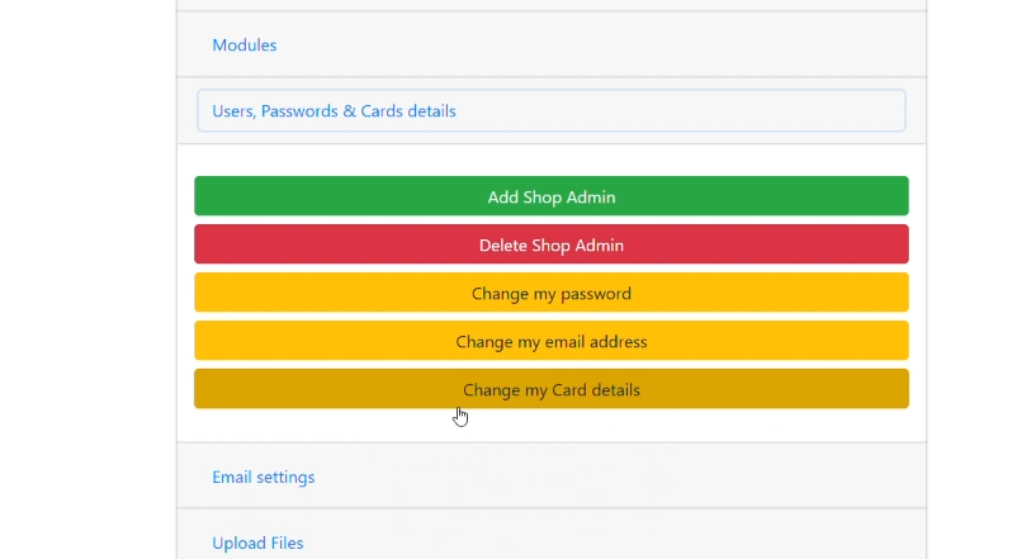
Step 1: In your Dashboard, Click on Users, Passwords & Cards details.
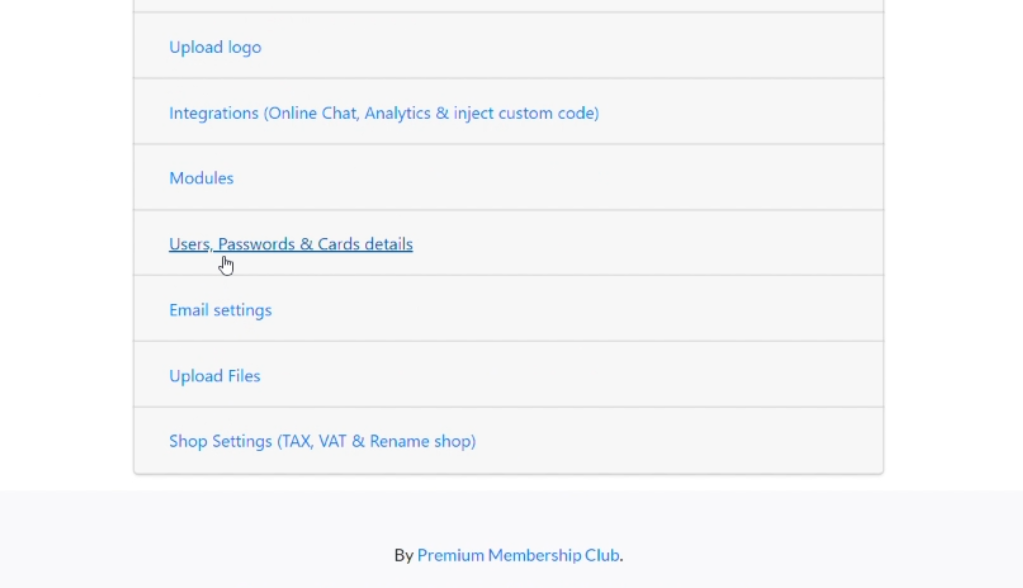
Step 2: Click Change my Card details.
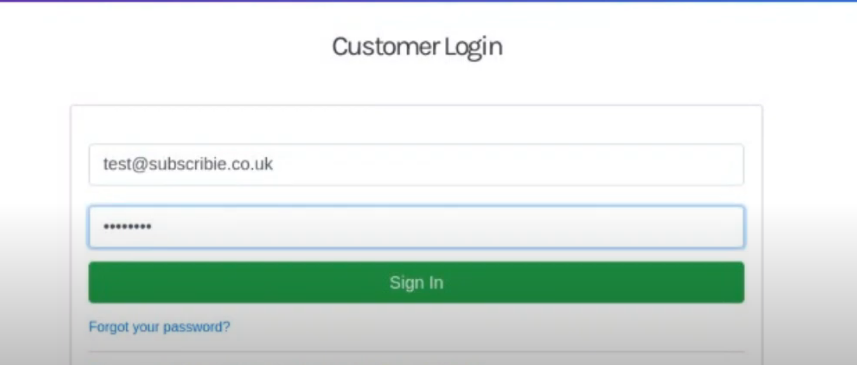
Step 3: Enter your Login Details.
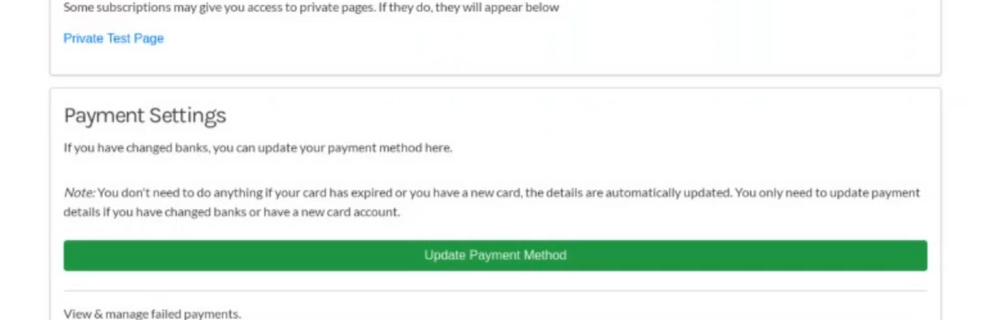
Step 4: Click Update Payment Method.
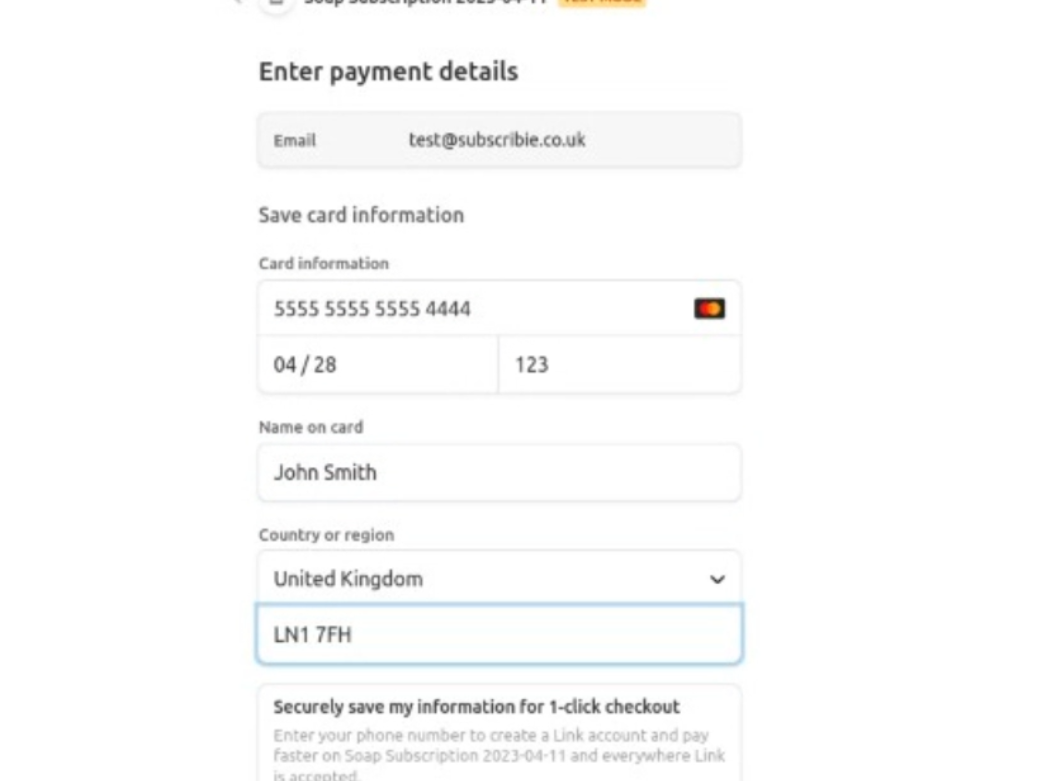
Step 5: Enter your card details and click Save.
That’s it! You have successfully updated your card details and can continue to use Subscribie.
Watch the Tutorial to Update/Change Subscription Card Details

4 - Why Can't You Cancel/Pause a Subscription
Cant find the option to Cancel/Pause a Subscription? Don’t worry, here are the steps you need to follow to be able to pause and cancel any subscription.
Steps to Enable the Option to Cancel/Pause a Subscription
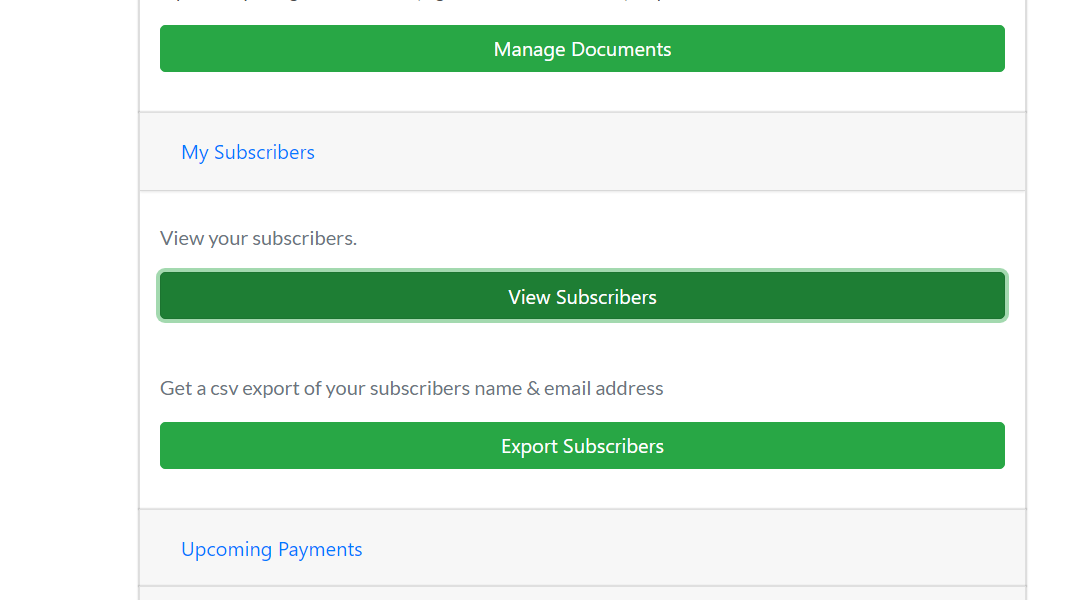
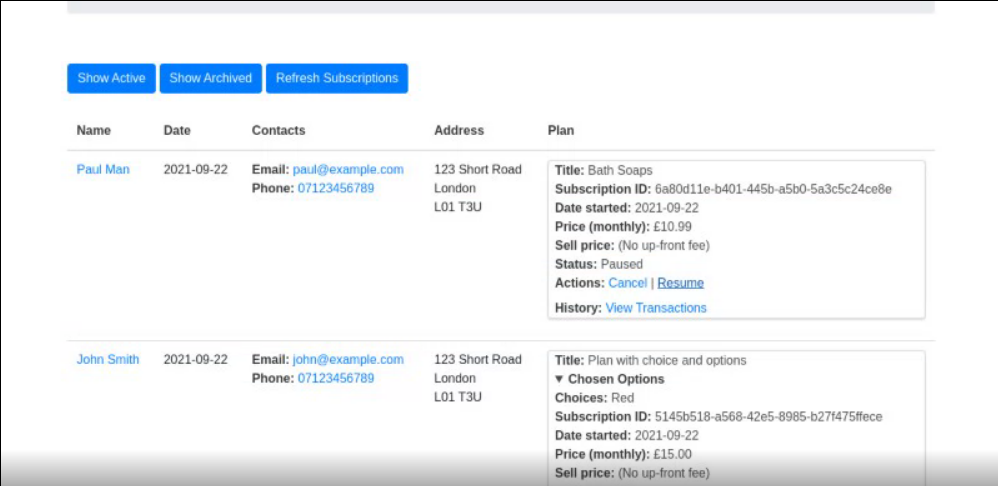
Step 1: Go to View Subscribers under My Subscribers.
Step 2: Click Refresh Subscriptions. This will update your subscriptions with the latest data and show you the available actions for each subscription.
Please note that if you have an extremely large number of subscriptions, this will take longer to complete.

Once the refresh is done, you will be able to see the option to pause or cancel a subscription for your subscribers.
Step 3: Now, your subscriber list will be updated and you can pause or cancel your subscriber’s subscription.
Want to know how to pause or cancel a subscription? Check out how you can do it on Subscribie and how you can refund a subscription.
Watch the Tutorial to Enable the Option to Cancel/Pause a Subscription

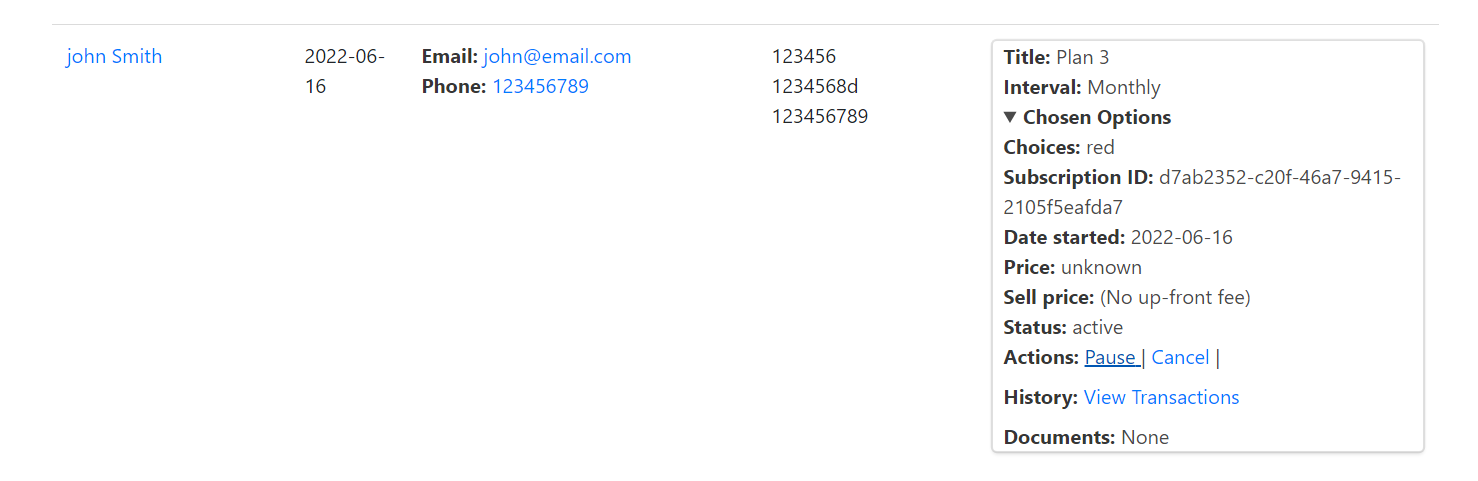
5 - Add Documents to Subscription Plans
Want to add documents to plans? Learn how to add documents to subscription plans.
When you add documents to plans, subscribers get access to those documents for easy
viewing. Use documents to add useful subscription related information, such as terms of business, or simply generic text you want subscribers to read when they sign-up to
your plans.
For adding files to your plans (such as images, PDFs etc), learn how to upload files to your shop.
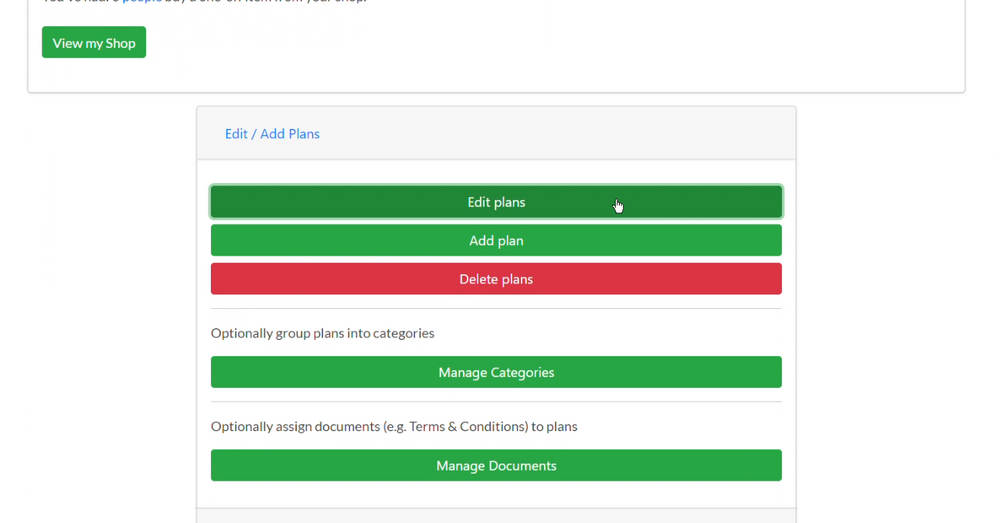
Steps to add documents to subscription plans
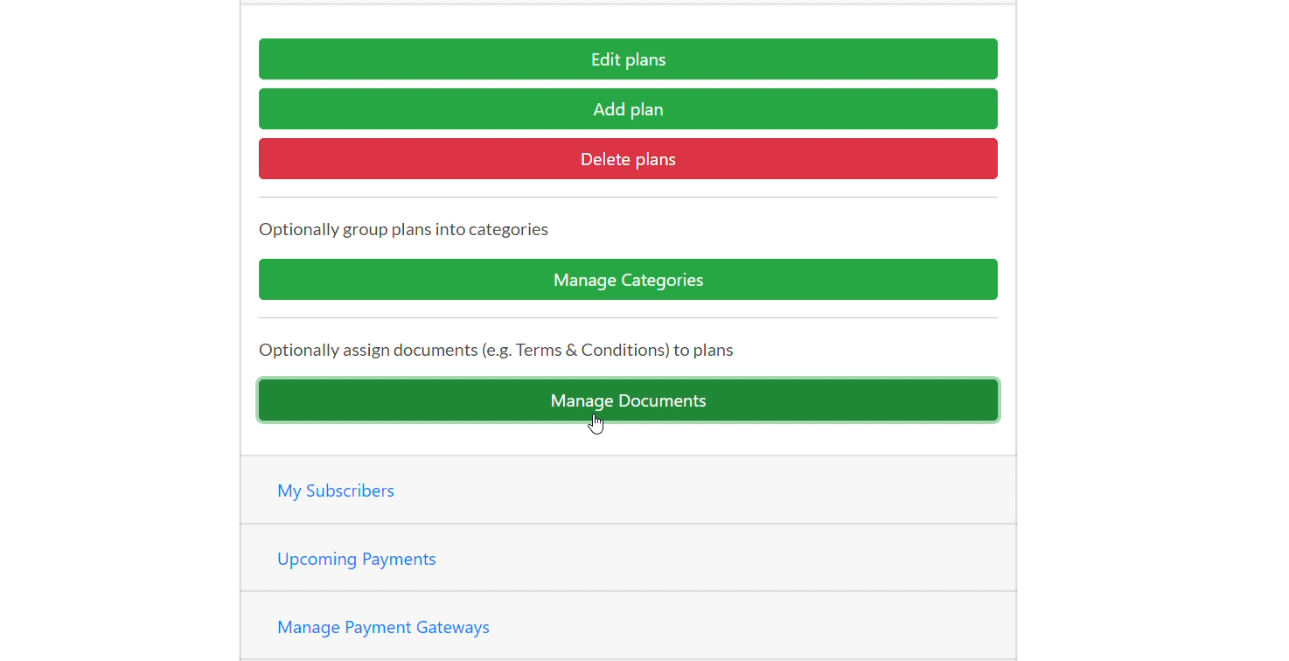
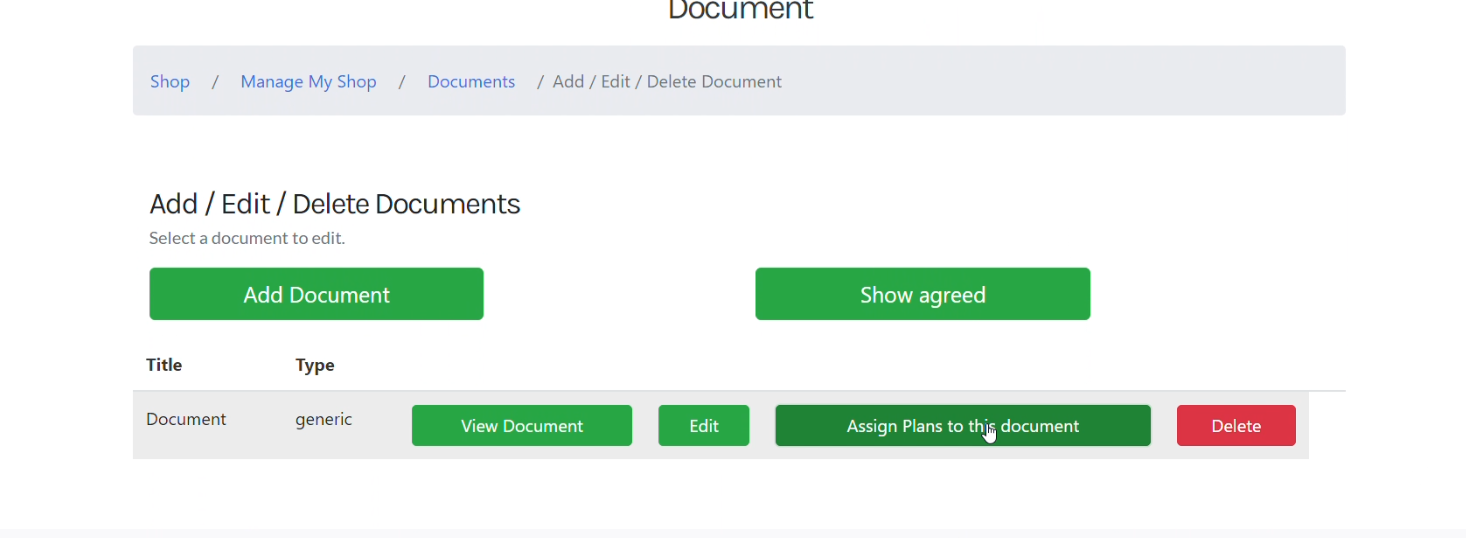
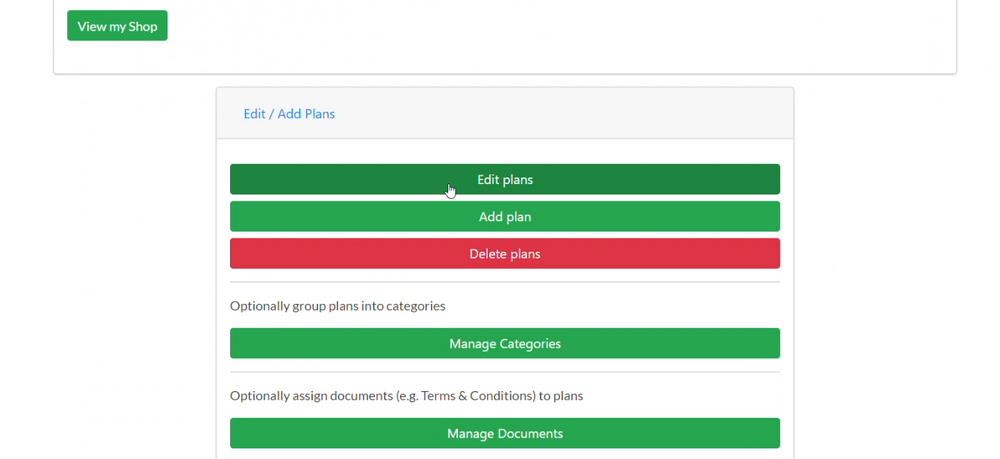
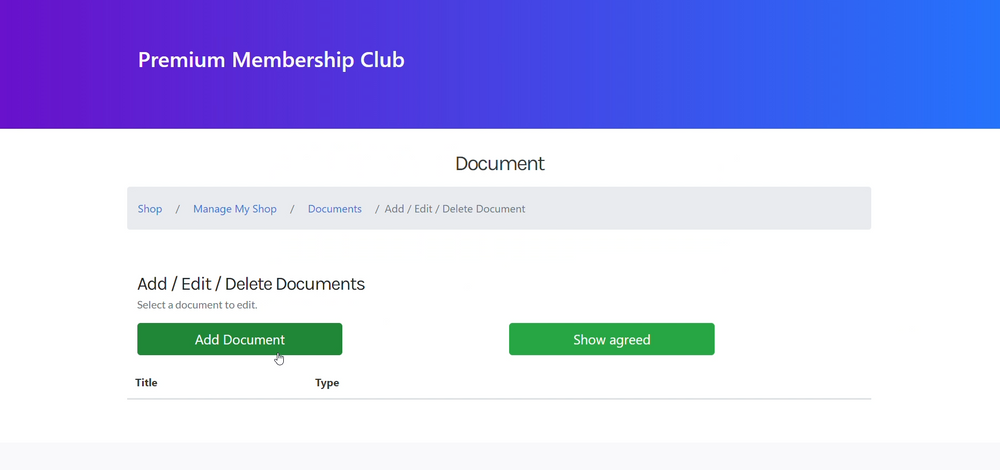
Step 1: Go to Manage Documents in Edit/ Add Plans.
Step 2: Click Add Document.
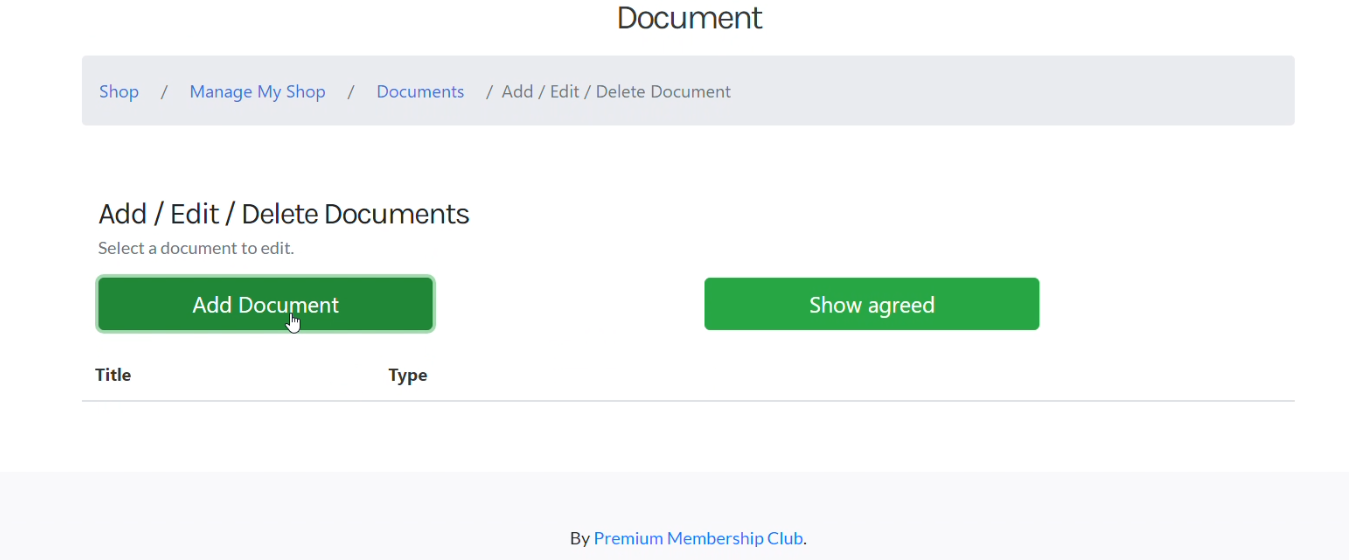
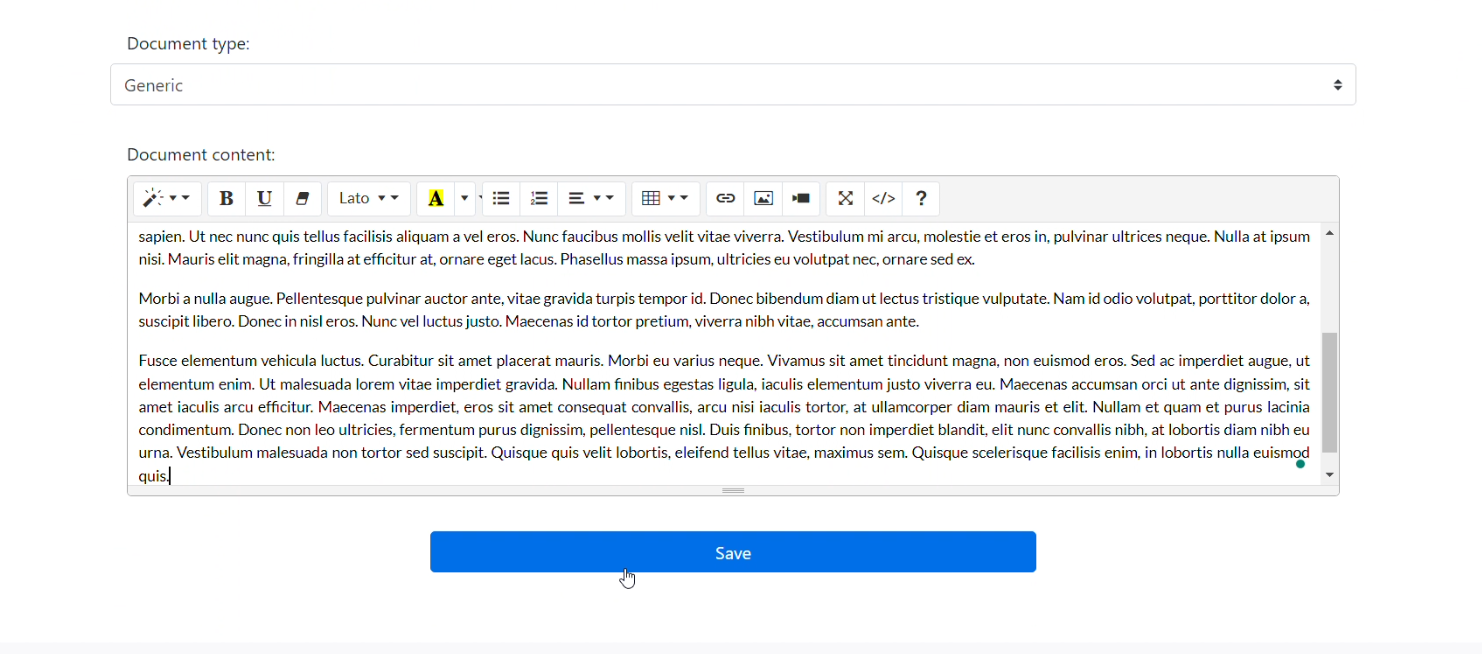
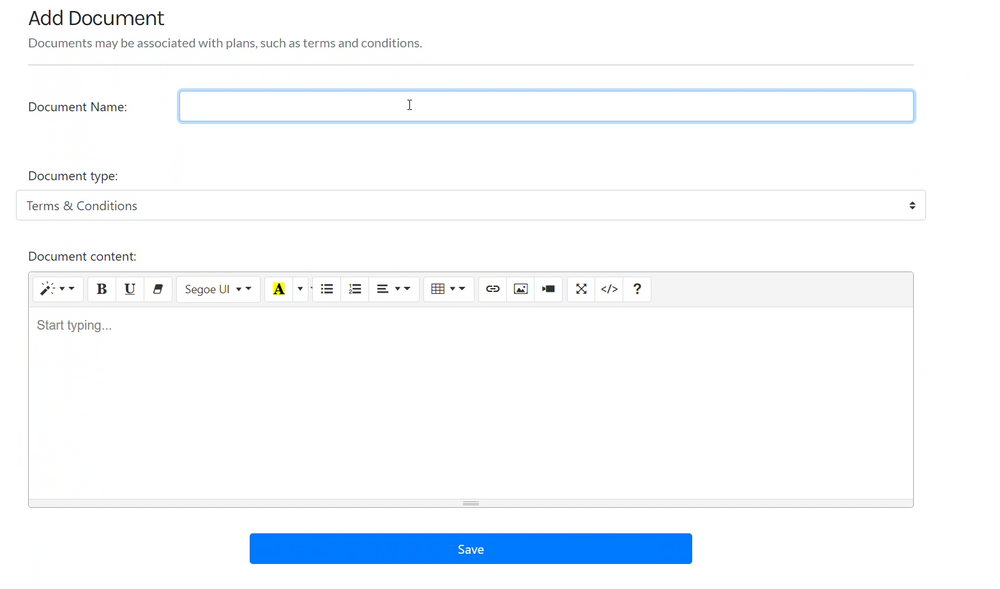
Step 3: Enter the Document Name and select the type of document you would like to add.
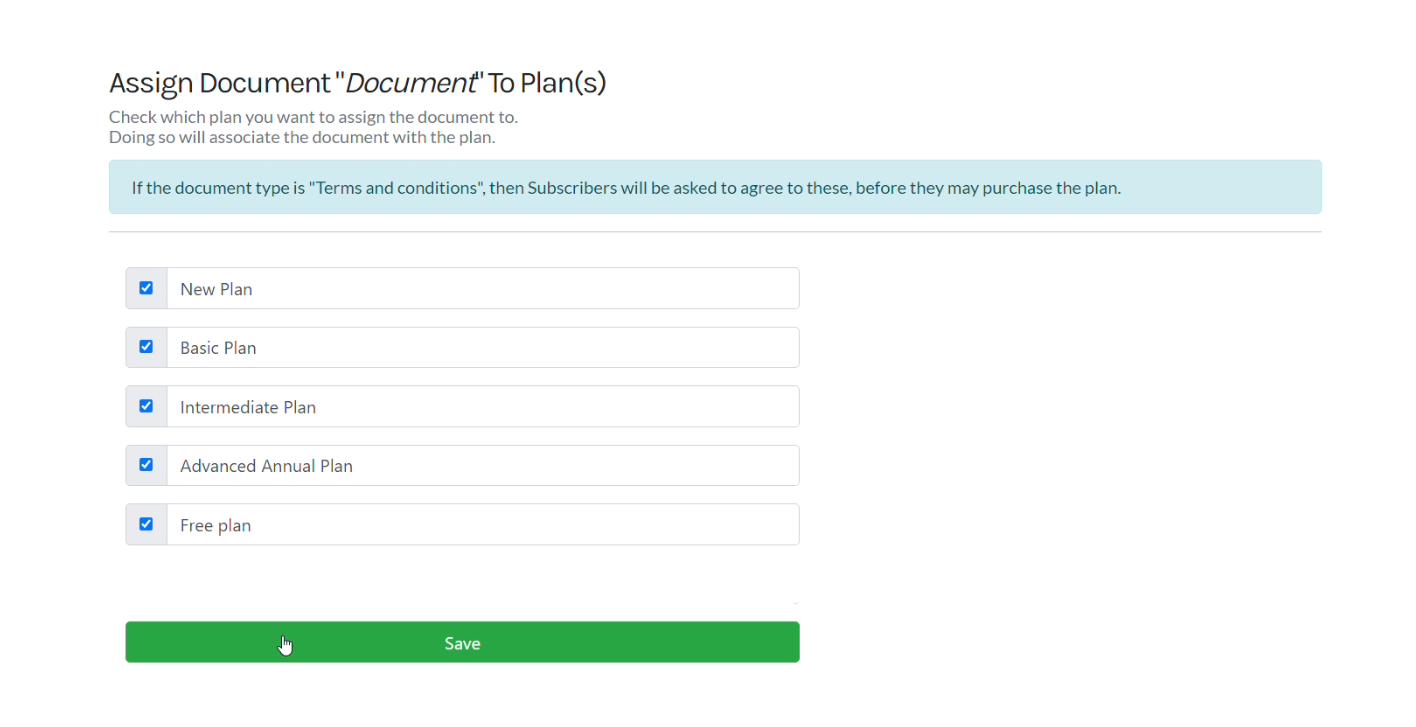
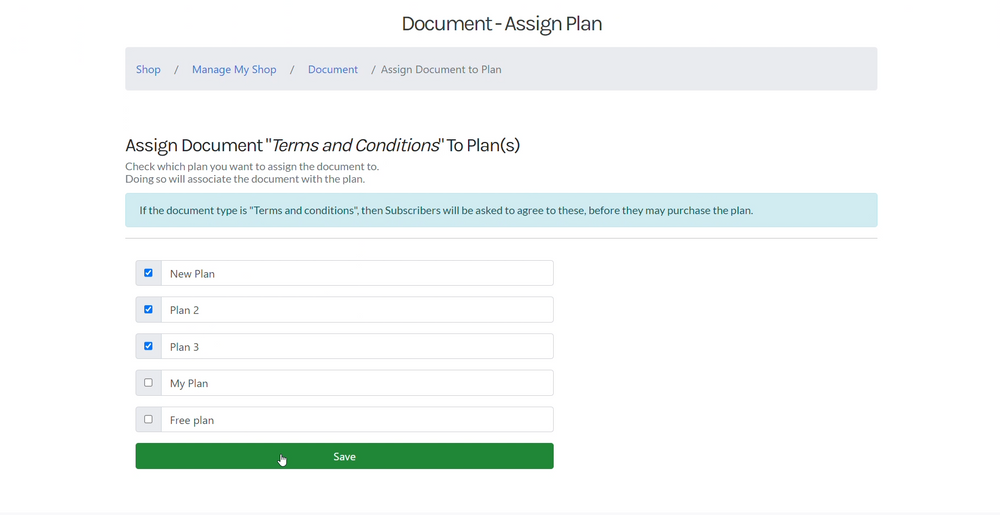
If the document type is “Terms and conditions”, then Subscribers will be asked to agree to these, before they may purchase the plan.

Step 4: Enter your document contents and click Save.
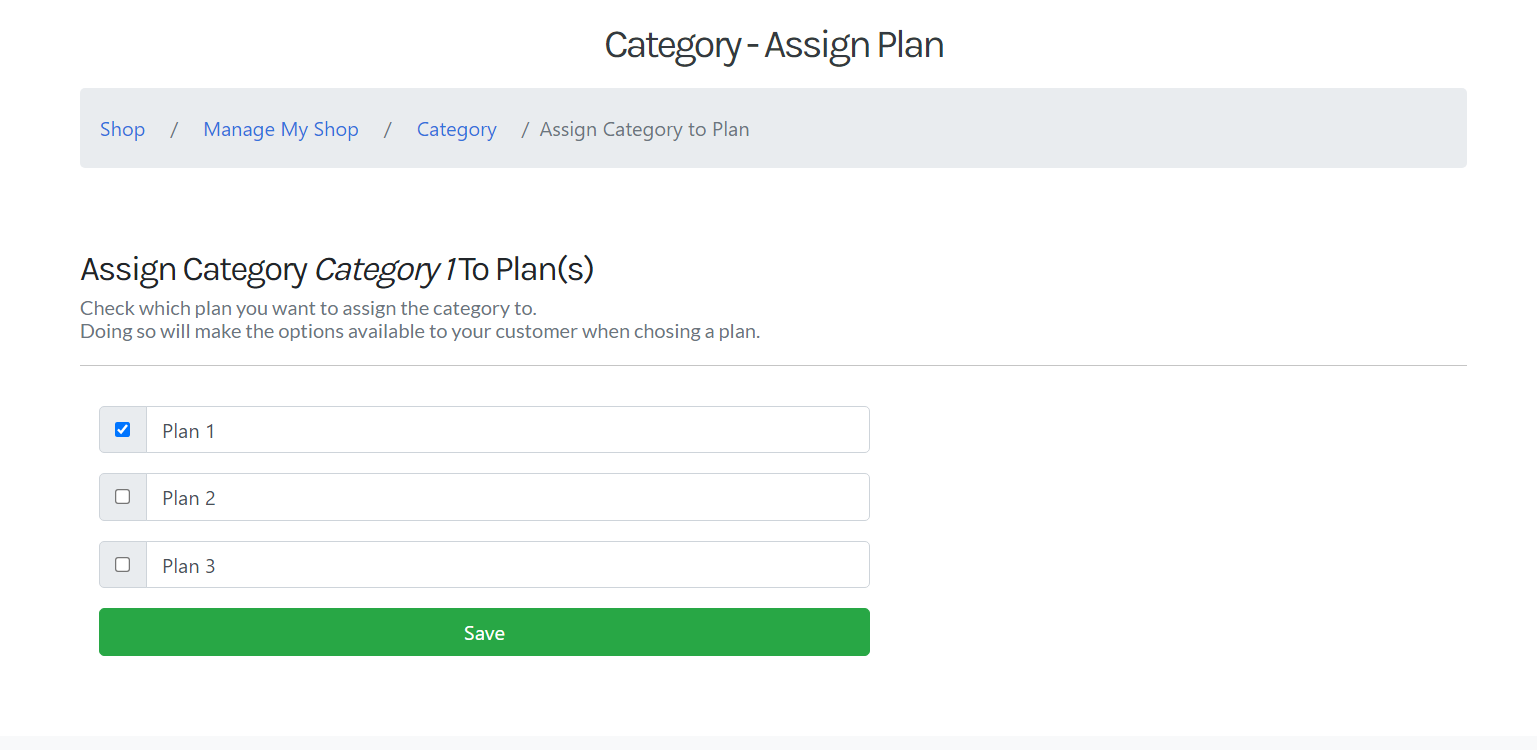
Step 5: To assign this document to your plans, click Assign Plans to this document.
Step 6: Select the subscription plans you would like to add the document to and click Save.
You have now added documents to the desired plans.
Watch the Tutorial to Add Documents to Subscription Plans

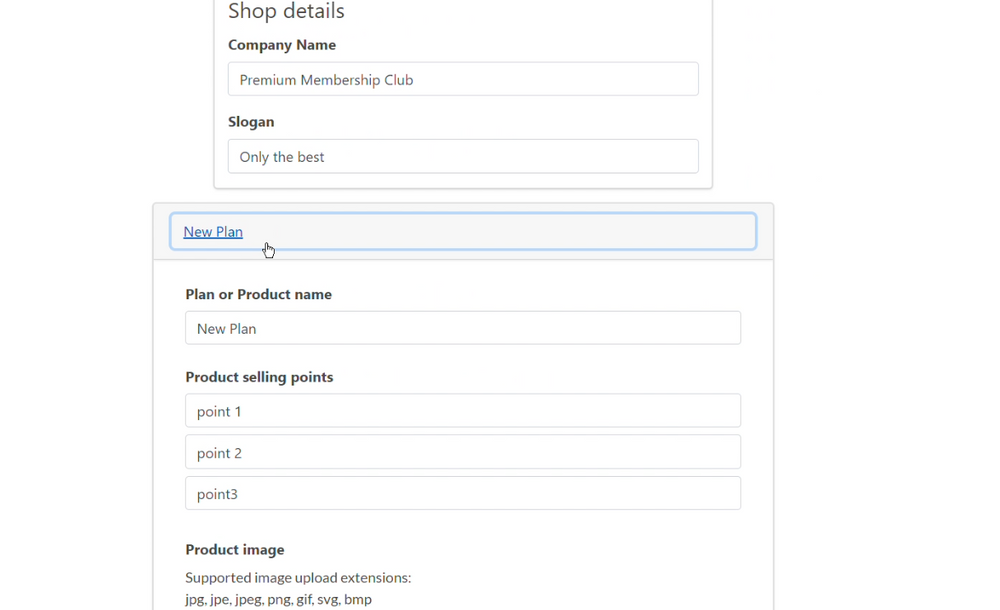
6 - Change the Name of Your Shop
Easily change the name of your shop, this will be reflected throughout your shop.
Steps to change the name of your shop
Note: Changing your shop name also changes your shop web address.
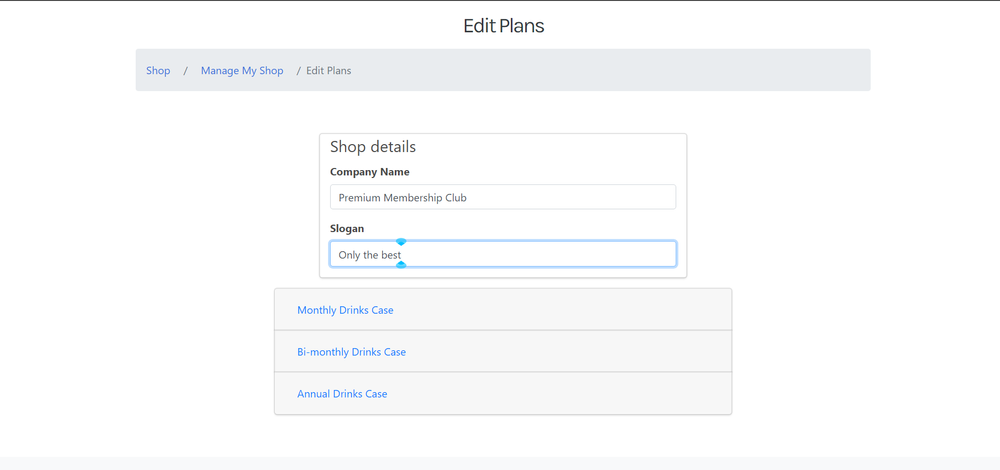
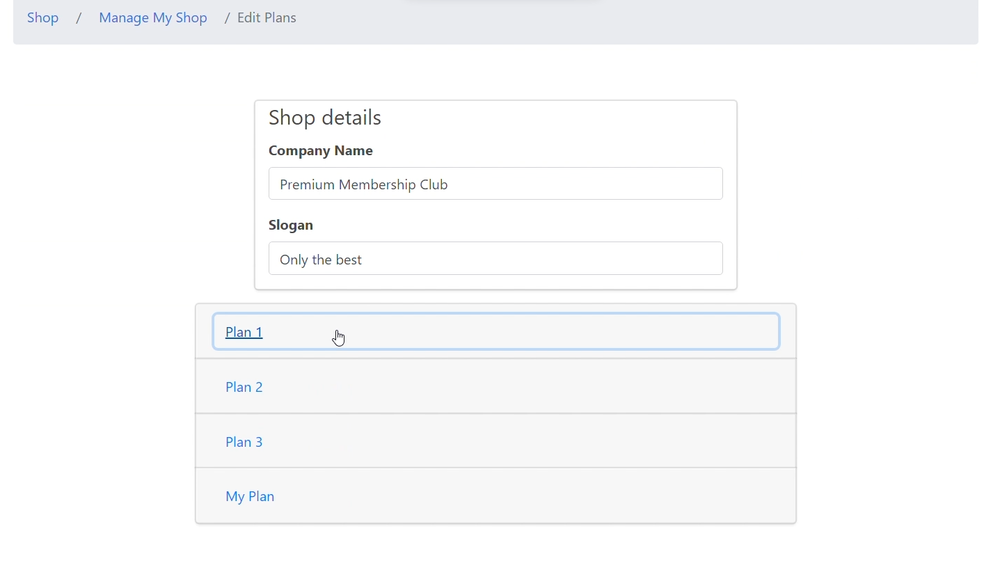
Step 1: Go to Edit Plans under Edit/Add Plans

Step 2: In the Company name text box under Shop Details, enter the name you want to change your shop.
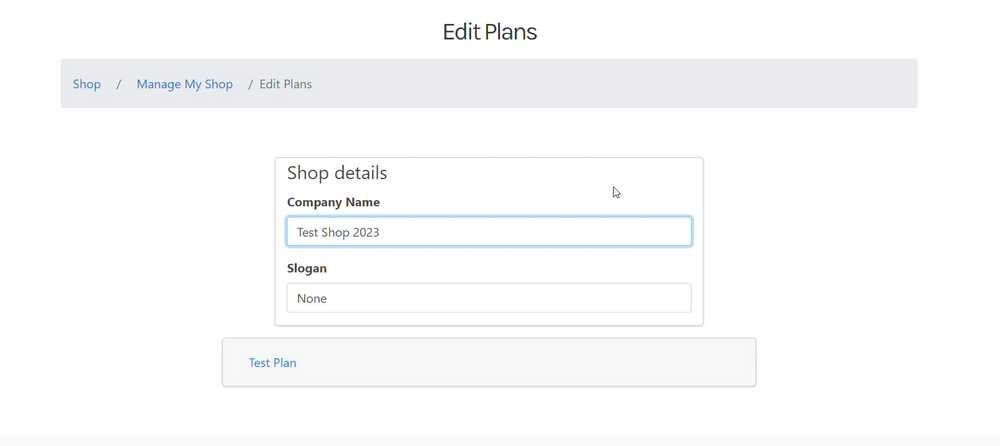
Step 3: Once you have entered the new name, scroll down and click Save
Please wait a short while whilst the shop name is changes.
Congratulations! You have successfully changed your shop name.
Remember your shop web address will also have changed to the new name you have chosen.
For more customisation, learn how to add a slogan, add a logo and change your shop’s website address URL link
Watch the Tutorial to Change Shop Name

7 - Change Your Subscription Website Web Address
A Guide on How to Change Your Subscription Website Web Address.
Steps to Change Your Subscription Website Web Address
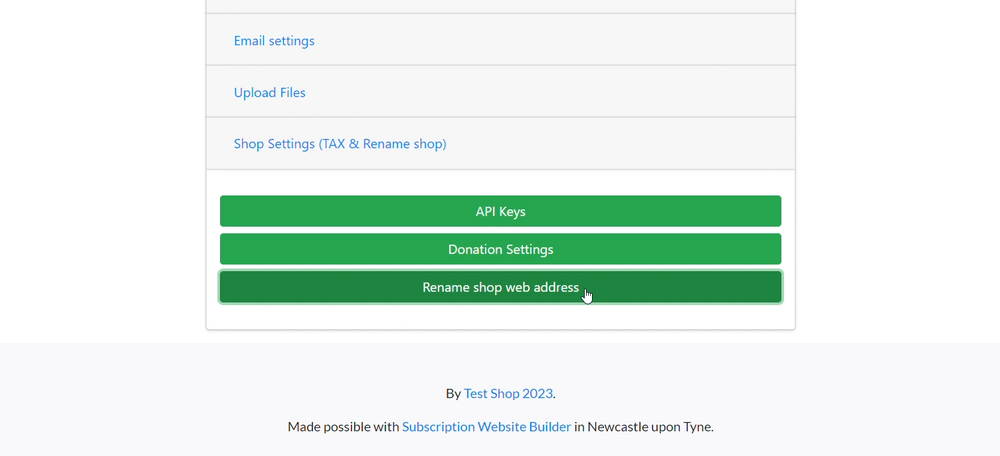
Step 1: Scroll to the bottom of your dashboard and click Rename shop web address, this is under the Shop Settings (Tax & rename shop) tab.
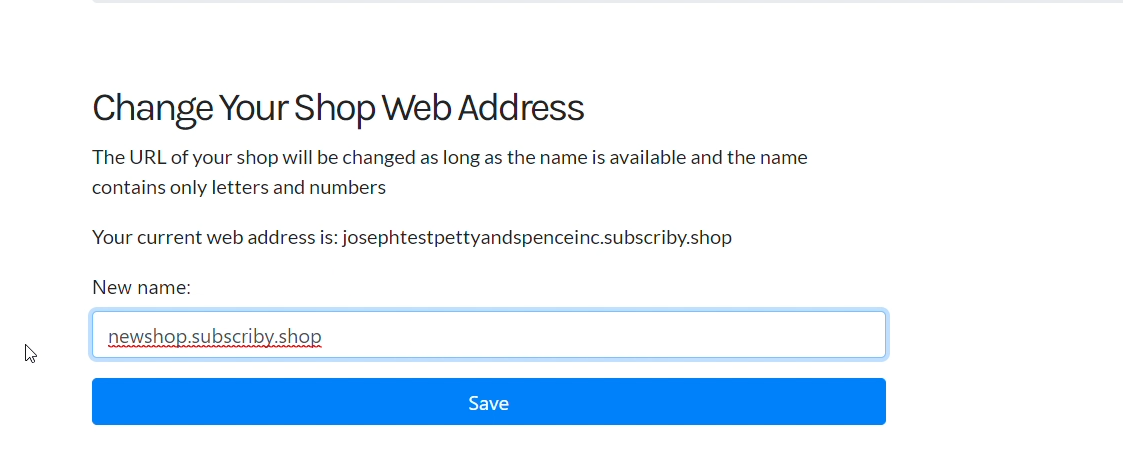
Step 2: Here, enter the address you would like to rename the shop to.
When changing your shop’s address, make sure you add “.subscriby.shop” after your desired name. For example: test.subscriby.shop
Step 3: Now click save.
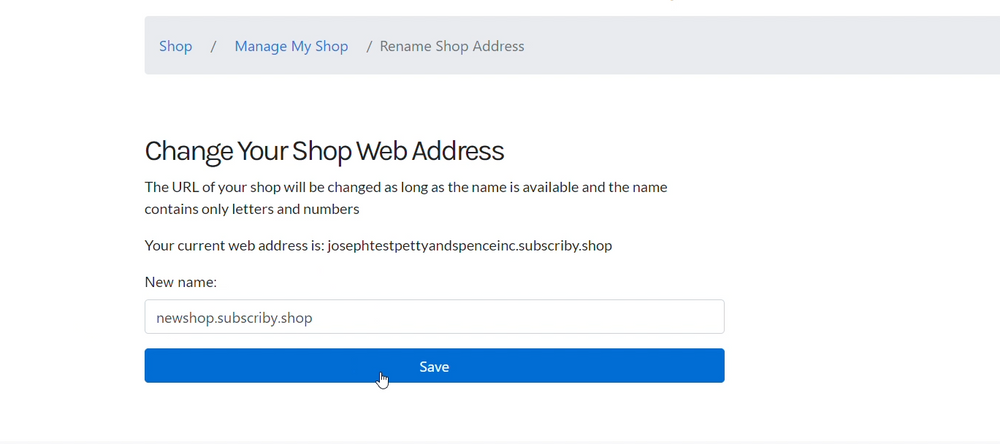
Now your new web address will reflect in your subscription shop!
For more customisation, learn how to add a slogan, add a logo and change the name of your shop
Watch the Tutorial to Change Your Subscription Website Web Address

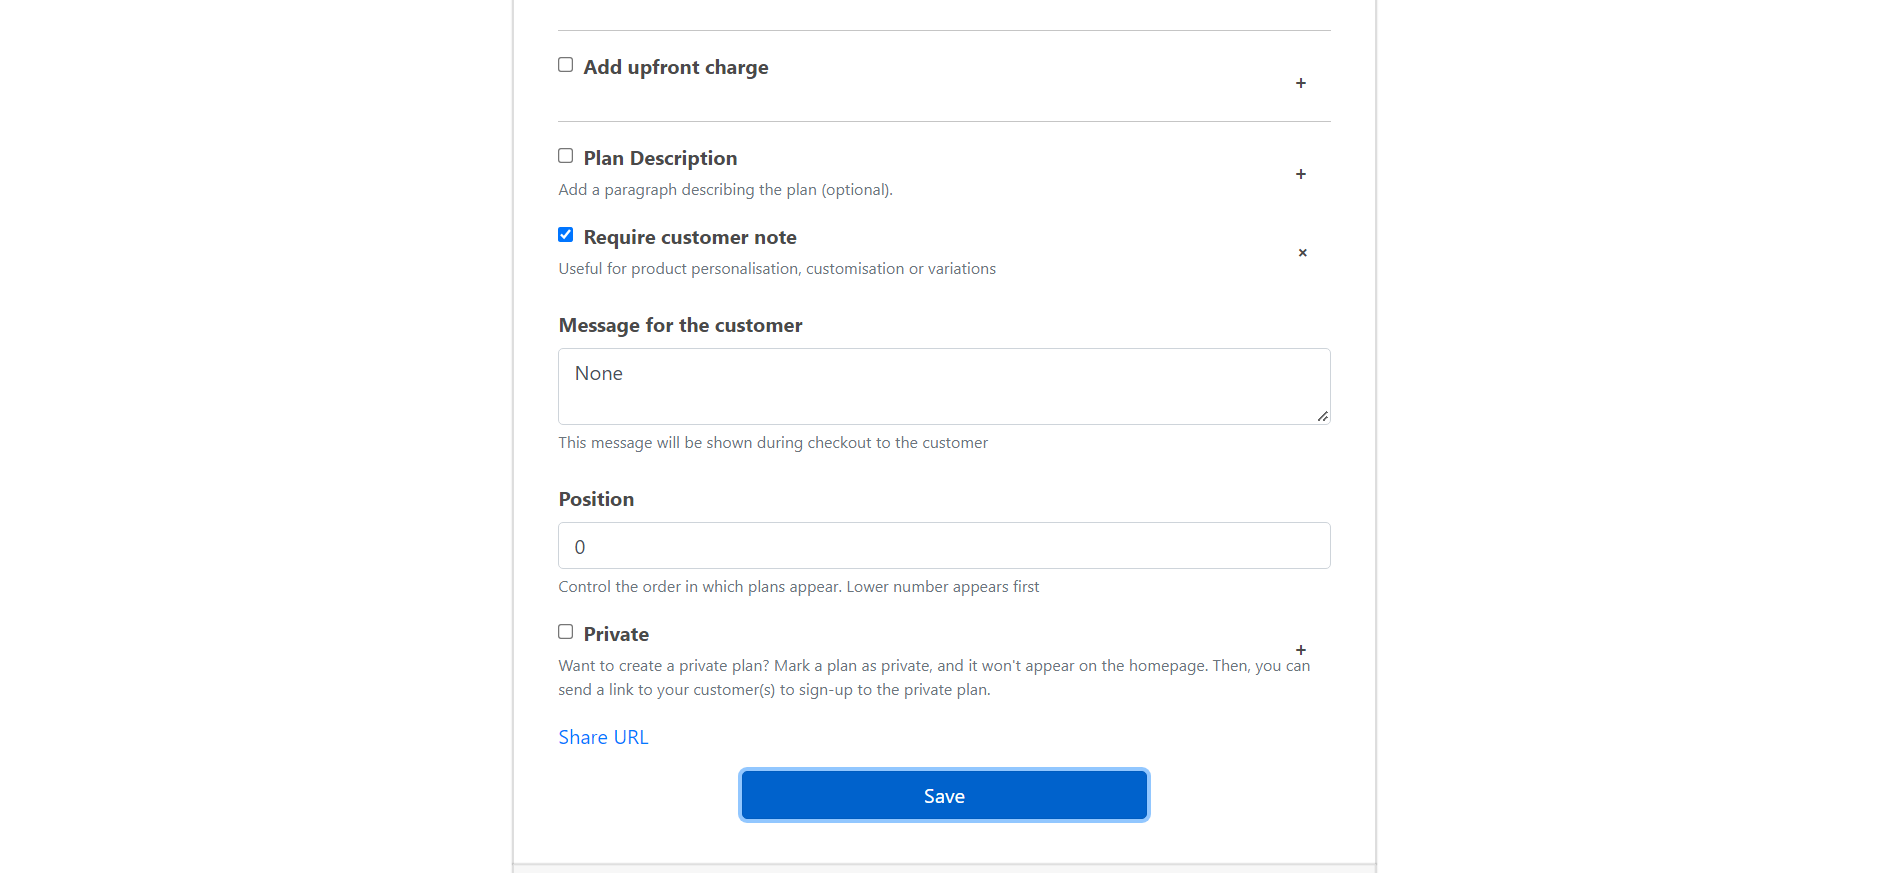
8 - Collect Order Notes
Need a way to collect notes from customers? Learn how to collect order notes from customers as they sign-up.
Steps to allow subscribers to add notes during sign-up
Step 1: Go to Edit Plans, under the Edit/Add Plans tab.
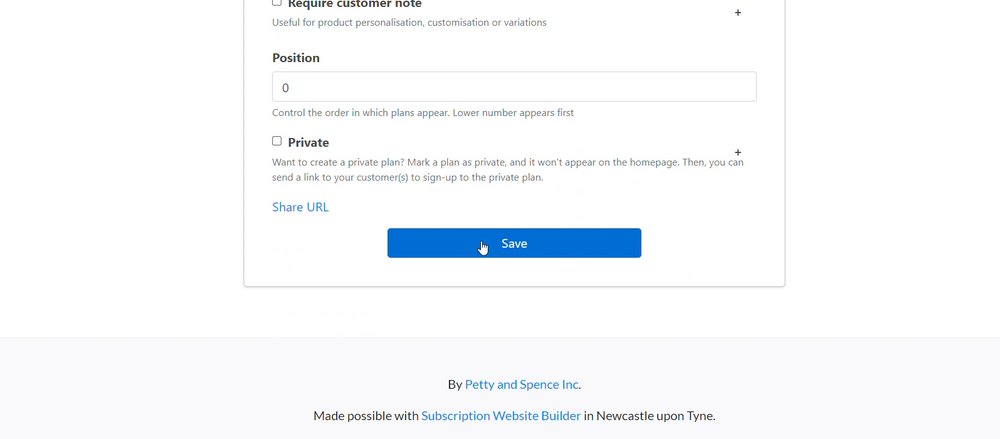
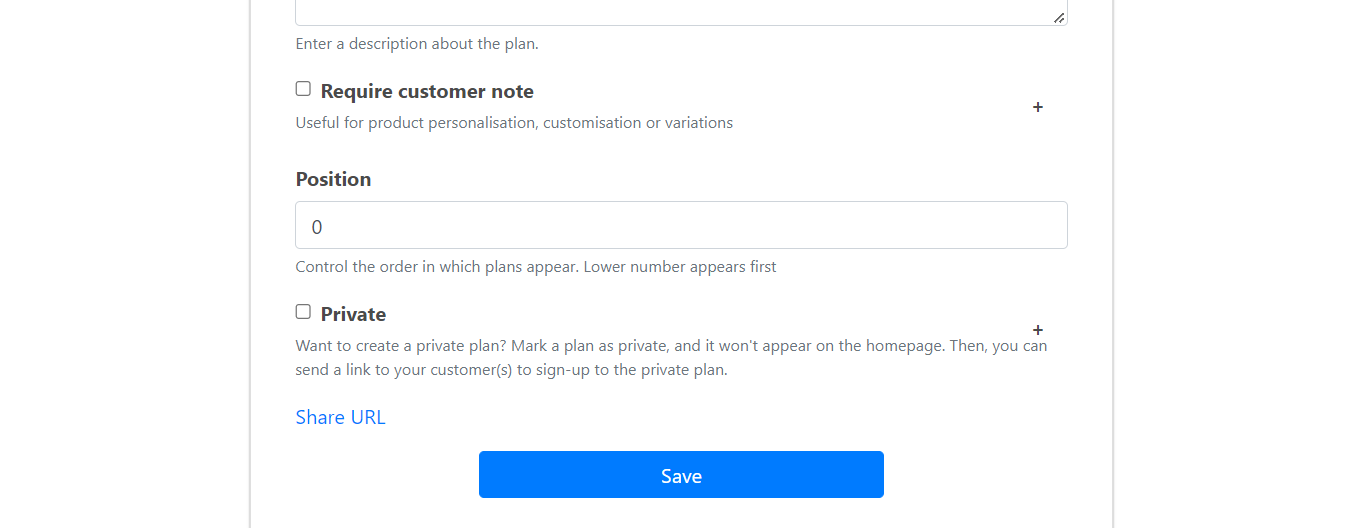
Step 2: Under the plan, you would like to add a custom note to, enable “Require Customer Note”.

Step 3: Enter instructions on what you would like your customers to fill out in the notes section in the “Message to customer” box
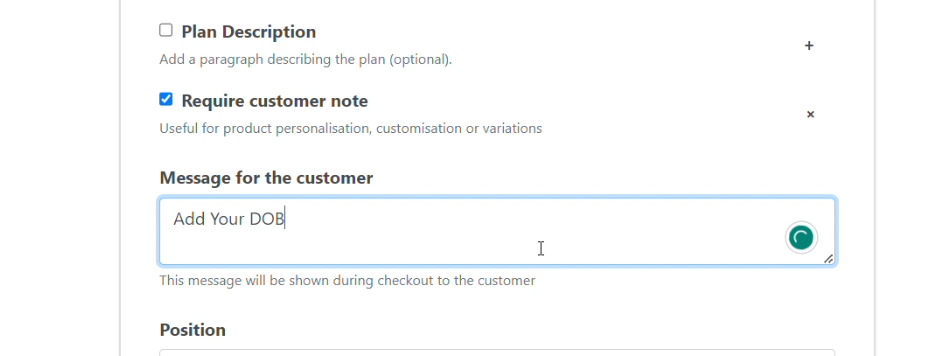
Step 4: Now, scroll down and Click Save
You subscribers can now add notes during sign-up to your plan.
Watch the Tutorial to Collect Order Notes

9 - Create a Cooling-off Period for Plans
Set a cooling-off period for Plans so customers can use your subscription without being charged for a specified period of time.
How to set a cooling-off period for Plans. For example, a 14 day cooling-off period where there are no charges.
What’s the difference between a cooling-off period and a free trial period?
In a free trial period, you charge less (because you give away some days ‘free’,
compared to a cooling-off period, where you may want to delay taking payment until
after the cooling period has completed.
Some shop owners prefer to delay taking
payments until after the cooling-off period. They do this to reduce the time spent dealing with refunds
should they occur during the cooling-off period.
Steps to Create a cooling-off period for Plans
Step 1: To create a cool off period on Subscribie, Log into your store and navigate to your Shop Dashboard.

Step 2: Under the “Edit/Add Plans” section, click “Add Plan”.
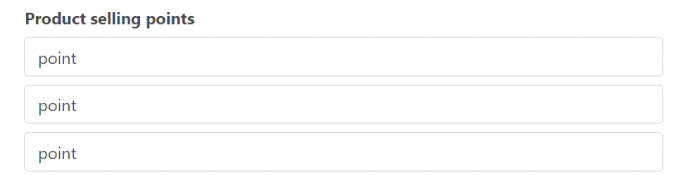
Step 3: Add the details of the plan such as the Plan or Product Name and Selling Points.
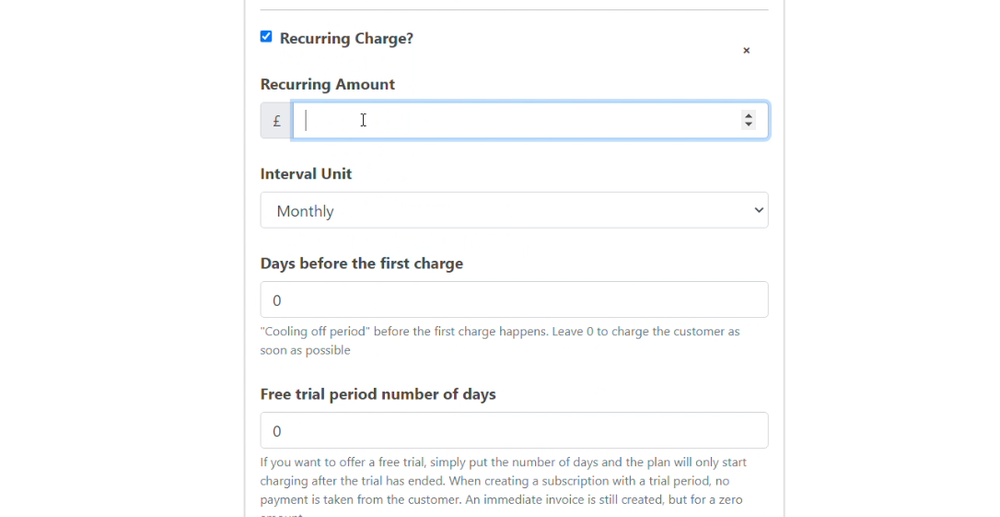
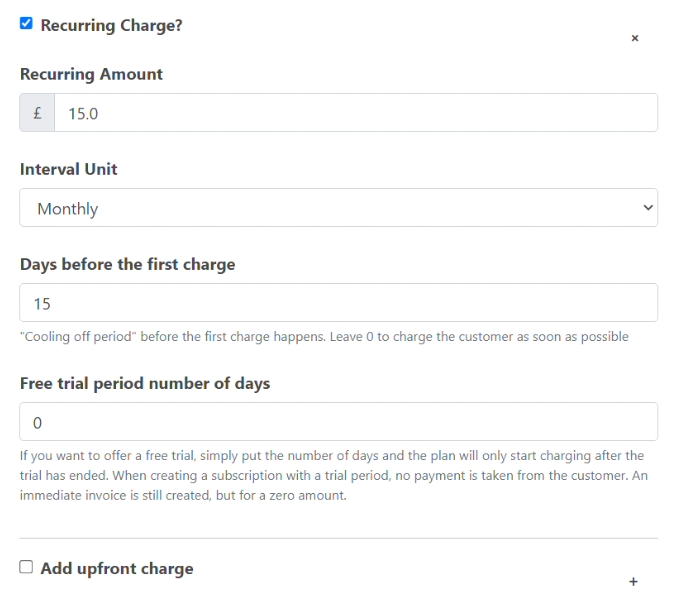
Step 4: If this is a recurring charge, select “Recurring Charge” and input the number of days you would like to have as your cooling-off period before charging your customer in “Days before the first charge”.
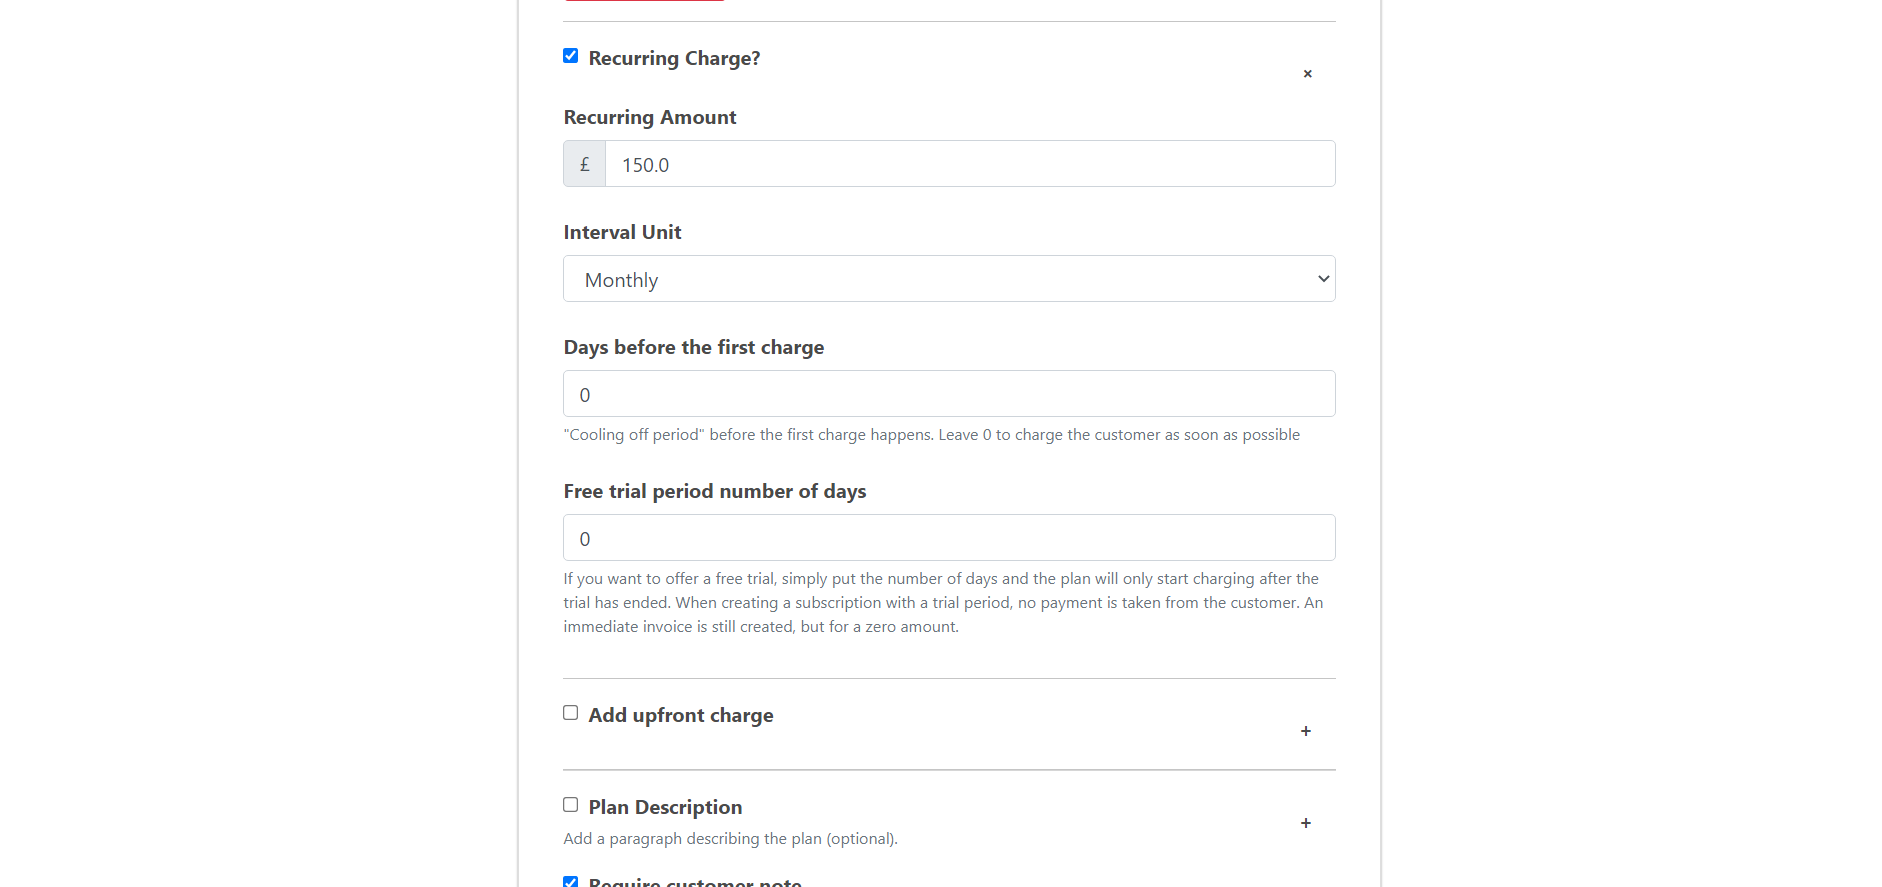
Step 5: Once you have input the number of days, click Save to save the new plan.
And that’s it! You’ve created your first plan with a cool off period of your choosing!
Want to create a free trial instead? Check out our guide to creating a free trial!
Watch the Tutorial for Creating a Cooling-off Period for Plans

10 - Create a Free Trial for Plans
Set a free trial for your subscription plans so customers can try out your subscription before purchasing.
What’s the difference between a cooling-off period and a free trial period?
In a free trial period, you charge less (because you give away some days ‘free’,
compared to a cooling-off period, where you may want to delay taking payment until
after the cooling period has completed.
Some shop owners prefer to delay taking
payments until after the cooling-off period. They do this to reduce the time spent dealing with refunds
should they occur during the cooling-off period.
Steps to Add a Free Trial to a Subscription
Step 1: Go to the “Edit / Add Plans” section in your Subscribie dashboard and choose Edit Plan.
If you are creating a plan for the first time and want to add a free trial to it, click Add Plan
Step 2: Open the plan you would like to add a free trial to.
Step 3: Set the number of days you would like to have under “Free trial period number of days”. For our example, we are setting the number of free trial days to 15. You can set it to how many days you would like to offer.
If you clicked add plan, don’t forget to fill out the information about your plan and set the number of days for the free trial.
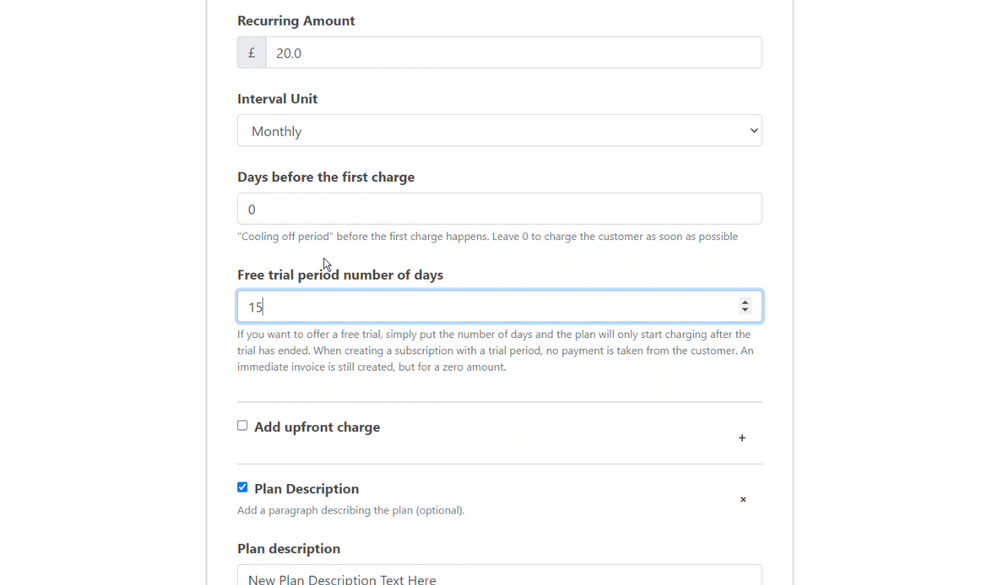
Step 4: Once you’ve set the number of days for your free trial, click on “Save”.
Now, your subscription plan offers a free trial to your subscribers.
Want to create a cool off period instead? Check out our guide to creating a cooling off period for plans!
Watch the Tutorial for Creating a Free Trial for Plans

11 - Enable email replies to emails sent by Subscribie
Easily add a reply-to email to your automated emails sent to your subscribers by Subscribie.
Subscribie sends a ‘welcome’ email to your Subscribers to confirm their
plan subscription.
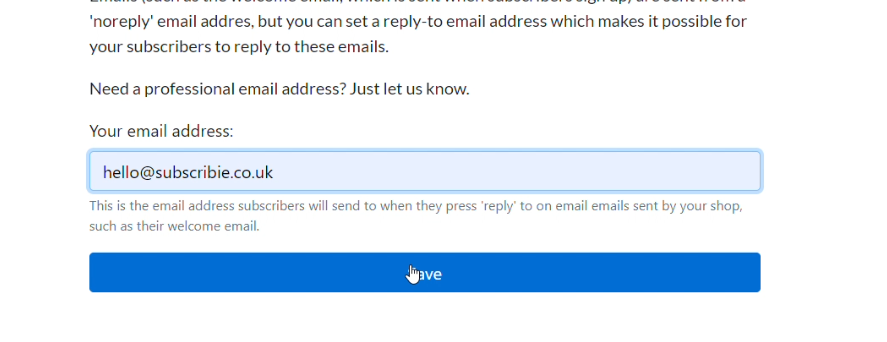
By default, this is from a ’noreply’ email address. However, you can change the reply-to address to be an email account you control to better support your customers.
Steps to setup the reply-to email address
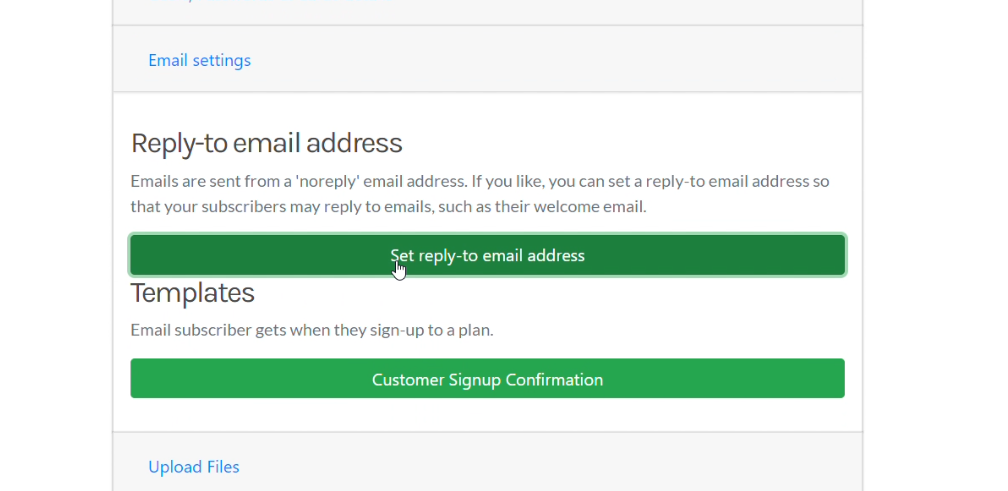
Step 1: Go to your shop dashboard and click on E-mail settings. Then, choose Set reply-to email address from the menu.
Step 2: Type in the email address that you want your customers to reply to if they choose to reply to confirmation email(s)
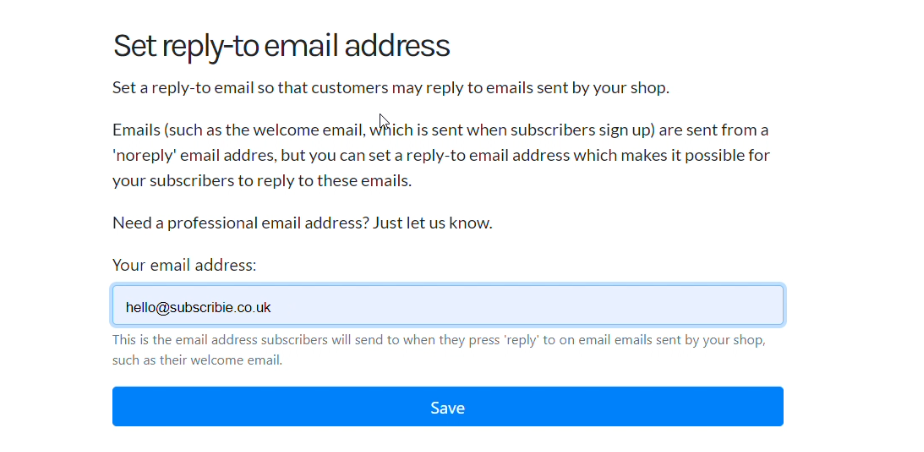
Step 3: Now click Save to enable replies to your email
That’s it! You have successfully configured the reply-to email address.
Want to customise your email? Learn how you can customise your automated emails
Video Tutorial to Setup a Reply-to Email Address

12 - Export Subscribers from your shop
Need a way export your subscriber’s data? Learn how to export Subscribers from your Shop as a CSV file.
Subscribie allows you to export your subscriber list as a CSV file.
Steps to export Subscribers from your shop
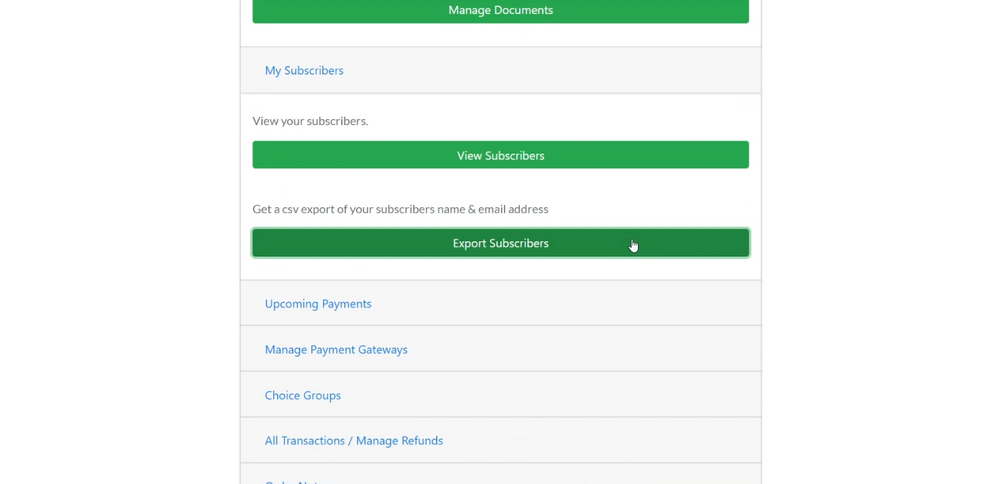
Step 1: Log into your Shop
Step 2: Click Export Subscribers under My Subscribers.

Step 3: Review the csv export
The file will contain your subscriber information, in the CSV file format.
Video Tutorial to Export Subscriber Data

13 - Refund Customer Subscription Payments
How to refund payments.
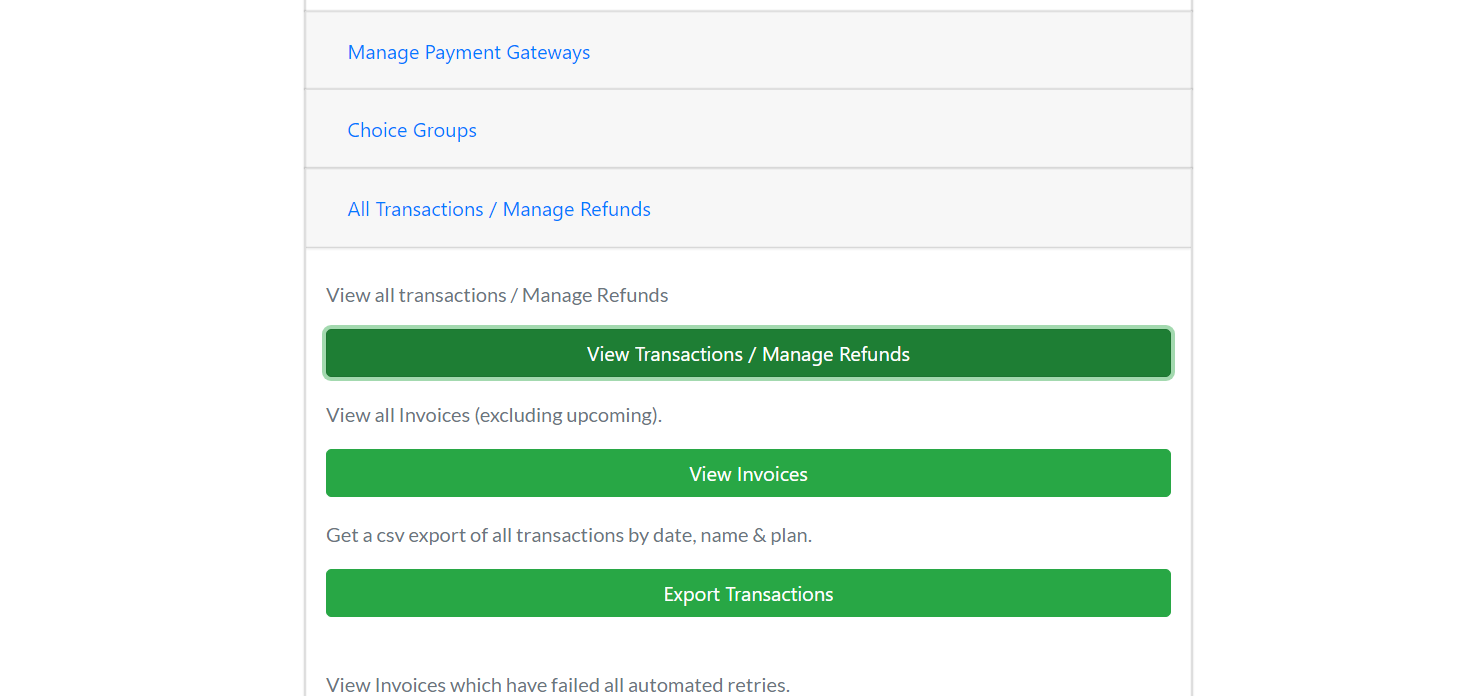
Steps to refund payments
Step 1: In your dashboard, go to View Transactions / Manage Refunds under the All Transactions / Manage Refunds tab.
Step 2: View the transaction you would like to refund and click Refund.
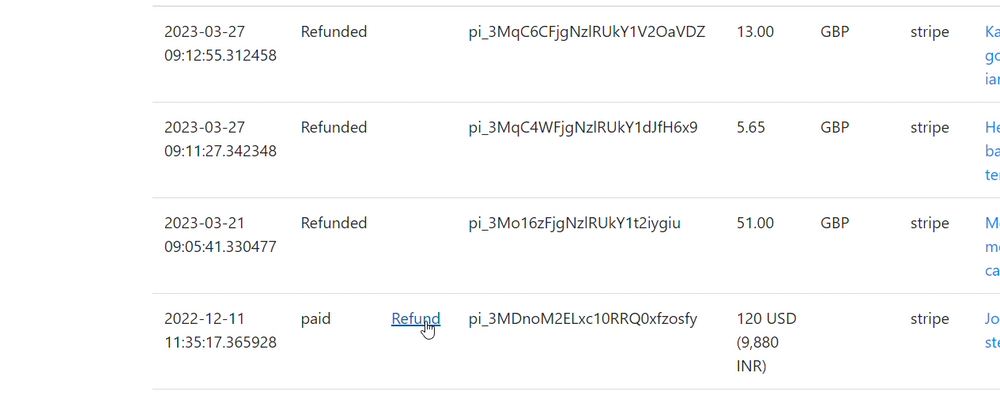
Step 3: You will now be prompted with a box asking if you are sure you want to refund, so choose Yes.
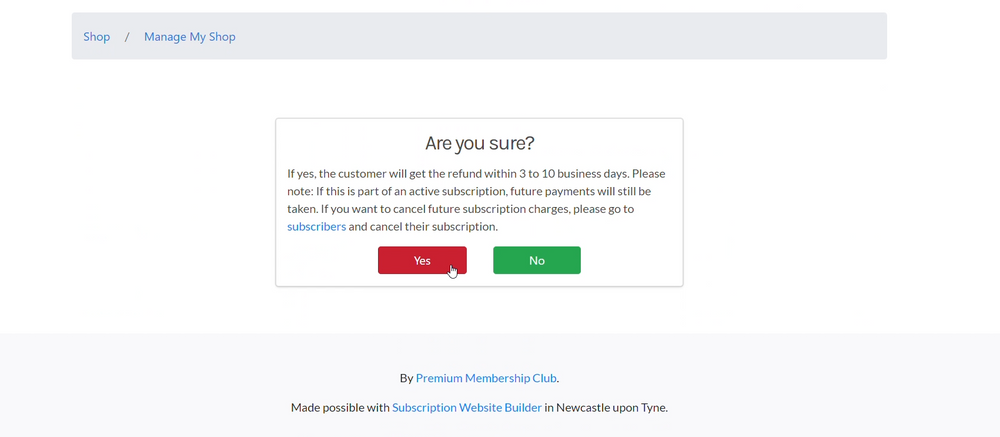
You have now successfully initiated your refund, you can rest assured that your customer will receive their refund within 3 to 10 business days.
Note: If this is part of an active subscription, future payments will still be taken. If you want to cancel future subscription charges, see how to pause or cancel a subscription
Video Tutorial for Refunding a Subscription

14 - Enable Donations
Need to collect donations? Learn how to enbale donations in your shop.
Steps to Enable Donations
Step 1: Log into your Shop Dashboard.

Step 2: Go to Donation Settings under Shop Settings at the bottom of the dashboard.

Step 3: Enable Donations and click Save.

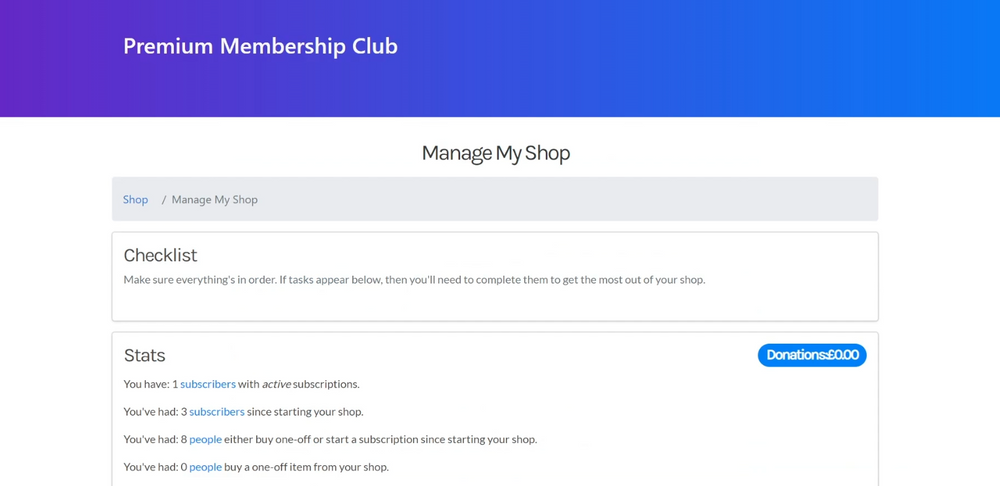
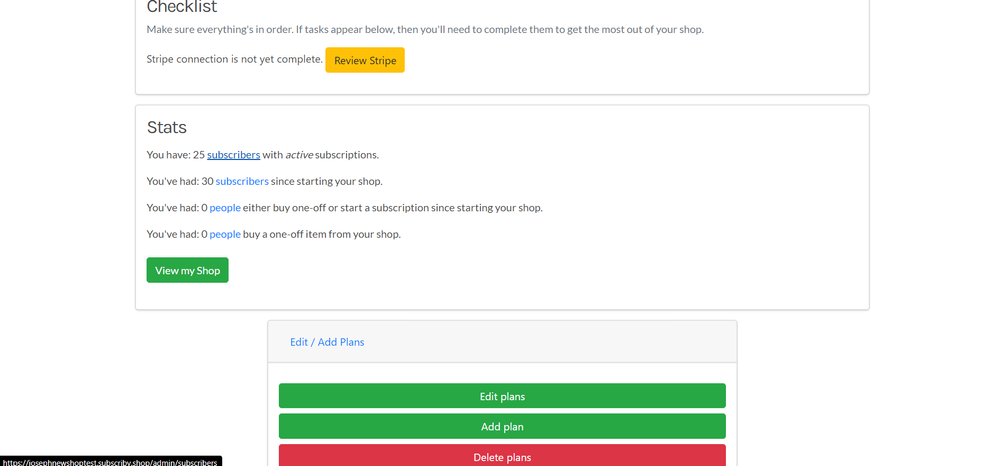
Donations is now enabled in your shop. You can view it at the top of your dashboard in blue.

You can find the Donate option on the right side of your shop’s header/banner.
Need a way to see your donations and filter them? Check out our guide to viewing and exporting your donation transactions.
Video Tutorial to Enable Donations

15 - View and Export Transactions and Donations
Need a way to keep track of transactions and export them. Follow these steps to view and export transactions and donations from your dashboard
Learn how to View and export Transactions and Donations.
Steps to View Transactions and Donations
Step 1:* Log into your Shop Dashboard.
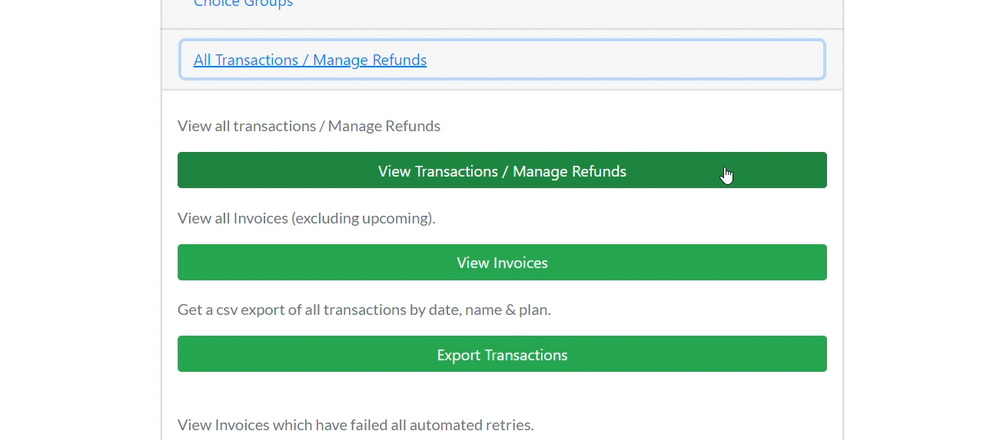
Step 2:* Go to View Transactions / Manage Refunds under the All Transactions / Manage Refunds tab.

Here you can see all your transactions and the plans that have been purchased. For donations, see the Donation coulmn.

Exporting Transactions and Donations
Click Export transactions under the All Transactions / Manage Refunds tab to export all your transactions including donations received as a CSV file.

Need to view and export your subscribers? Here is our guide to exporting subscribier list and pausing a subscriber.
Video Tutorial to View and Export Transactions and Donations

16 - Add Team Members to Shop
A guide to adding your team members to manage your subscription shop.
Team members who are added can help manage your shop through the dashboard easily.
Steps to Add Team Members to Subscription
Step 1:** Log into your Shop Dashboard.

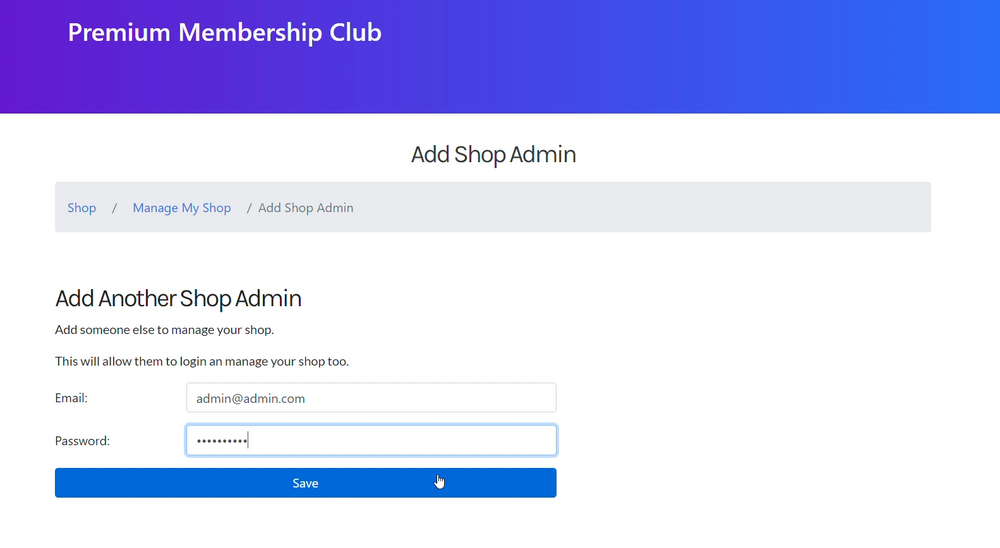
Step 2:** Under “Users, Passwords & Cards details” Tab choose “Add Admin Shop”.
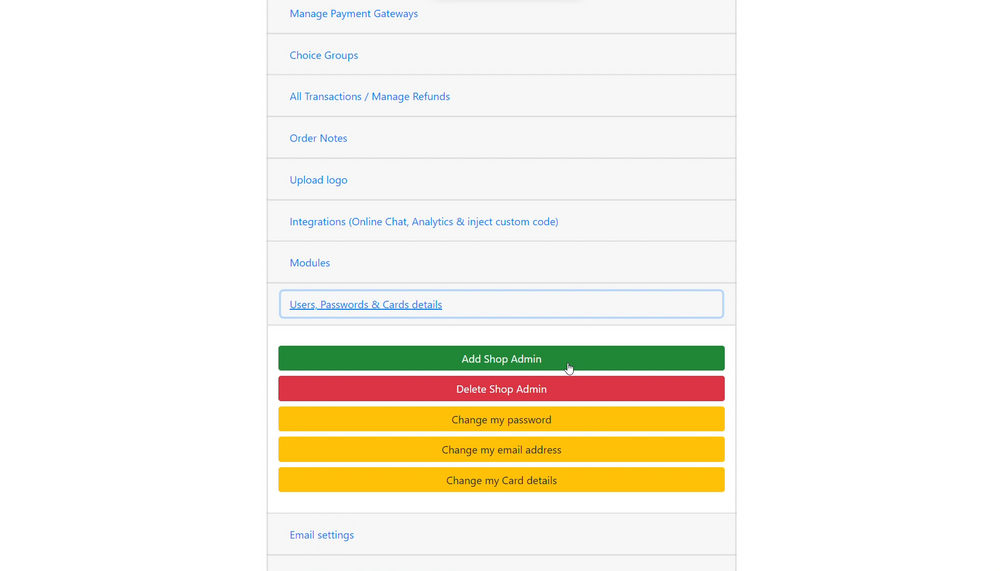
Step 3:** Enter the Email of your teammate and create a password.
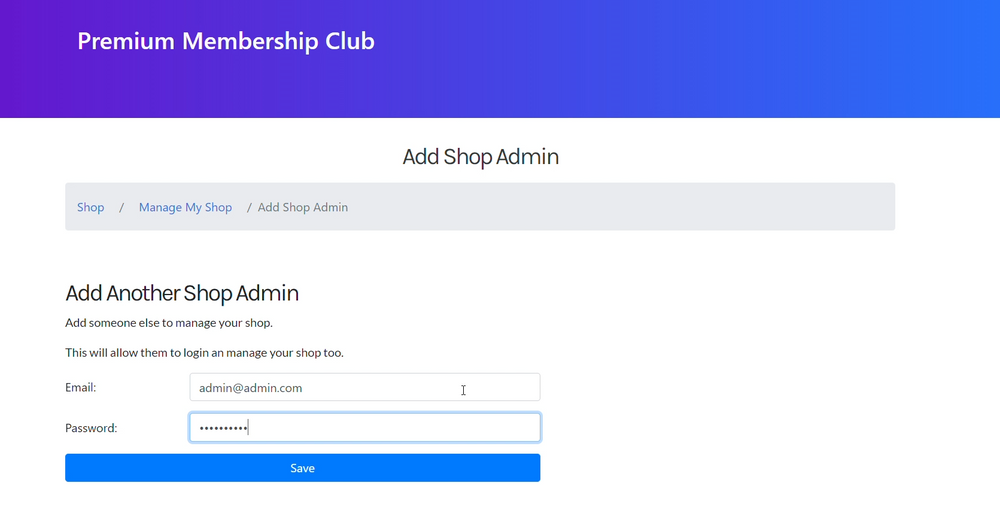
Step 4:** Click Save.
Now you have added a team member to your shop!
Watch the Tutorial to Add Team Members to Shop

17 - Add Terms and Conditions
A guide to adding terms and conditions to any plan in your shop.
Adding Terms and Conditions to your plans allows you to clearly set out the details of your plans terms. This can be viewed by the subsciber when signing up to your subscription.
Terms and Conditions helpful documents to fall back on should disputes arise.
Steps to Add Terms and Conditions
Step 1: In your Shop’s Dashboard, select “Manage Documents” under Edit / Add Plans

Step 2: Click Add Documents.
Step 3: Add the Name and Contents for your Terms and Conditions. Then click Save.
Choose Terms and Conditions as the Document Type
Step 4: Now, click “Assign Plans to this document”
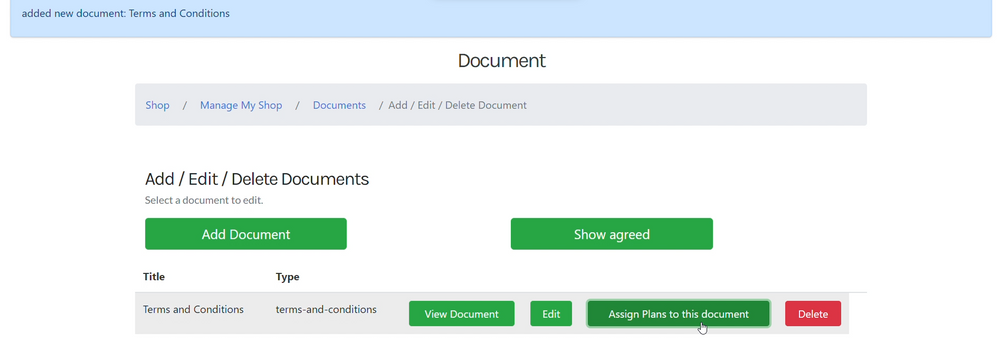
Step 5: Choose the plans you would like to add the Terms and Conditions to and click Save.
You have now added terms and conditions to your plans!
Are you looking for a way to add documents to your subscription instead? Check out our guide to adding documents to your subscription plans.
Watch the Tutorial to Add Terms and Conditions

18 - Add Videos to Shop Page
Need to add your videos? Here’s a guide on how to add a video from a video platform to a page on your shop.
Learn how to add a video from video platforms like YouTube and Vimeo to your page in your shop.
Steps to Add a Video to a Shop
You first need to create a page on your Subscribie shop.
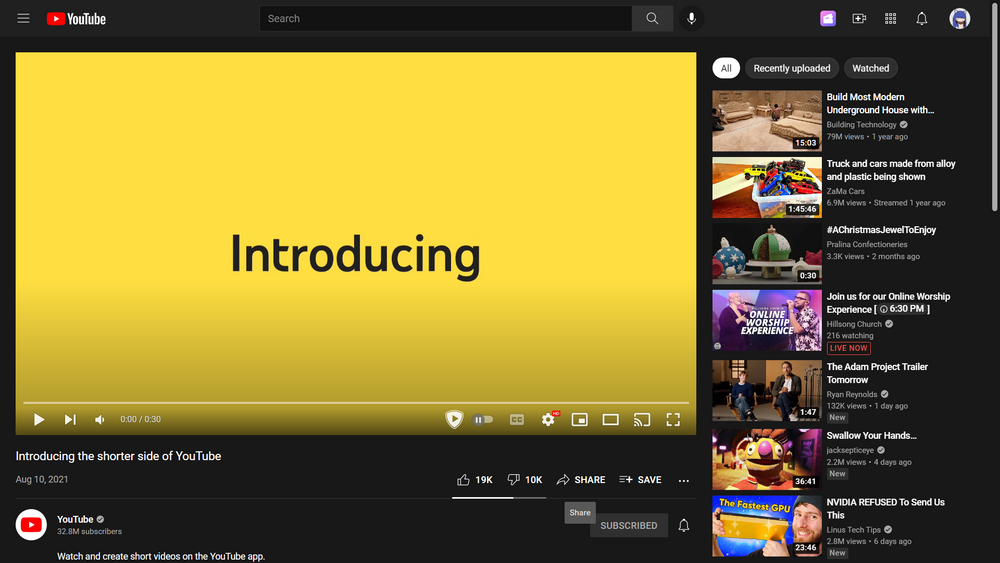
For YouTube:
Step 1: Go to the youtube video that you would like to add to your Subscribie Store and click the share button that is below the video.
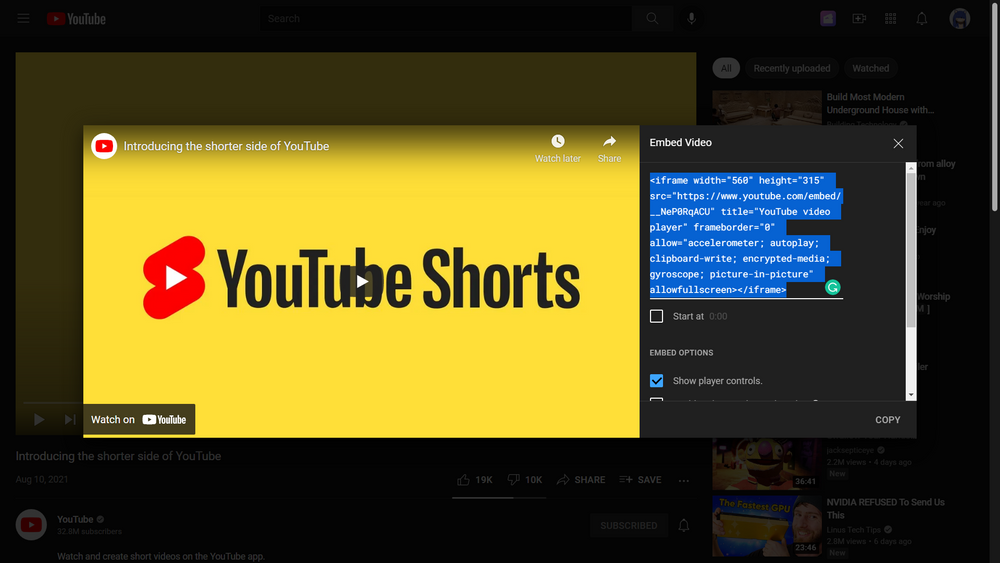
Step 2: Select “Embed” and copy the text that is shown in the “Embed Video” box.
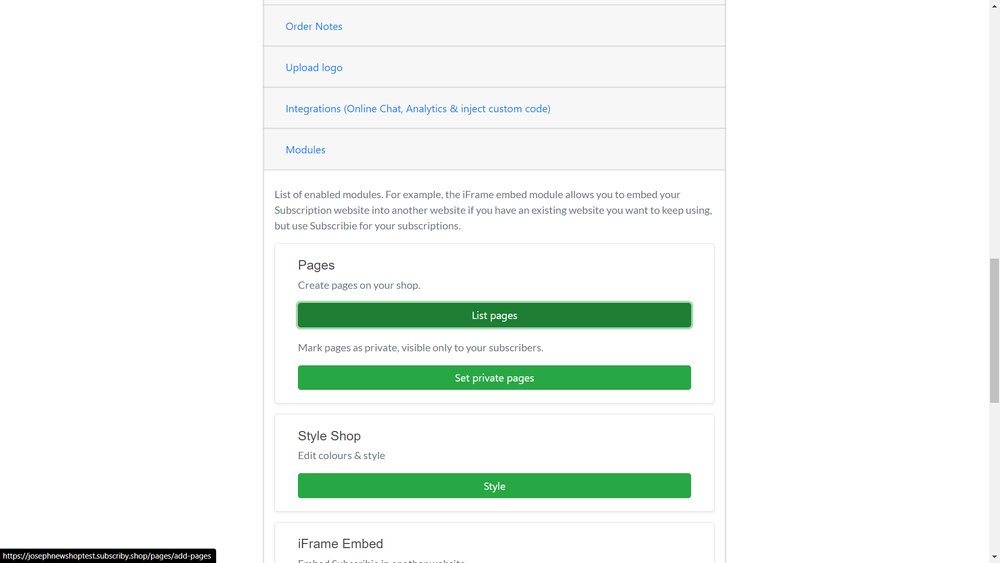
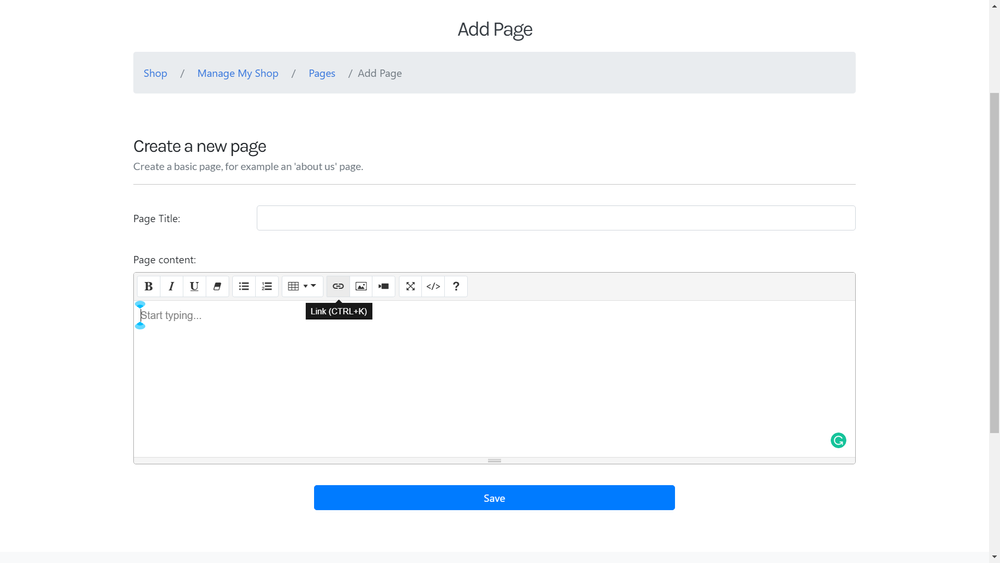
Step 3: Go to the “modules” section on your Subscribie Store Dashboard and select “List Pages.”

Step 4: Go to the desired page in Subscribie’s Dashboard and select the “Link” icon 🔗

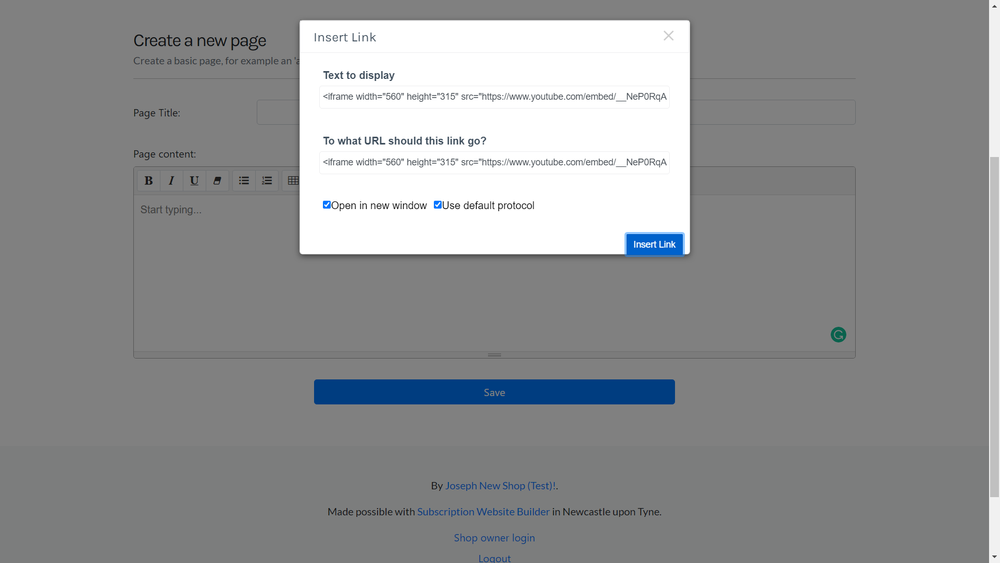
Step 5: Paste the text you copied in the “To what URL should this link go?” box.
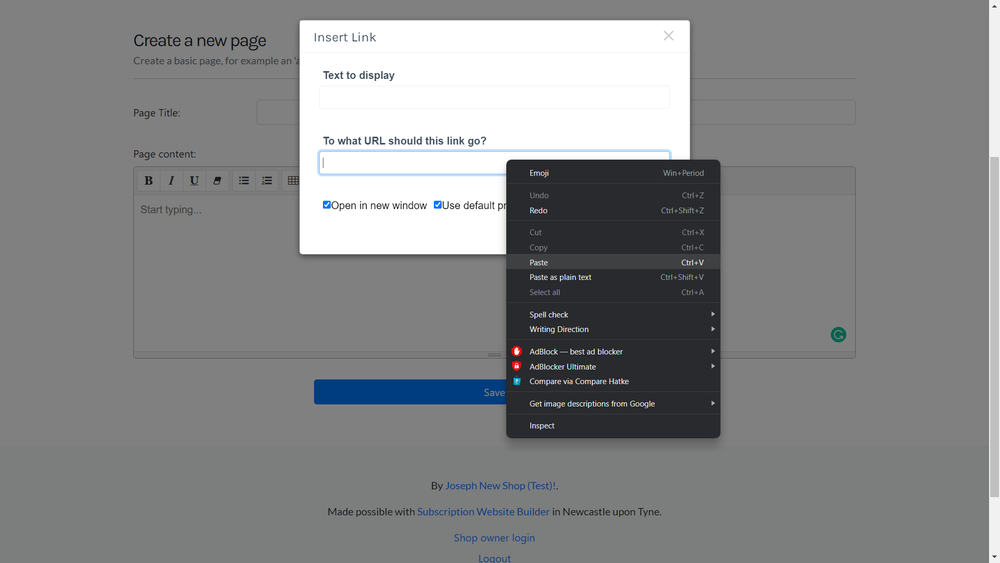
Step 6: Click “Insert Link”

Is there any way to stop YouTube from recommending other videos at the end of my video?
Yes! To remove all recommended videos from showing at the end of your video, add ?rel=0 after the video URL in the code copied from the embed box.
For example:
<iframe width="560" height="315" src="https://www.youtube.com/embed/nPSa946m2C8?rel=0" frameborder="0" allow="autoplay; encrypted-media" allowfullscreen></iframe>
For Vimeo:
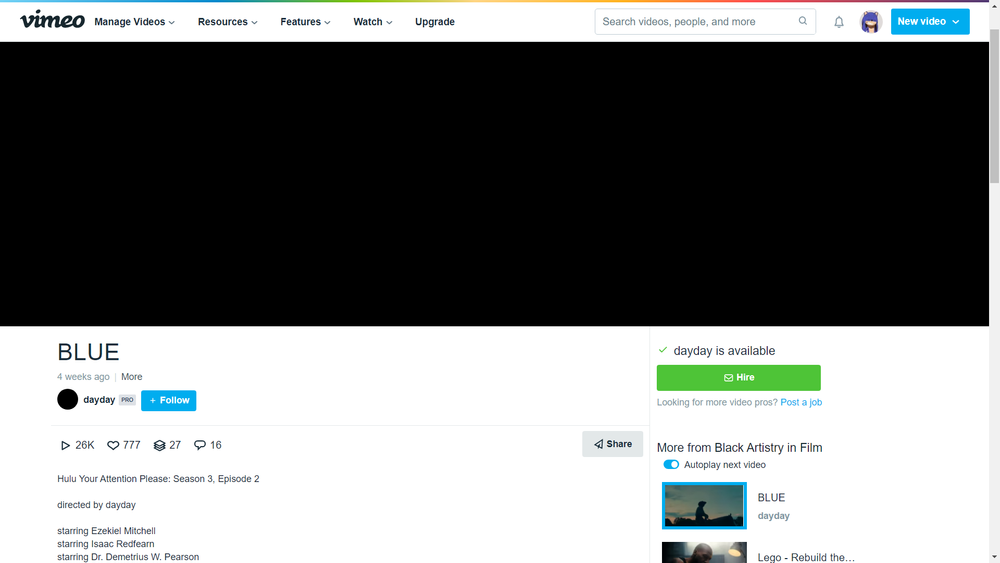
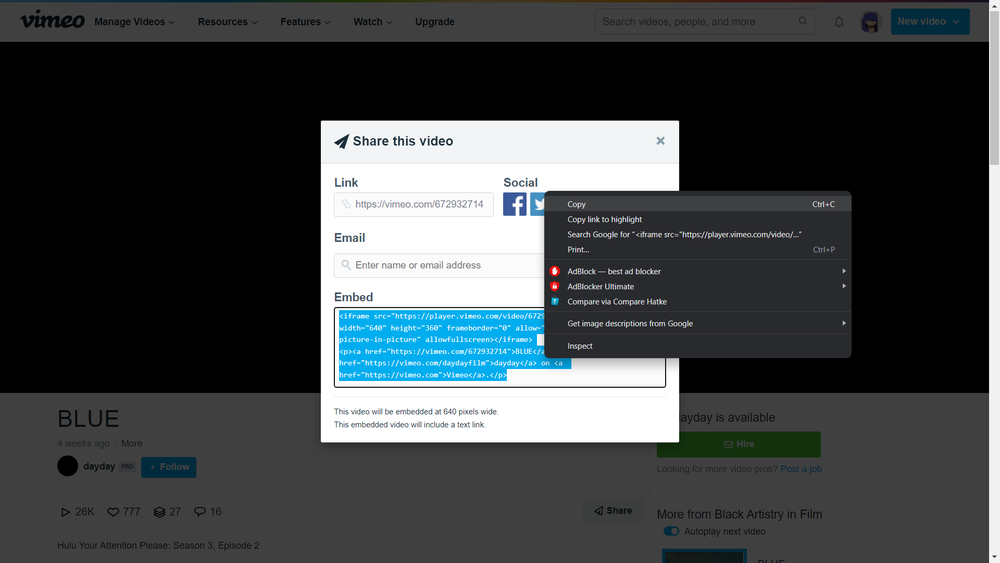
Step 1: Go to the Vimeo video that you would like to add to your Subscribie Store and click the share button that is below the video.
Step 2: Select the text shown in the “Embed” box.
Step 3: Go to the “modules” section on your Subscribie Store Dashboard and select “List Pages”
Step 4: Go to your desired page in Subscribie’s Dashboard and select the “Link” icon 🔗
Step 5: Paste the text you copied in the “To what URL should this link go?” box.

Step 6: Click “Insert Link”.
Now you have a working video embeded in your shop page!
If you’d like, you can make these pages private.
Video Tutorial to Add Videos to Shop Page

19 - Calculate Subscription Revenue
Easily calculate your potential subscription revenue according to your number of subscibers and subscription rate.
Steps to Calculate Subscription Revenue
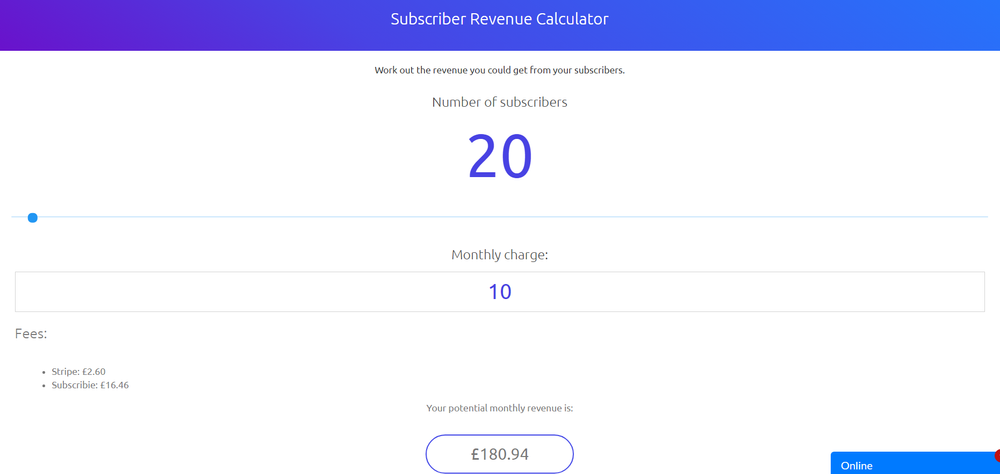
Step 1: Go to Subscribie.co.uk, click Home and navigate to the “Subscriber Revenue Calculator” from the drop-down box.

Step 2: Choose the number of subscribers you have using the slider under the number of subscribers.
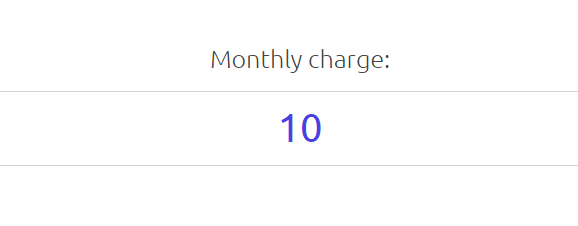
Step 3: Enter the monthly price you would like to charge your subscribers for your subscription plan.
Step 4: Now, you should see the potential monthly revenue/profit with a breakdown of the costs incurred and the final revenue earned by you.
You have successfully calculated your potential subscription revenue.
Watch the Tutorial to Calculate Subscription Revenue

20 - Delete a File from a Shop
A guide to delete files from your shop perminantly.
You learnt how to add files to your shop, but what you uploaded the wrong file? Dont worry, we’ll show you how to delete a file from your shop with these steps!
Be sure you are deleting the correct files, you can not recover deleted files once they are deleted.
Steps to Delete a File from a Shop
Step 1: Log into your Shop Dashboard.
Step 2: Click “List Files”

Step 3: Click “Delete” to remove the file you would like to delete.
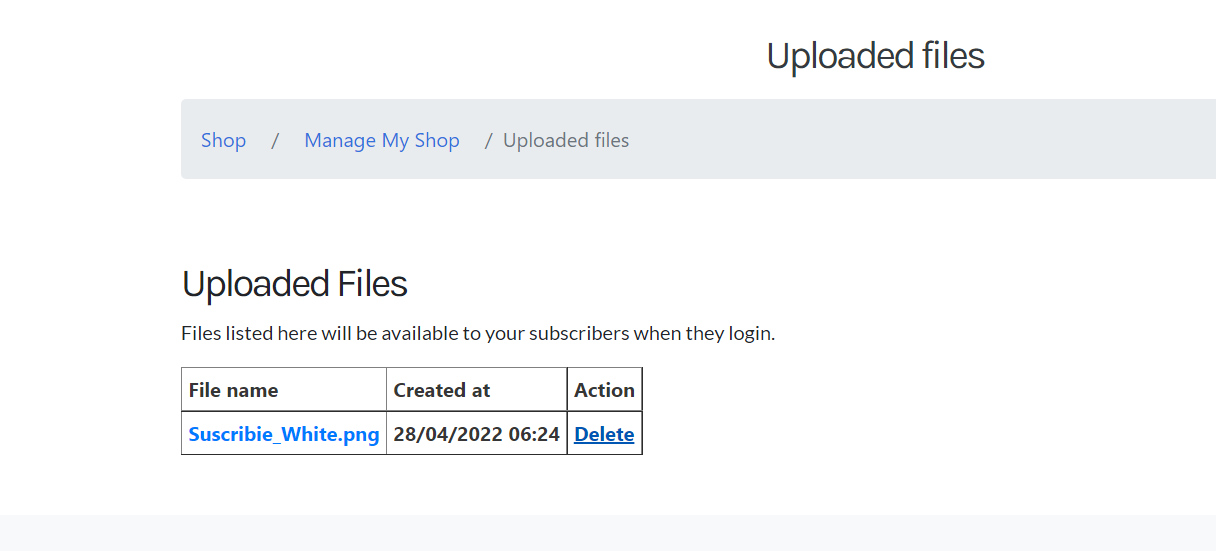
You have now successfully deleted the file.
Watch this Tutorial to Delete Files from your Shop

21 - Embed Subscribie in a Website
Want to add subscribie to your site? Follow this easy guide to embed Subscribie into your website.
Steps to Embed Subscribie in a Website
Step 1: Log into your Dashboard.
Step 2: Go to Modules and choose Get Embed Code under iFrame Embed.
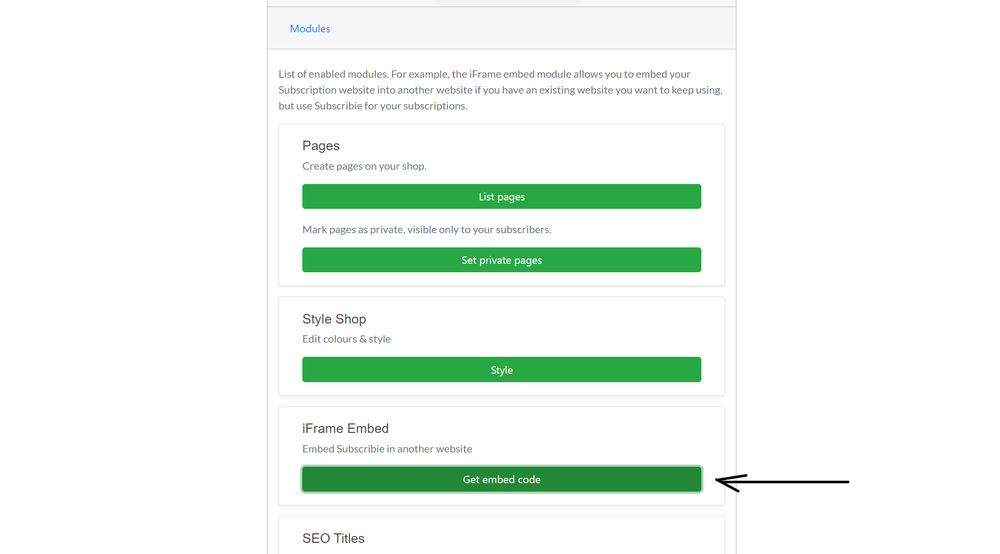
Step 3: Copy the text under “Copy the embed code into your website”.
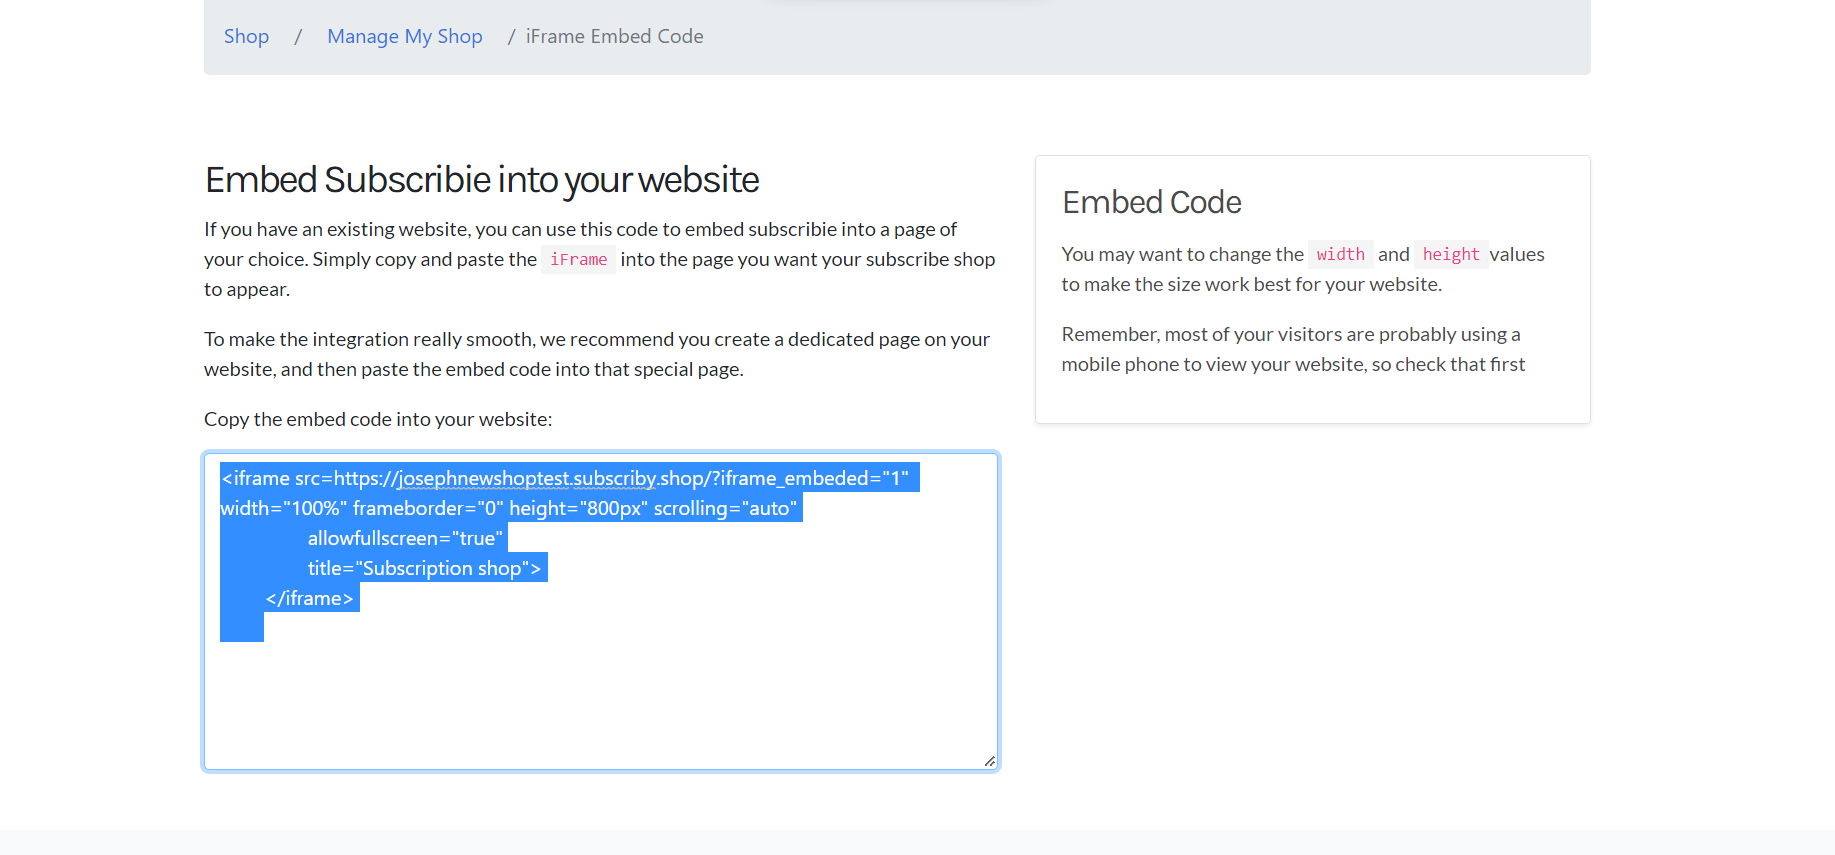
Step 4: Paste the copied text to your page.
If you would like a simpler option, simply create a link to your subscription plans from your website to Subscribie. To set that up, create an account on Subscribie, and then add a link in your website menu to your subscription plans. That is the easiest least complicated approach.
Video Tutorial to Embed Subscribie in a Website

22 - Filter Transactions
Need to search and filter subscription? Here’s a guide on how to filter transactions.
Subscribie offers the facility to filter transactions, learn how to with these easy steps.
This can be done by filtering with the subscriber’s name or the plan’s title.
Steps to Filter a Transaction
Step 1: Log into your Shop Dashboard.
Step 2: Click “View Transactions / Manage Funds” under “All transactions / Manage Refunds”.
Step 3: Here, you can search for the Subscriber Name or Plan Title.
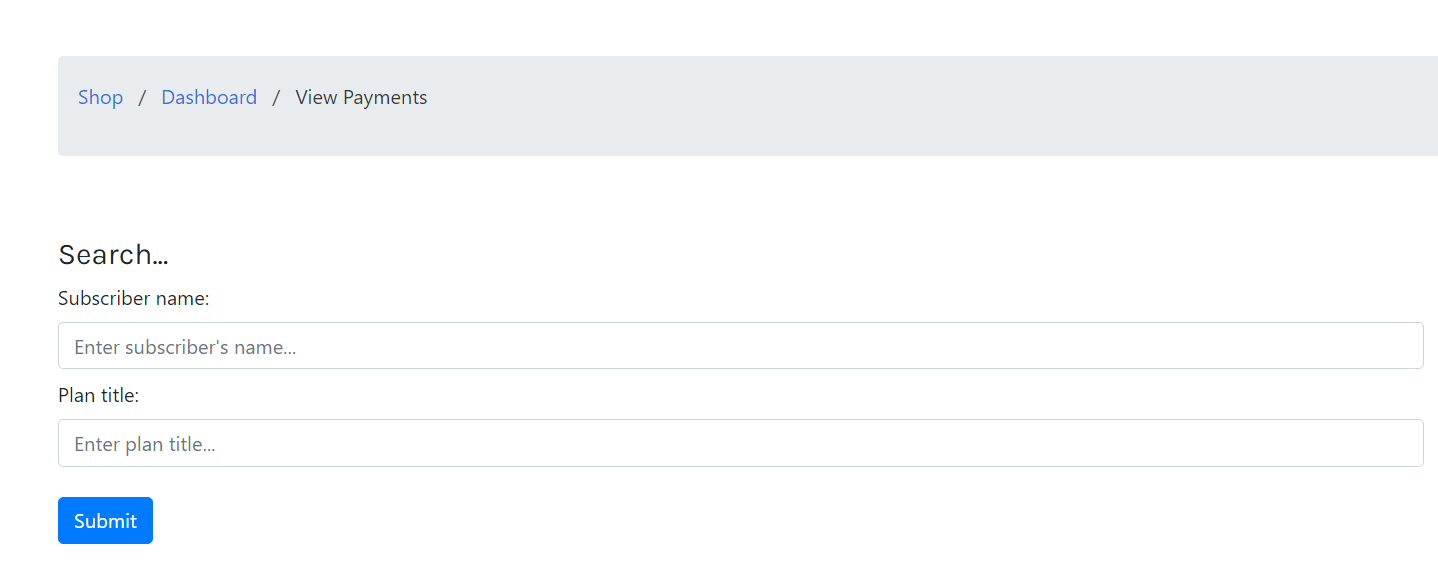
Now you can view the Filtered Transactions.
Video Tutorial to Filter Transactions

23 - Add a Logo to a shop
Upload your own logo to your subscription shop
Learn how to add a slogan, this will be displayed in your shop’s banner below your shop’s name.
Steps to Add a Logo
Step 1: Go to the Upload Logo section in your Subscribie dashboard.
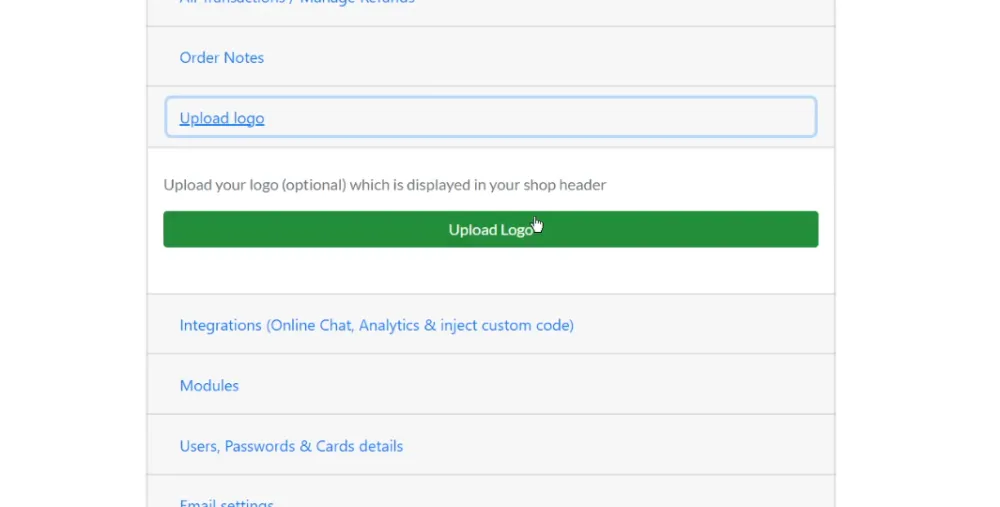
Step 2: Click on “Choose File” and select your logo from your computer.
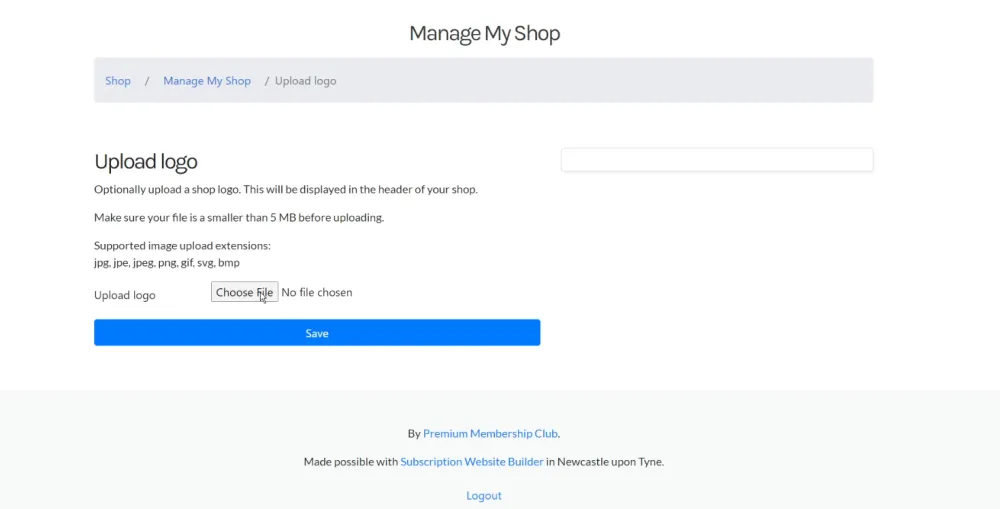
Step 3: Once you’ve chosen your logo, click on “Save”.
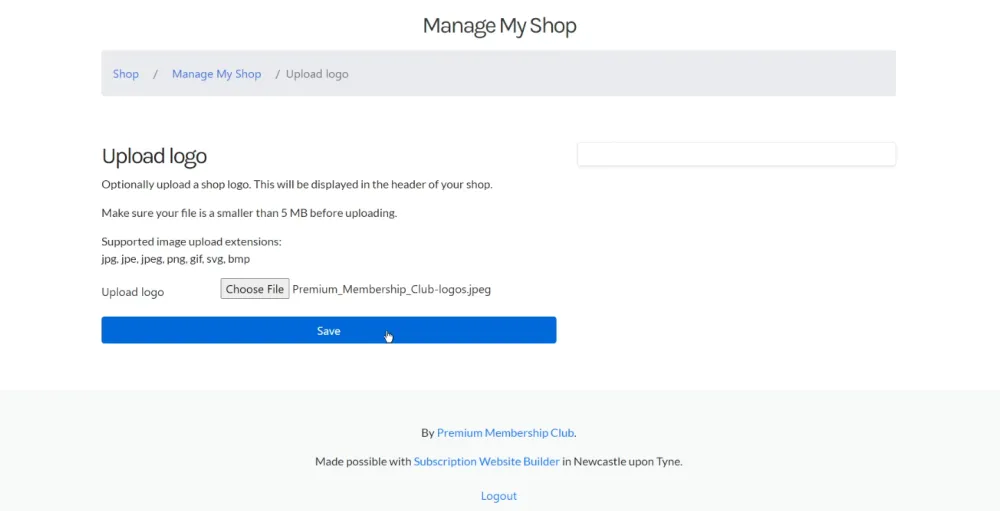
Now, your logo will now be visible on your Subscribie subscription shop. Customers will see your logo when they visit your shop.
You can also add a slogan and change the color of your shop.
Watch this Tutorial to Add a Logo

24 - Add a Slogan
Add your own Slogan to your shop. This will be displayed in your shop.
Learn how to add a slogan, this will be displayed in your shop’s banner below your shop’s name.
Steps to Add a Slogan
Step 1: Log into your Shop Dashboard.
Step 2: Under the “Edit/Add Plans” section, click “Edit Plan”.

Step 3: Here type your Slogan in the “Slogan” Text box.
Now, your slogan will reflect on your shop page!
You can also add a logo and change the color of your shop.
Watch the Tutorial to Add a Slogan

25 - Change Shop Colour
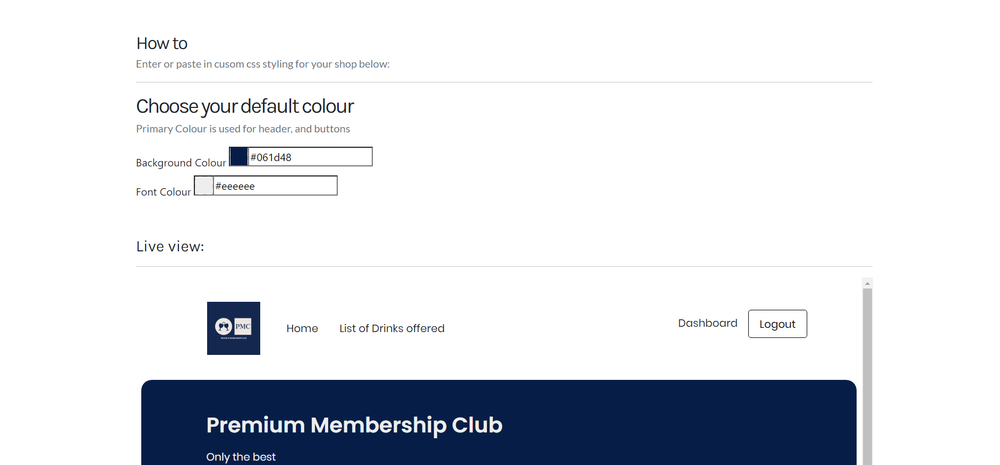
Learn how to change the colour of your shop.
Subscribie offers you the option to change the colour of your shop. This can be done with the following steps.
Steps to Change Shop Colour
Step 1: Log into your Dashboard.
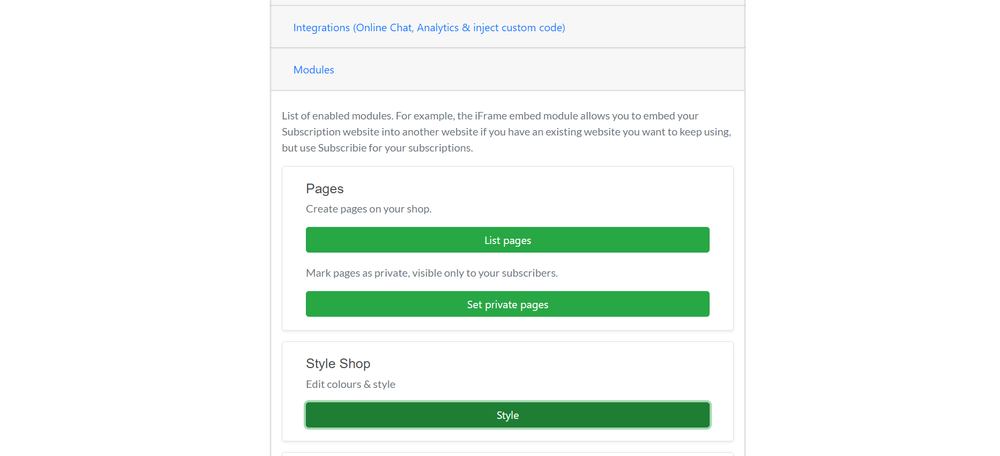
Step 2: Click the “Modules” tab and select “Style” under “Style Shop”.
Step 3: Select the background and font colour (Blue, Green, etc) for your shop.
Step 4: Click “Save”.
Now you have successfully changed the colour of your shop!
For more customisation, learn how to add a slogan, add a logo and change your shop’s website address URL link
Watch the Tutorial to Change Shop Colour

26 - Create a Shop Page
Want to add more pages to your shop? Follow these steps to add additional pages to your shop.
Steps to Create a Shop Page
Step 1: Log into your Dashboard.
Step 2: Click the “Modules” tab and select “List Pages” under the “pages” category.
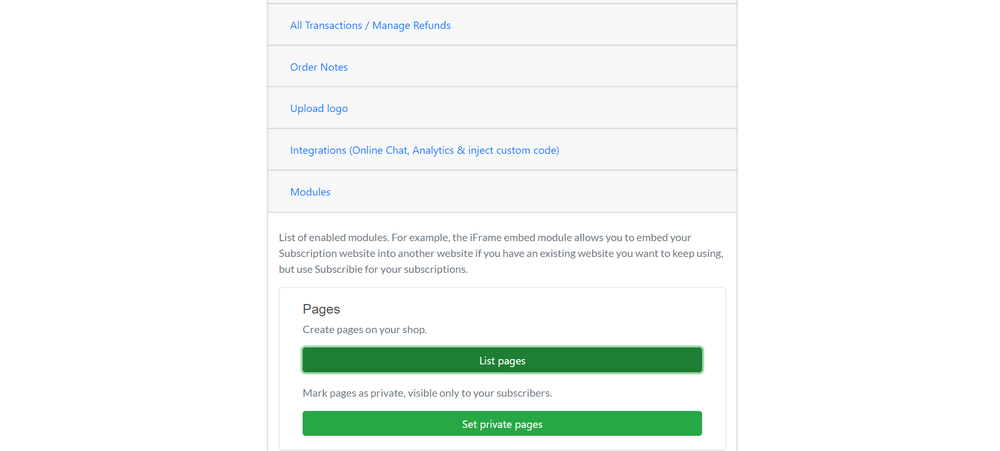
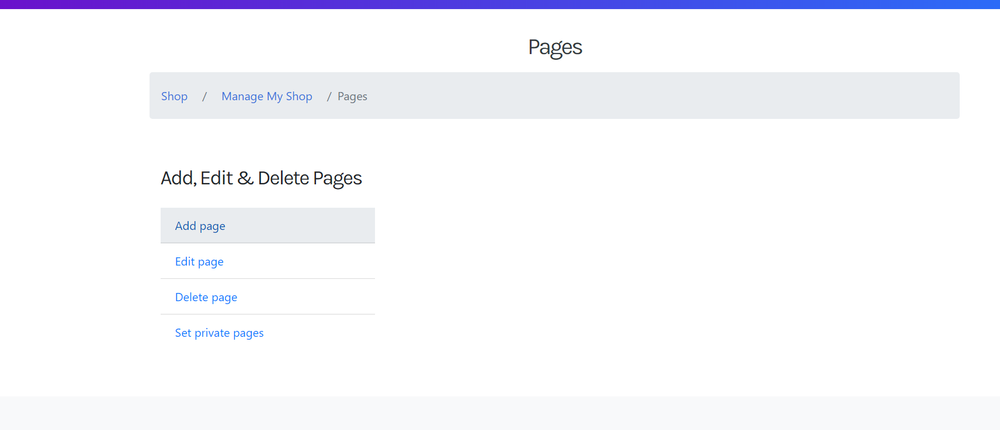
Step 3: To add a Public Page, click “Add Page”
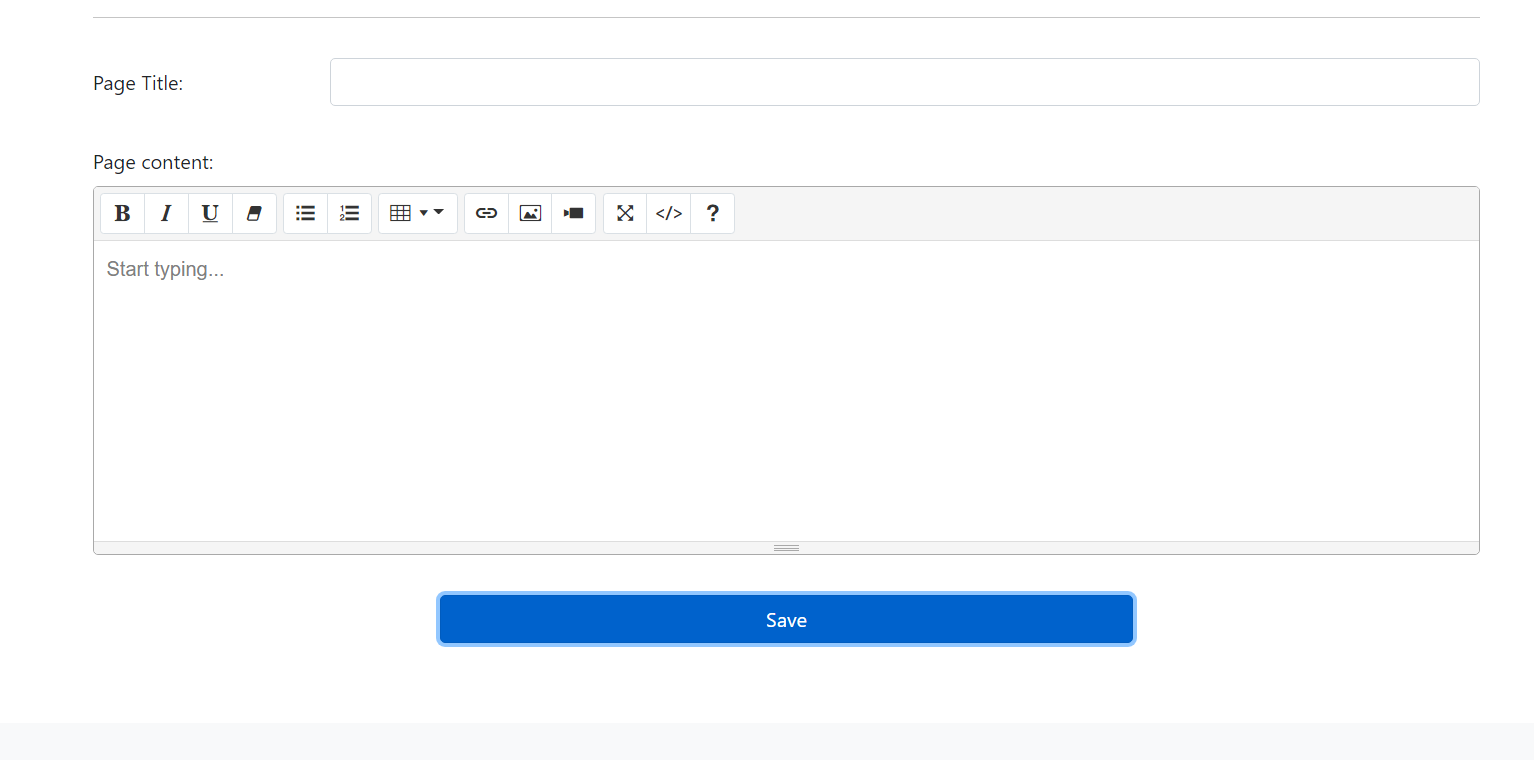
Step 4: Now add a title and contents to your new page.
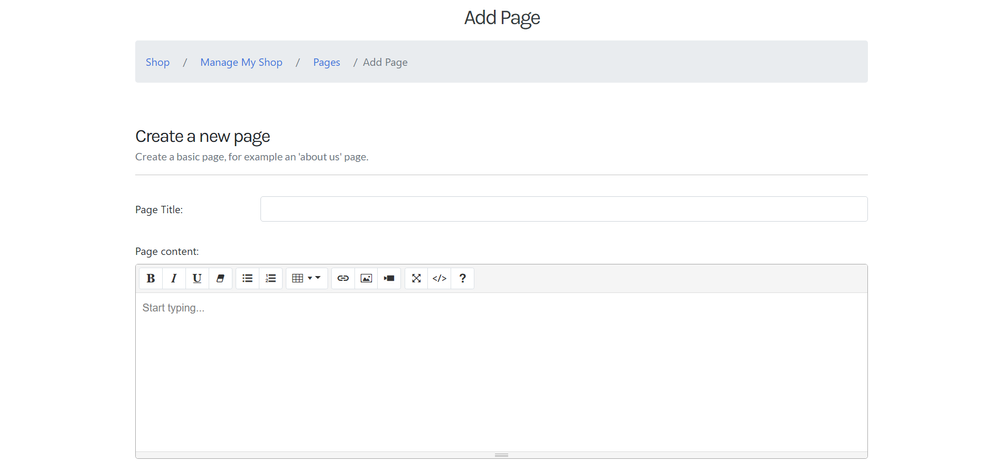
Step 5: Click “Save”.
Repeat these steps to add more pages to your shop.
If you’d like to make some of your pages only visible to your subscribers, check out our guide to creating a private page.
Watch the Tutorial to Create a Shop Page

27 - Pause a Subscriber's Subscription
Need to Pause Payments from a Customer? Learn how to Pause a Subscriber’s Subscription to stop charging a specific customer.
Learn to pause a customers subscription, this is useful if you only want to temperarly stop charging them.
Steps to Pause a Subscriber’s Subscription
Step 1:* Log into your Shop Dashboard.
Step 2:* Click on “Subscribers with Active Subscriptions” in the “Stats” section at the top of the dashboard.
Step 3:* Here, Navigate to the customer you would like to pause and select “Pause”.
To Unpause the Customer’s Subscription, select “Resume”.
And that’s it! You can now Pause and Resume Subscriptions!
Need to provide a customer a refund? Check out our guide on refunding a customer.
Video Tutorial for Pausing a Subscription

28 - Upload Files to a Shop
Need to upload files for your customers? Learn how to add files to a shop.
Subscribie allows shop owners to upload simple files like documents, photos and short videos. These can be viewed and downloaded by customers in your shop webiste. To upload file, follow these steps.
Steps to Upload Files to a Shop
Step 1: Log into your Dashboard.
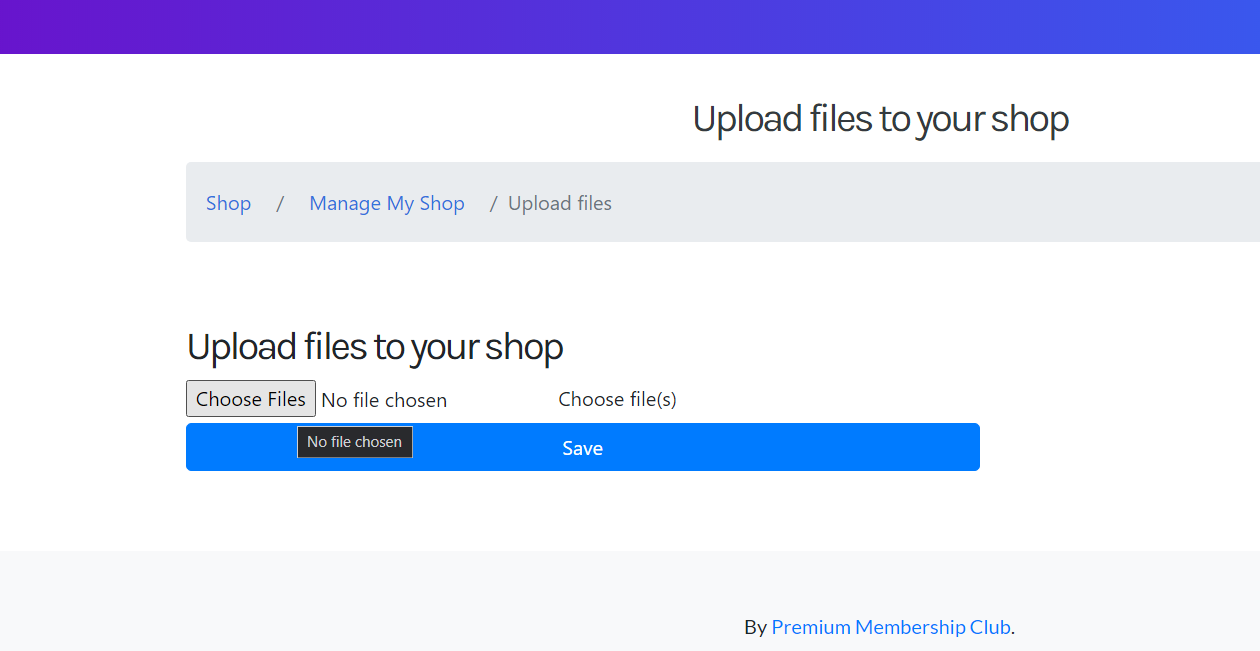
Step 2: Click “Upload Files”
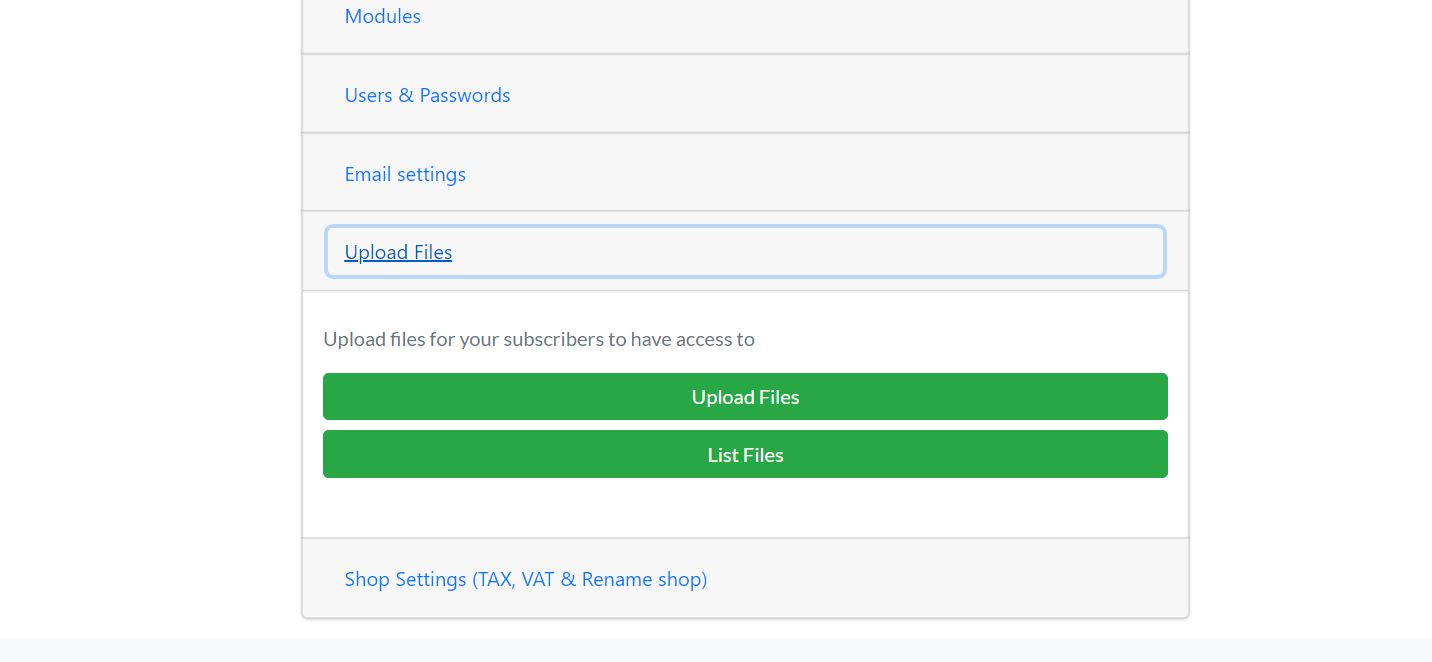
Step 3: Click “Choose Files” and upload the files needed and Click “Save”
You have now successfully added Files that can only be accessed by subscribers through your shop.
Need to delete a file? Check out our guide on how to delete an uploaded file.
Video Tutorial to Upload Files

29 - Categorise Subscription Plans
Need a way to organise your plans? Organise your subscription plans by categorising them by following these steps.
Steps to Categorise Subscription Plans
Step 1: Log into your Shop Dashboard.
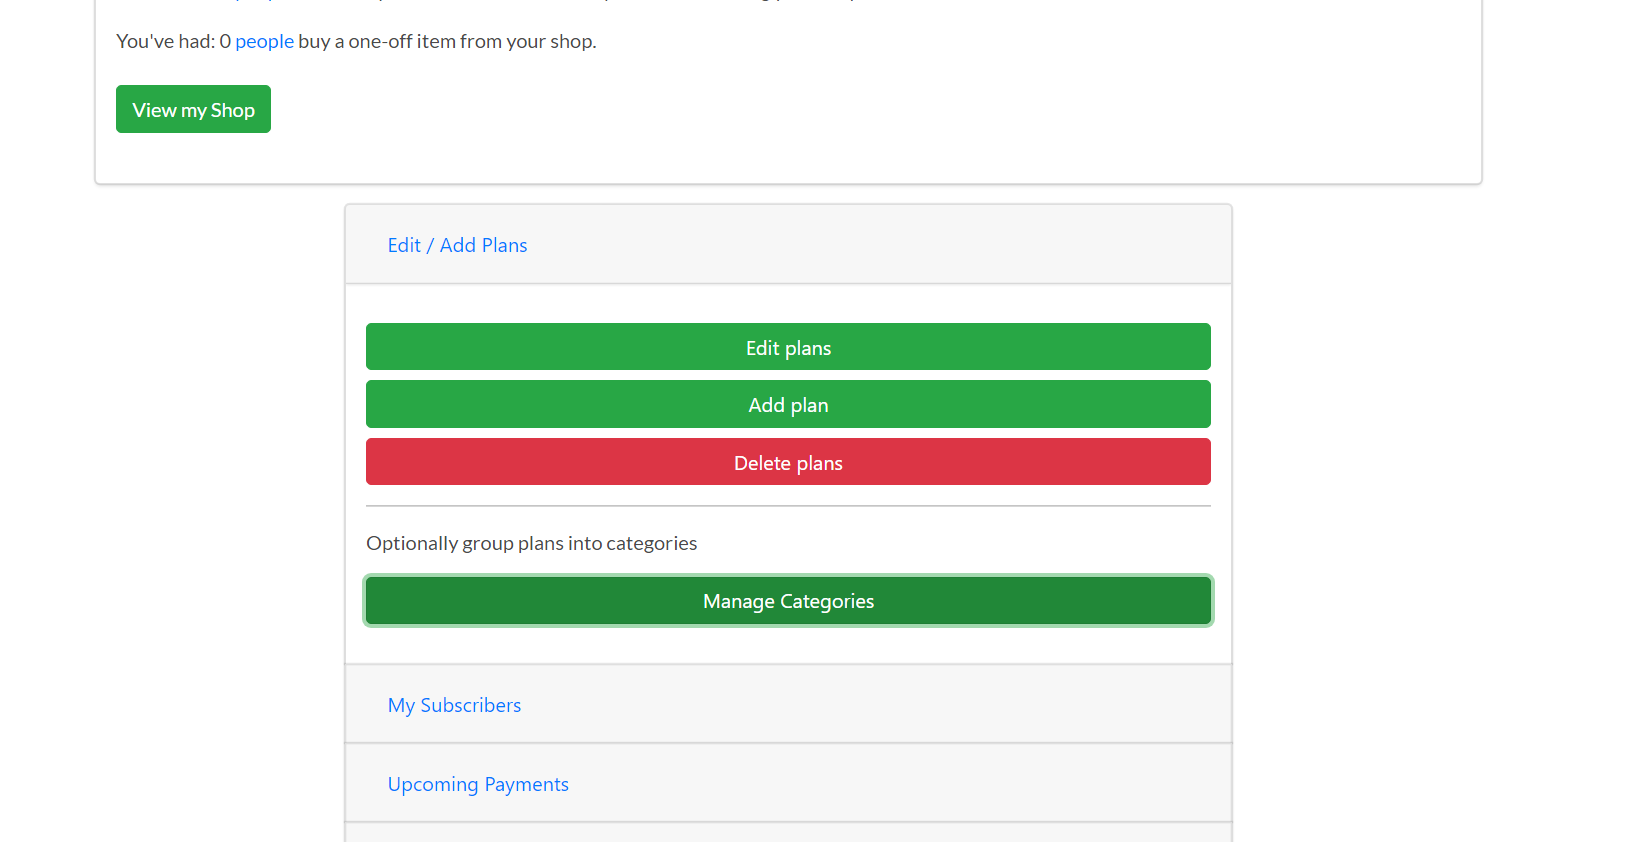
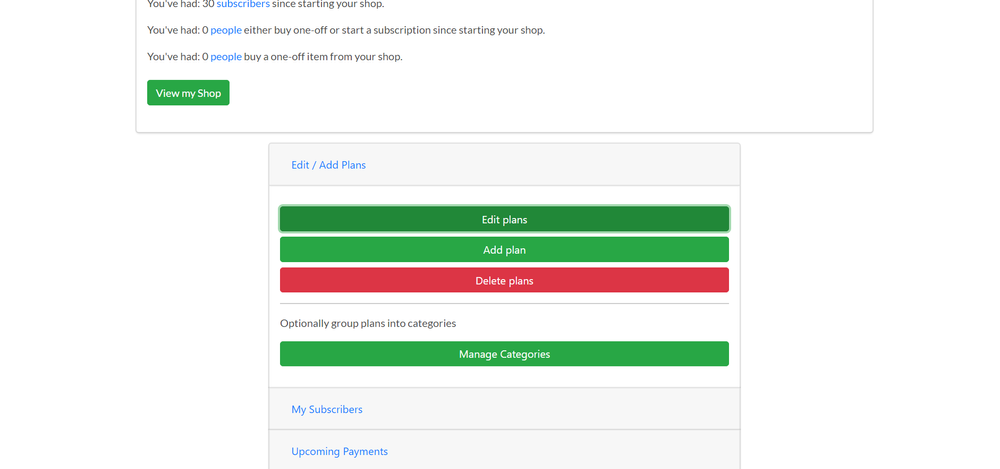
Step 2: Select “Manage Catagories” under “Edit/Add Plans”
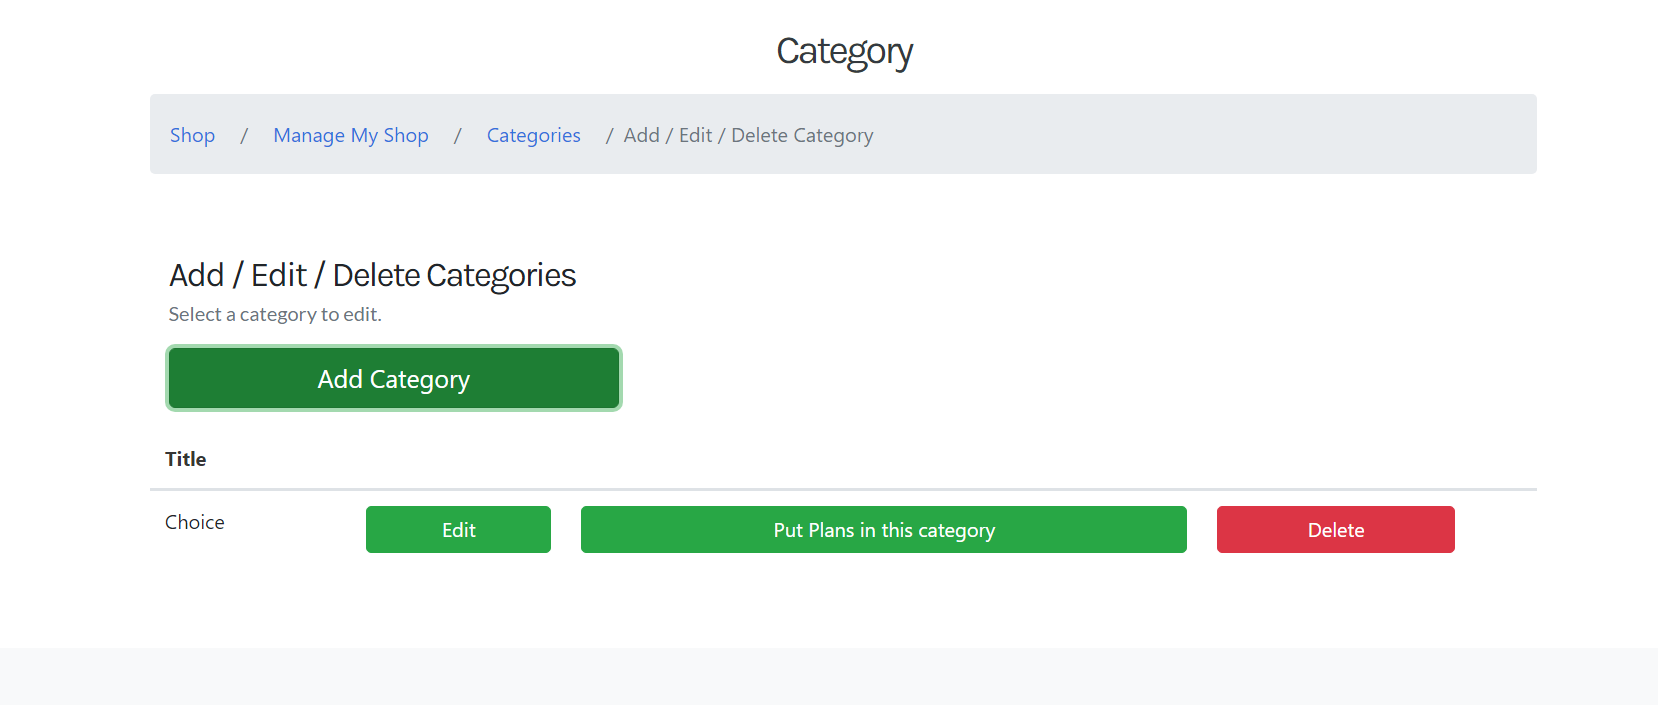
Step 3: Select “Add Catagory”
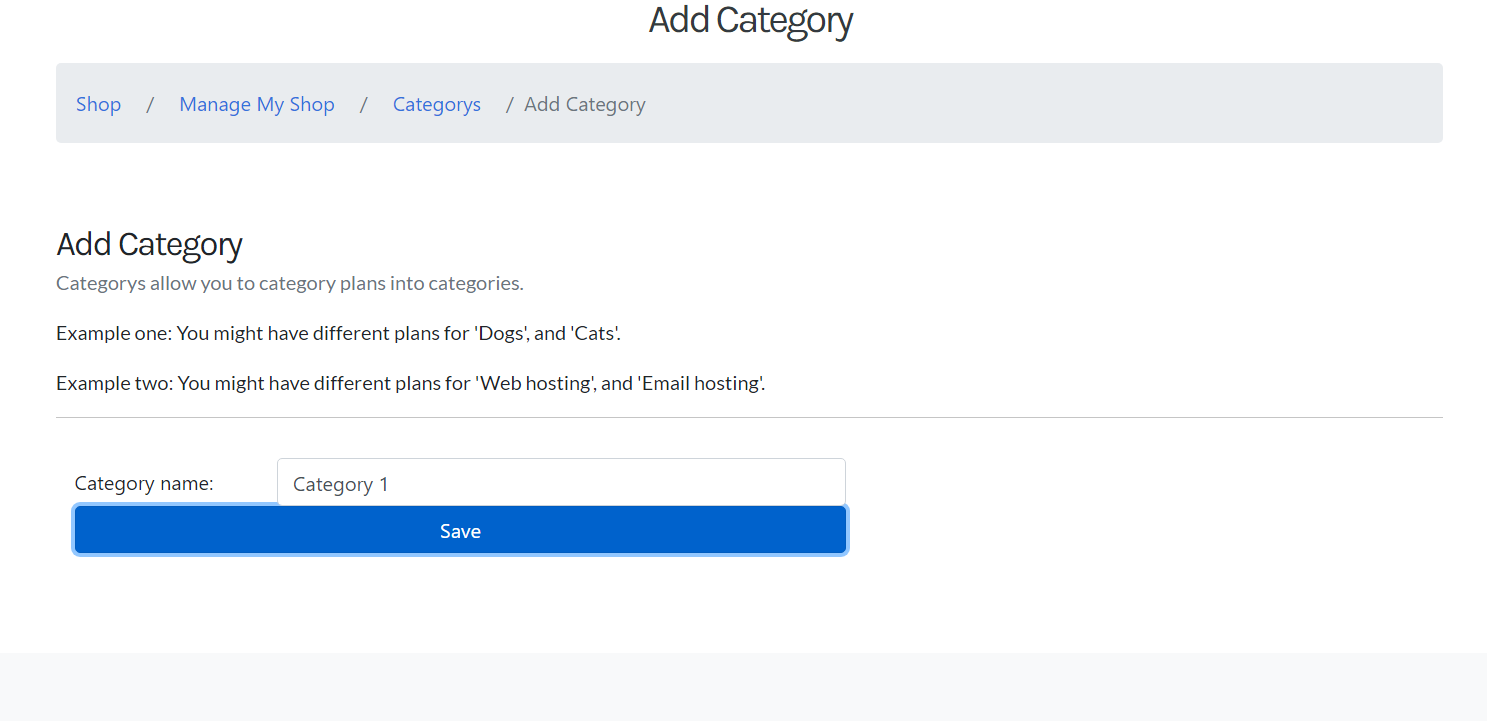
Step 4: Enter your category’s name in “Category Name” and save.
Step 5: Return back to “Add / Edit / Delete Categories” and click “Put Plans in this Catagory”
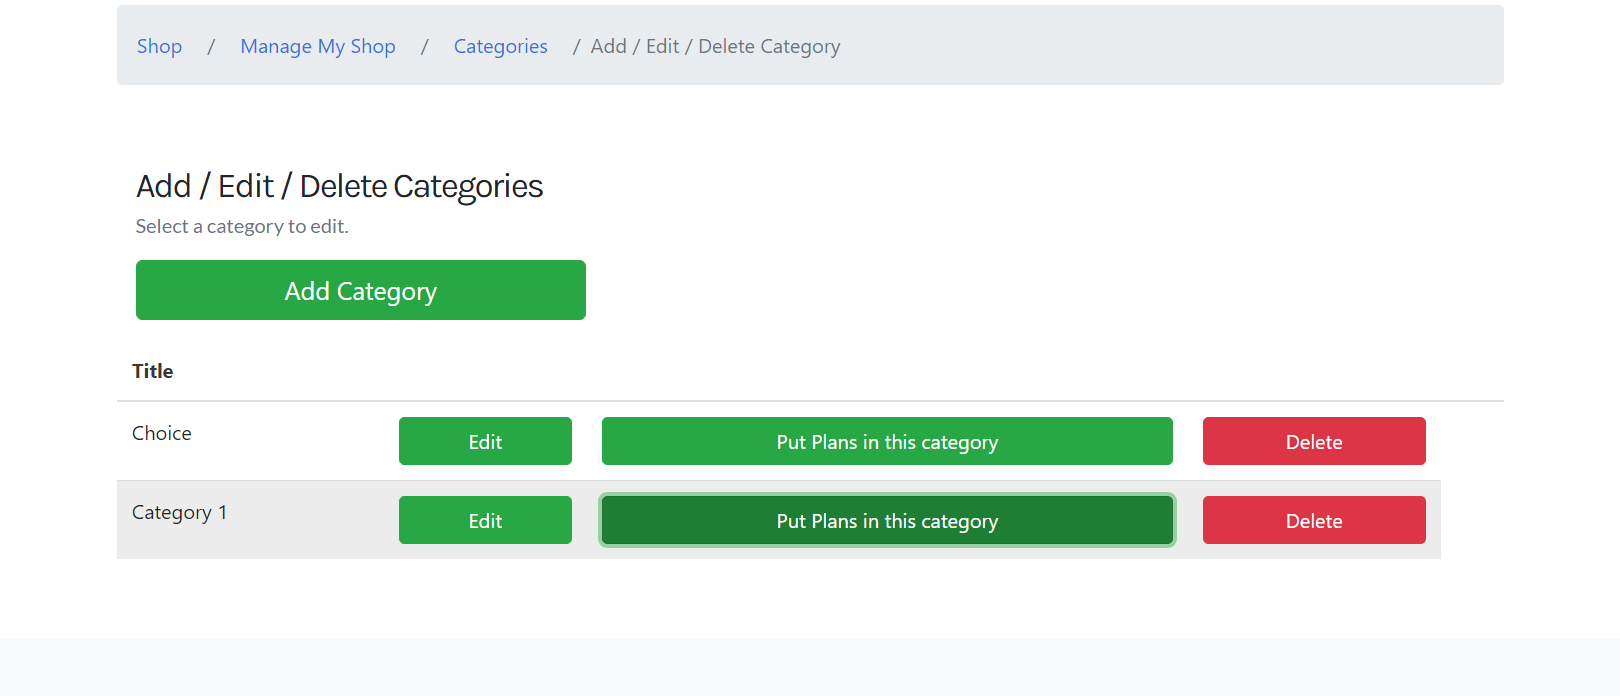
Step 6: Now select the plans that you would like to add to your category.
Now you have successfully created your category for your plans! The changes will refect on your shop’s page.
To reorder your subscription plans, check out our guide to reorder subscription plans.
Watch the Tutorial to Categorise Subscription Plans

30 - Create a Plan Link
A guide to creating a link for a specific plan to share to subscribers.
A Plan link can be used to share a specific plan to your customers so that they can pay and sign up to the subscription plan.
This is useful for sharing private plans.
Steps to Create a Plan Link
Step 1: Log into your Shop Dashboard.
Step 2: Under the “Edit/Add Plans” section, click “Edit Plan”.

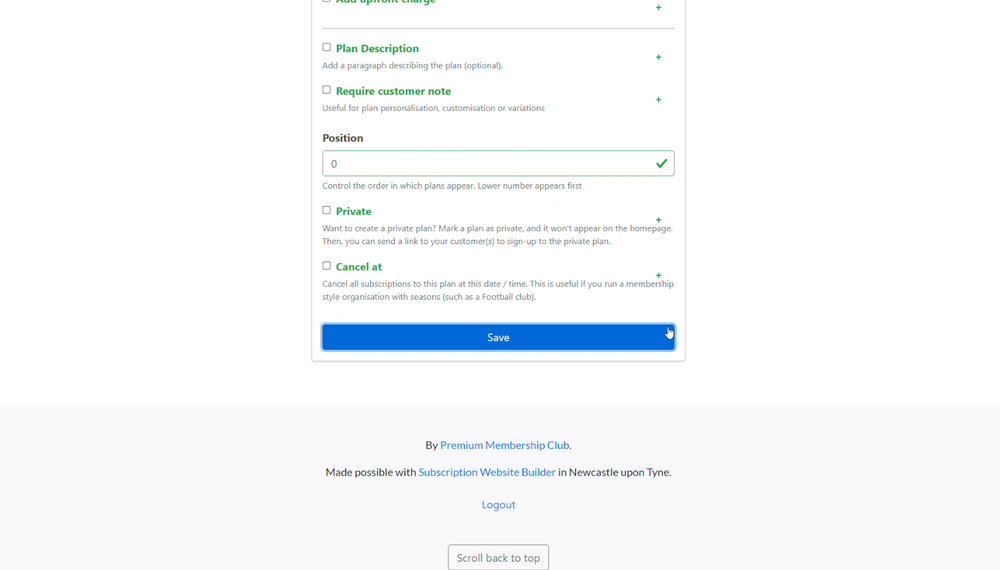
Step 3: Here select the “Cancel at” checkbox, add the date and time you would like to end the subscription and click Save.
Now you have successfully created a limited-time Subscription Plan for your customers!
Watch the Tutorial to Create a Plan Link

31 - Create a Private Plan
A guide to creating a private subscription plan that is not visible in your shop.
Follow these steps to create an account private plan, these private plans will not be visible on your shop’s signup page but can accessed through the plan’s link. Learn how to create a subscription plan link here.
Steps to Create a Private Plan
Step 1: Log into your Dashboard.
Step 2: Under the “Edit/Add Plans” section, click “Edit Plan”.

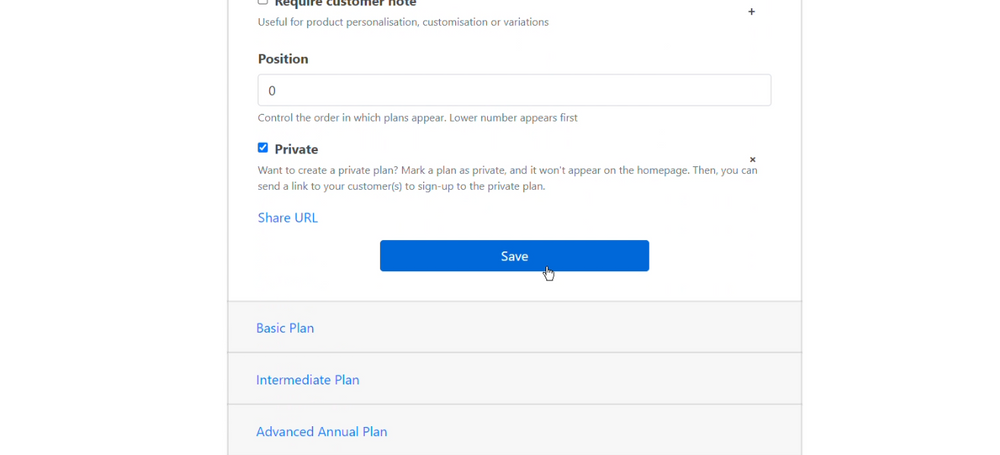
Step 3: Here select the “Private” checkbox and click Save.
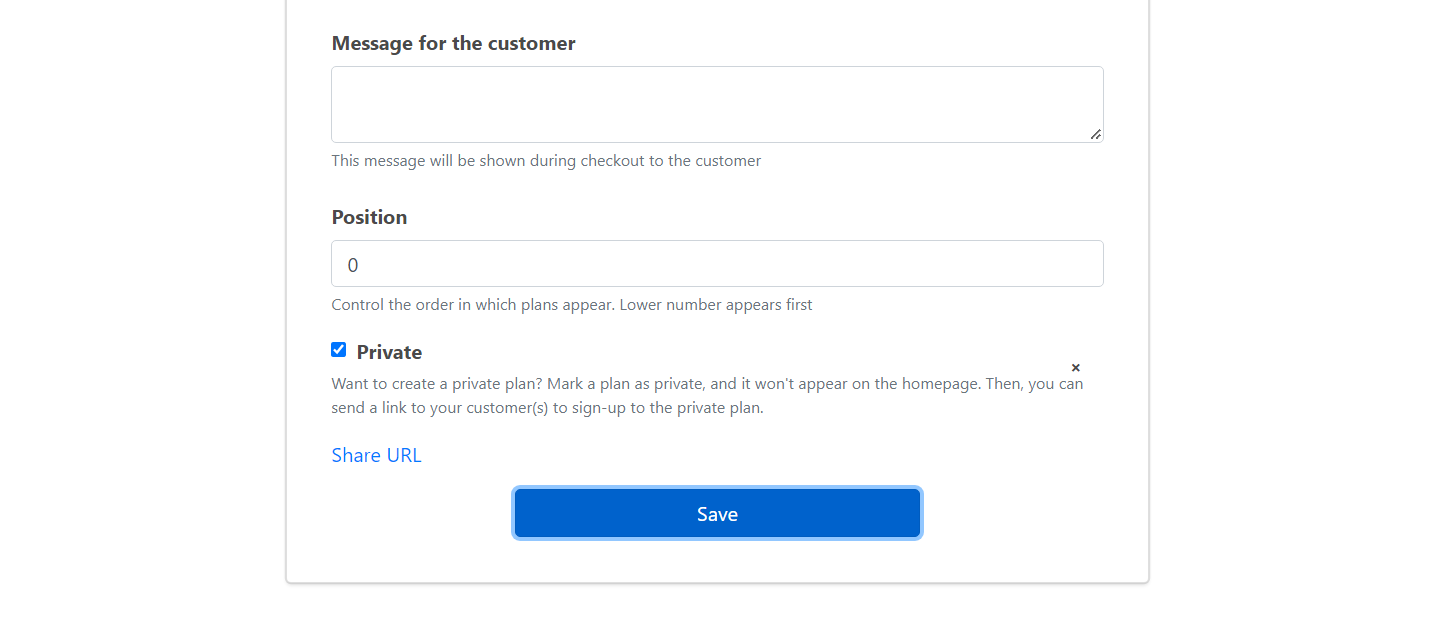
You have successfully created a private plan! Now, it will not be visable on your shop page, it can be shared through the subscription plan link.
Watch the Tutorial for Creating a Private Plan

32 - Create a Seasonal Plan
Learn to create a seasonal subscription plan that ends at a specified date.
A Sesonal Plan, which is also known as a Limited Plan, stops collecting payments after a specified date. To set up a seasonal plan that auto cancels, follow these steps.
Steps to Create a Seasonal Plan
Step 1: Log into your Shop Dashboard.
Step 2: Under the “Edit/Add Plans” section, click “Edit Plan”.
Step 3: Here select the “Cancel at” checkbox, add the date and time you would like to end the subscription and click Save.
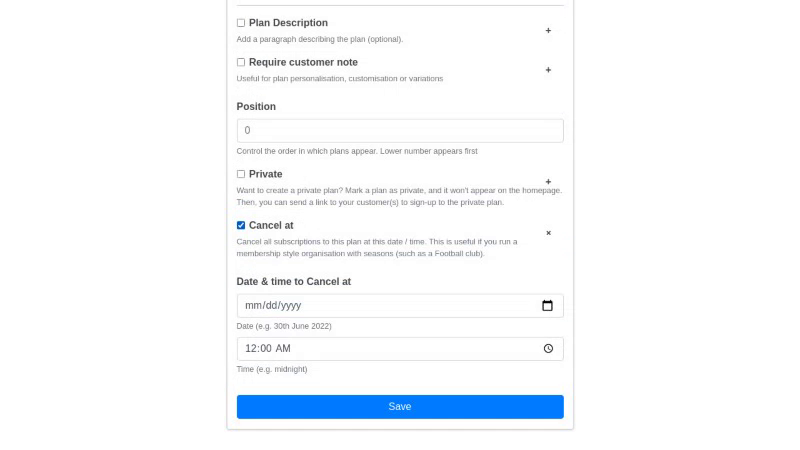
Now you have successfully created a limited-time Subscription Plan for your customers and potential Subscribers!
Learn how you can share your seasonal plans with a link.
Watch the Tutorial to Create a Seasonal Plan

33 - Add a New Subscription Plan
Need to add more pages to your shop? Here’s how you can create additional subscription plans for your shop.
Plans are visible on your Shop’s home page. There are no limits to the number of subscription plans that can be created.
If you are looking for how to edit/modify a plan, check out our guide on how you can edit an existing subscription plan.
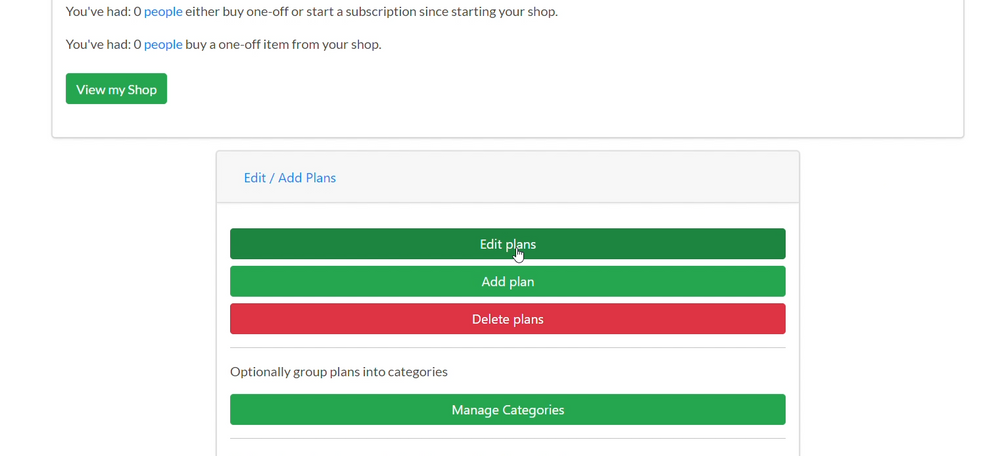
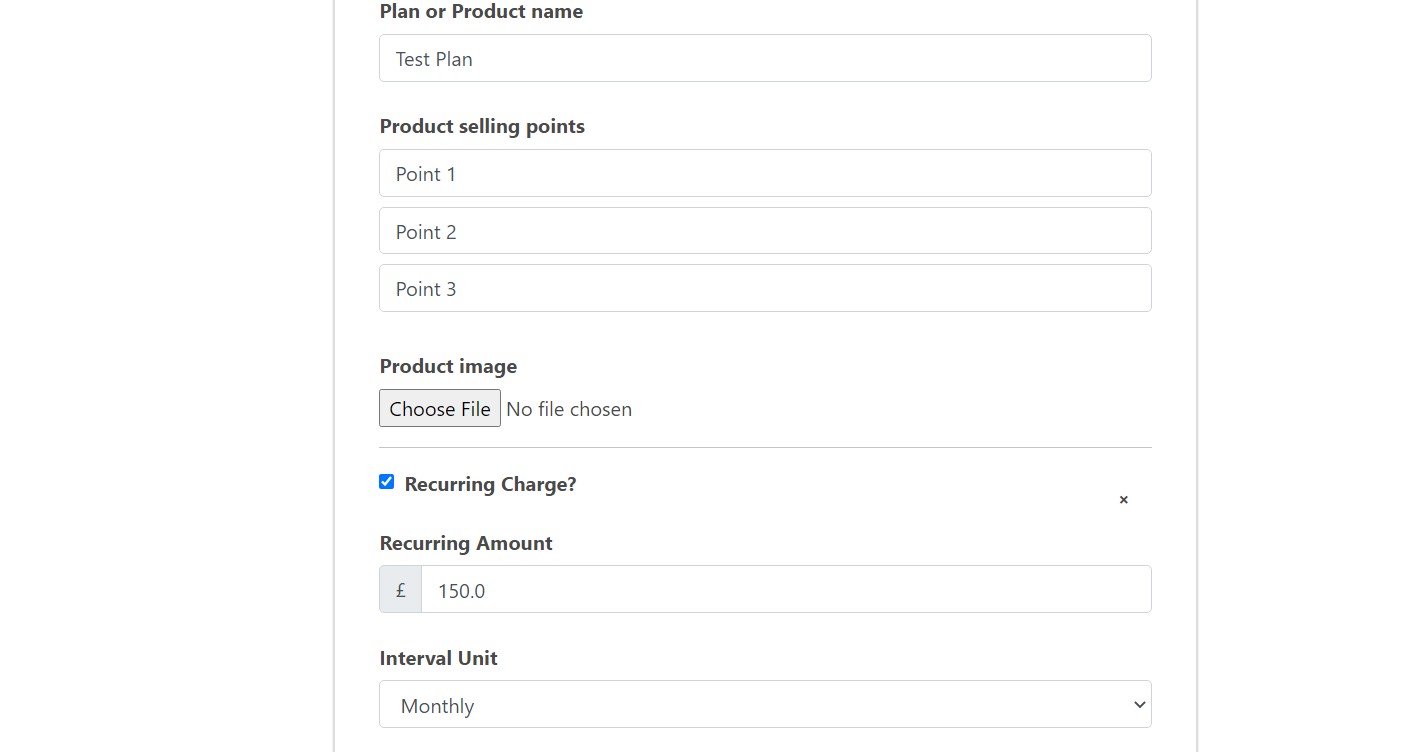
Steps to Add a New Subscription Plan
Step 1: Log into your Shop Dashboard.

Step 2: Under the Edit/Add Plans section, click Add Plan.
Step 3: Here, enter your Plan Name & Selling Points.
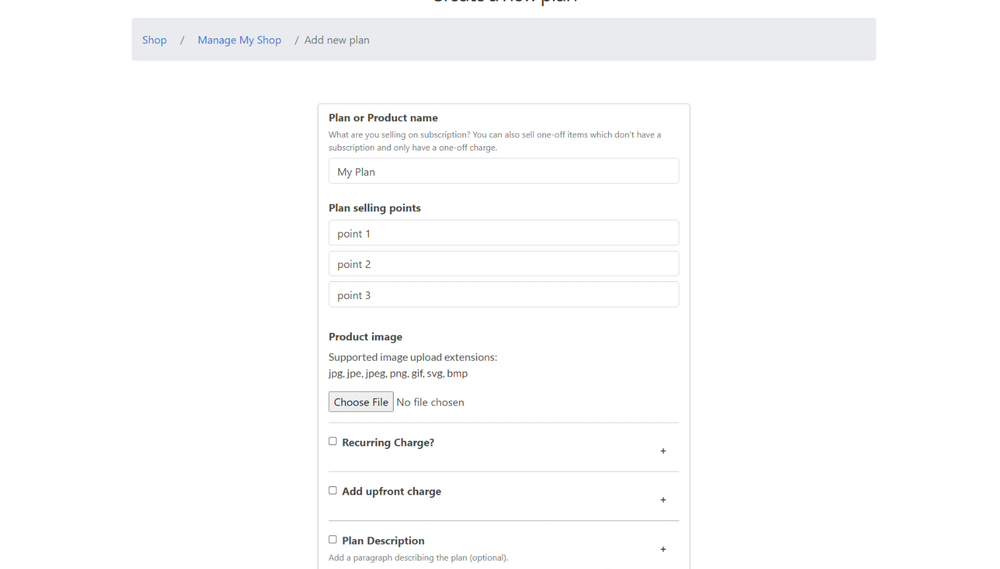
Step 4: Choose whether you would like to set up your plan as a Recurring Charge by checking the checkbox and enter the amount.
If you plan to Recurring, then choose if it should be charged weekly, monthly or yearly.
Step 5: Now Click Save
You have now successfully added a new plan to your shop.
You can now edit your subscription plan at any time or make it a private plan.
Do note, seasonal plans can not be applied to existing subscription shops.
Watch the Tutorial to Add a New Subscription Plan

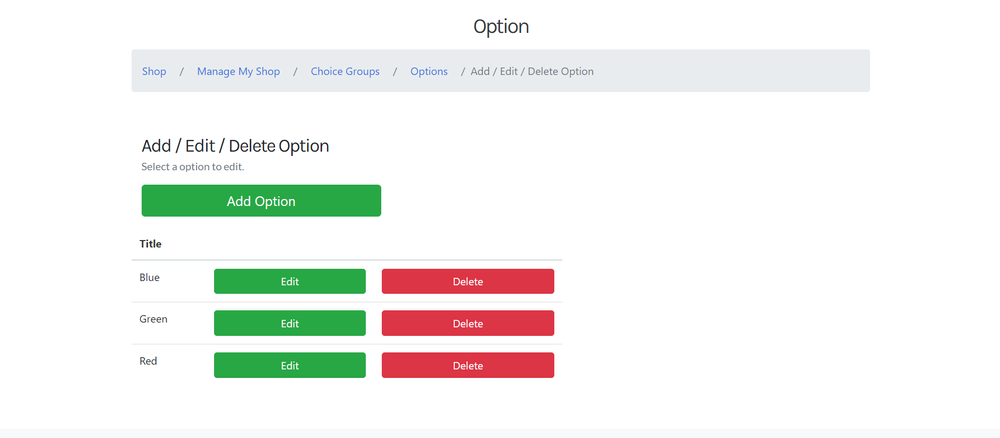
34 - Add Options to a Subscription Plan
Need to provide your customers with some options? Leran how to add options to a subscription plan.
Learn how to add options to a subscription plan, this will be shown when customers are signing up to your subscription plan. These are simple options that you can use to offer some verirty in your subscription plans.
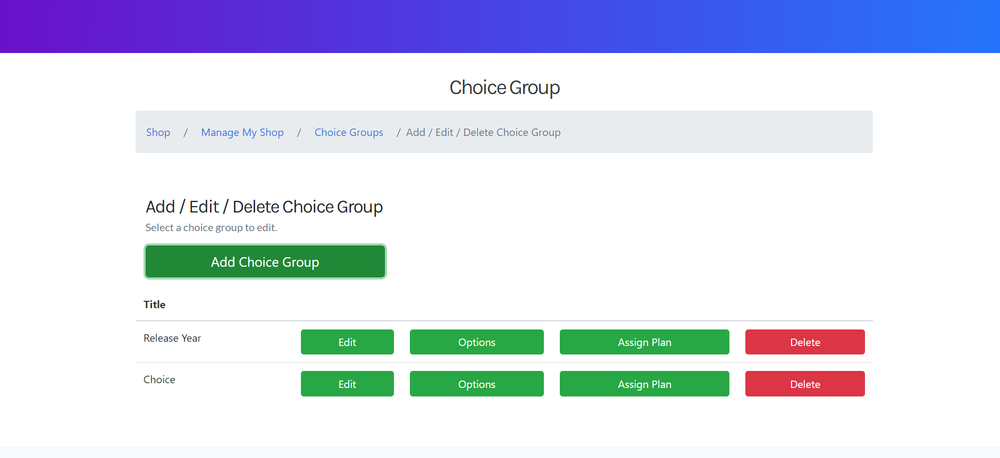
Step 1: Log into your Shop Dashboard.

Step 2: In the Shop Dashboard, Go to the “Choice Group” Section and Click “Add / Edit / Delete Choice Group”.
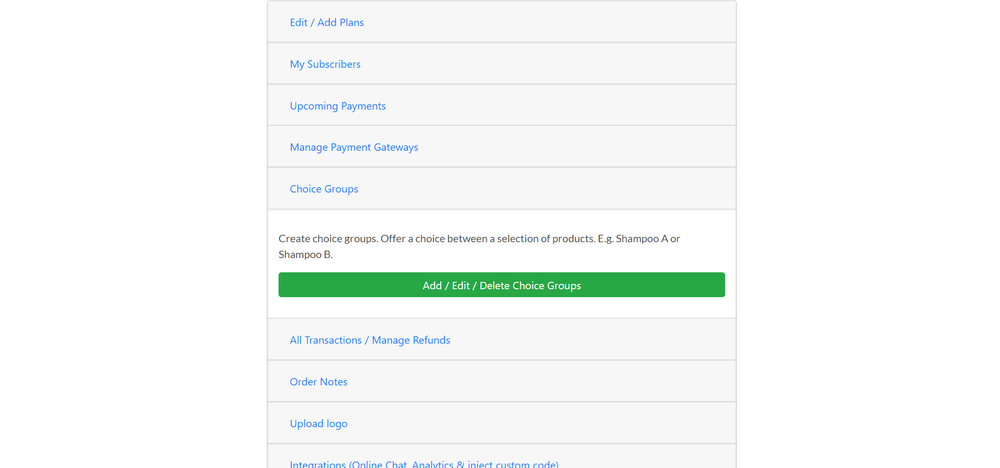
Step 3: Here, Click “Add Choice Group” and add a Title for your Options then Click “Save”.

Step 4: Now, Go back to the Choice Group page and Select “Options”. Here you can add the choices your subscribers can use when Subscribing to your plans.
Step 5: Now select “Assign” in the Choice Group page to add it to your preferred plans.
And that’s it, you have successfully added Choice Options to your Subscription Plan!
Watch the Tutorial to Add Options to a Subscription Plan

35 - Edit an Existing Subscription Plan
Want to modify your plans? Here’s guide on how to edit/modify an existing subscription plan.
Steps to Edit an Existing Subscription Plan
This does not affect other subscribers in the existing subscription.
Step 1: Log into your Dashboard.

Step 2: Under the “Edit/Add Plans” section, click “Edit Plan”.

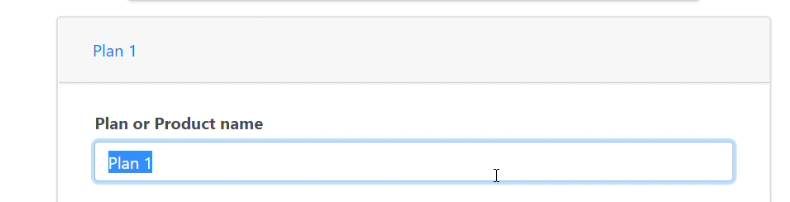
Step 3: Now, choose the plan you would like to edit.
Step 4: Here, you will be able to:
Edit the name of the plan
You can change the name of your plan, remove the existing name and add the name you would like to change to
Edit the points of the plan
Points are an important part of plans and if you messed up or feel like changing your plan points, you can alter them here
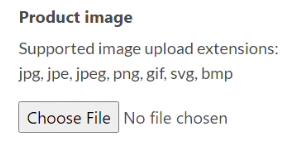
Add an image to your plan
Sometimes an image can say more than a thousand words, so feel free to add an image to the plan that best represents it!
Change the price
Input the wrong price during the set-up process or feel like changing it up a bit? Then feel free to edit the price of the plan. Here you can also add an upfront cost, the interval (weekly, monthly or yearly) and an option to add a free trial.
Add a plan description
In this description field, write up what your plan is about and let your customers know why your plan is the best!
Add the option for a customer note
Sometimes you need notes from customers, fear not! enable this option if you want to receive notes from customers regarding your product or service.

Private Plan
A private plan helps you to keep it hidden from the public and can not be viewed on your shop’s main page, it can be accessed through the plan link (learn more here)

Step 5: Now Click Save.
Now, you have successfully edited your plan! Your changes will reflect in your shop.
If you do not have an existing plan and want to create a new one, check out our guide on creating a subscription plan.
Video Tutorial on Editing an Existing Subscription Plan

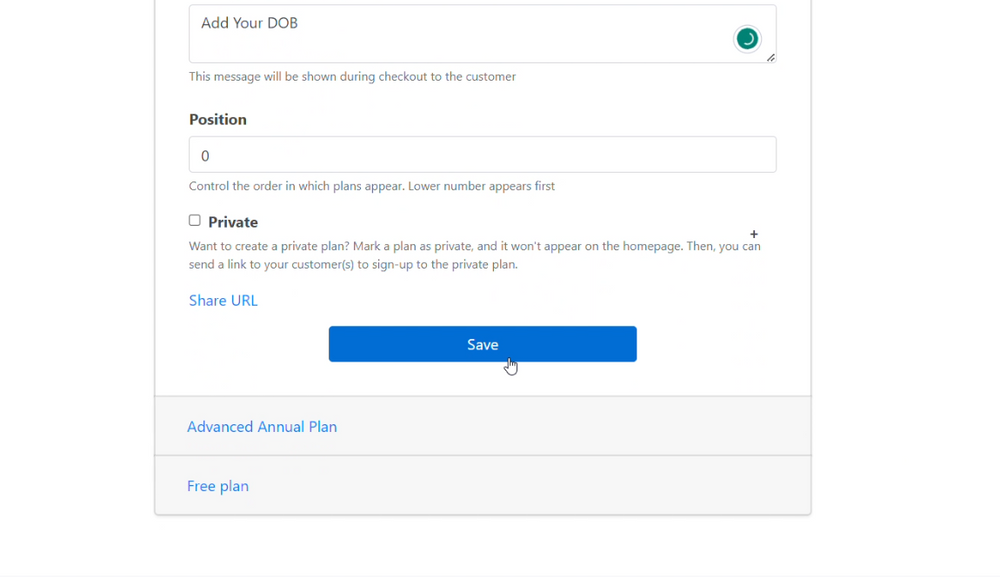
36 - Reorder Plans
Learn how to organise your subscription shop by reordering plans.
Steps to Reorder Plans
Step 1: Log into your Shop Dashboard.

Step 2: Under the “Edit/Add Plans” section, click “Edit Plans”.

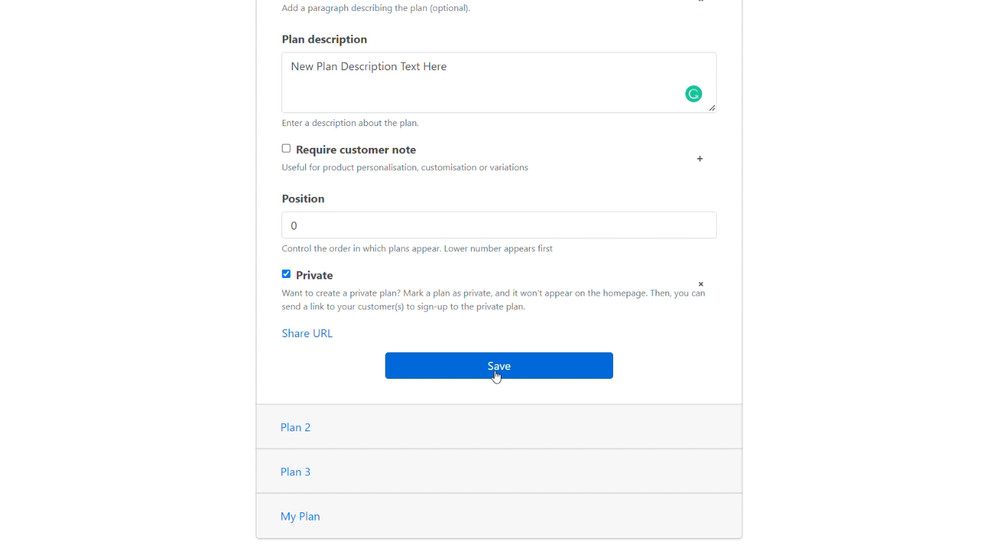
Step 3: Here, select the plan, scroll down to “Position”, and set the value that changes the position of the plan.
“0 (zero)” denotes the first position and so on.
Step 4: Click “save”.
Now you have successfully rearranged your plans in your shop!
Want to make your subscription shop more organised? Learn how you can categorise your subscription plans.
Watch the Tutorial to Reorder Plans

37 - Updating Credit Card details for Shop Owners
How to update your credit card details as a shop owner.
Steps to Update your credit card details
#Step 1:
- On your Admin dashboard scroll down and click Users, Passwords & Cards details
#Step 2:
- After the dropdown, click Change My Card details. It will redirect you to your profile side of subscribie where you will need to enter your credentials.
Note: If you can’t remember your Subscribie credentials, use the forgotten password link on the login page.
#Step 3:
- After logging in, scroll down and click update payment method.
#Step 4:
- Follow the steps and click Save.
#Step 5:
- After updating your credentials, you can scroll down the dashboard to check the 4 last digit of your new card which will be that it was changed succesfully!
38 - Add a Description to Subscription Plans
Provide more information about your subscription plan by providing a description to your subscription plan
Steps to add a description to your subscription plan
Step 1: Log into your store and navigate to your Shop Dashboard.

Step 2: Under the “Edit/Add Plans” section, choose “Edit Plans”.

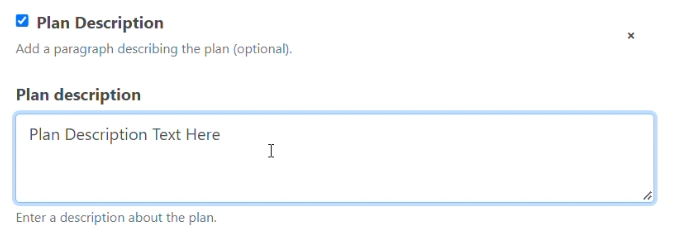
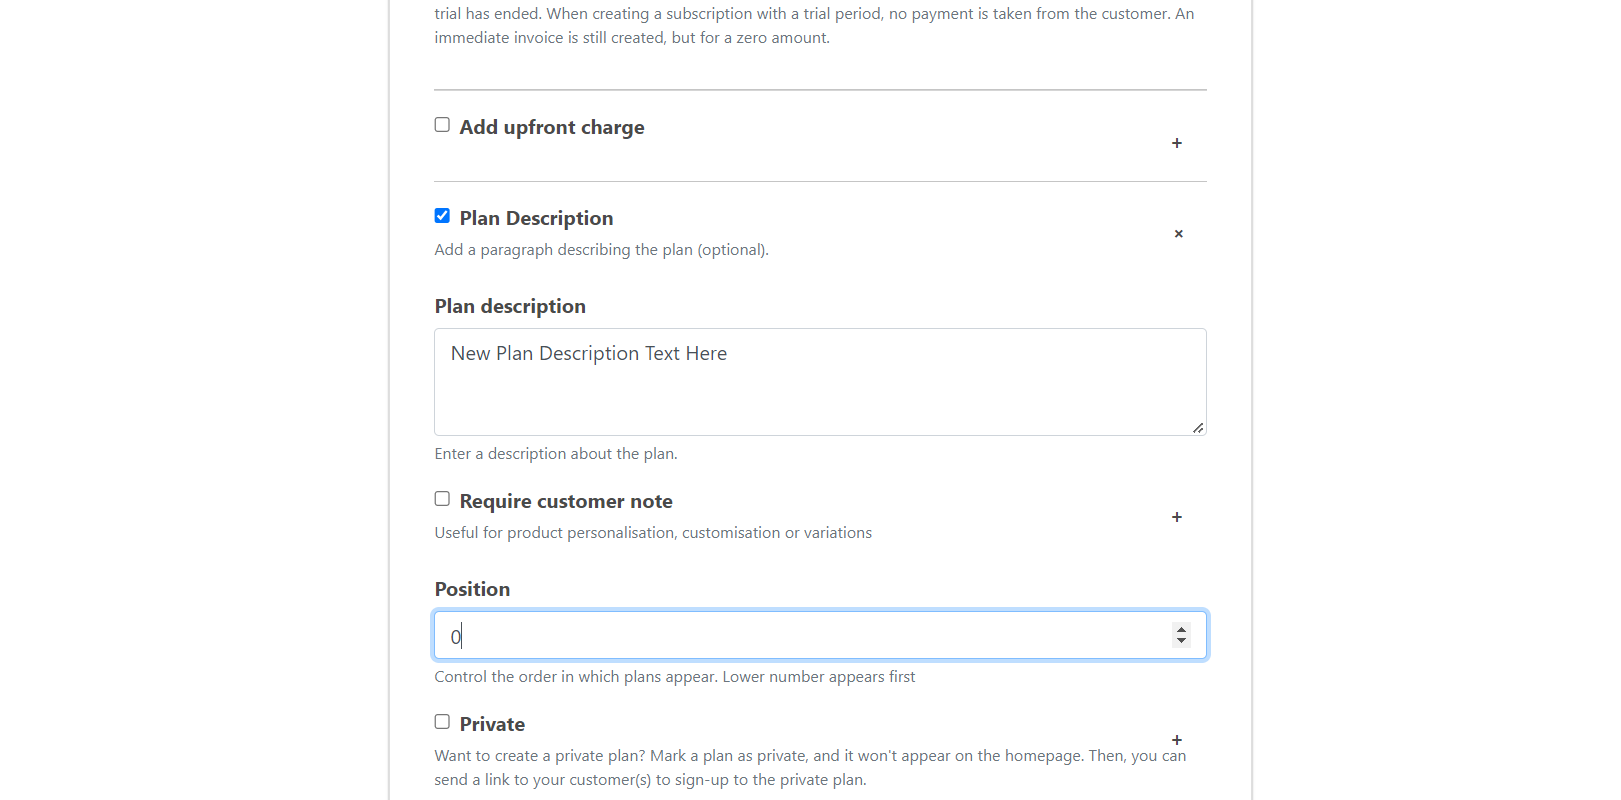
Step 3: Choose the plan you would like to add a description to and scroll down and add a checkmark to Plan Description.

Step 4: After adding the checkmark to Plan Description, a text box will appear. In the text box, write a description for your subscription plan.

Step 5: Now scroll down and click Save.

Watch the Tutorial to Add a Description to Subscription Plans

39 - Create a Private Page
A guide to make any page in your shop into a Private Page. Private Pages are hidden pages that do not appear in your shop publically.
Learn how to add a private page that is only accessable by your subscribers by following these steps.
Steps to Create a Private Page
Step 1: Log into your store and navigate to your Shop Dashboard.

Step 2: Click the “Modules” tab and select “List Pages” under the “Pages” category.

Step 3: Select “Set Private Pages”

Step 4: Choose the Page and click Submit.
Select all the pages you wish to private in this step.

Now you have created a private page.
Watch the Tutorial to Create a Private Page

40 - Charge VAT Automatically
Need to charge VAT? Learn how you can automatically charge value added tax (VAT) to all your subscription plans
Does your shop need to charge VAT for your products and services? You can enable the option to auto-calculate VAT with these steps.
VAT is not enabled by default for shops.
Steps to add VAT to your Subsciption Plans.
Step 1: On your Dashboard go to “Manage My Shop”.
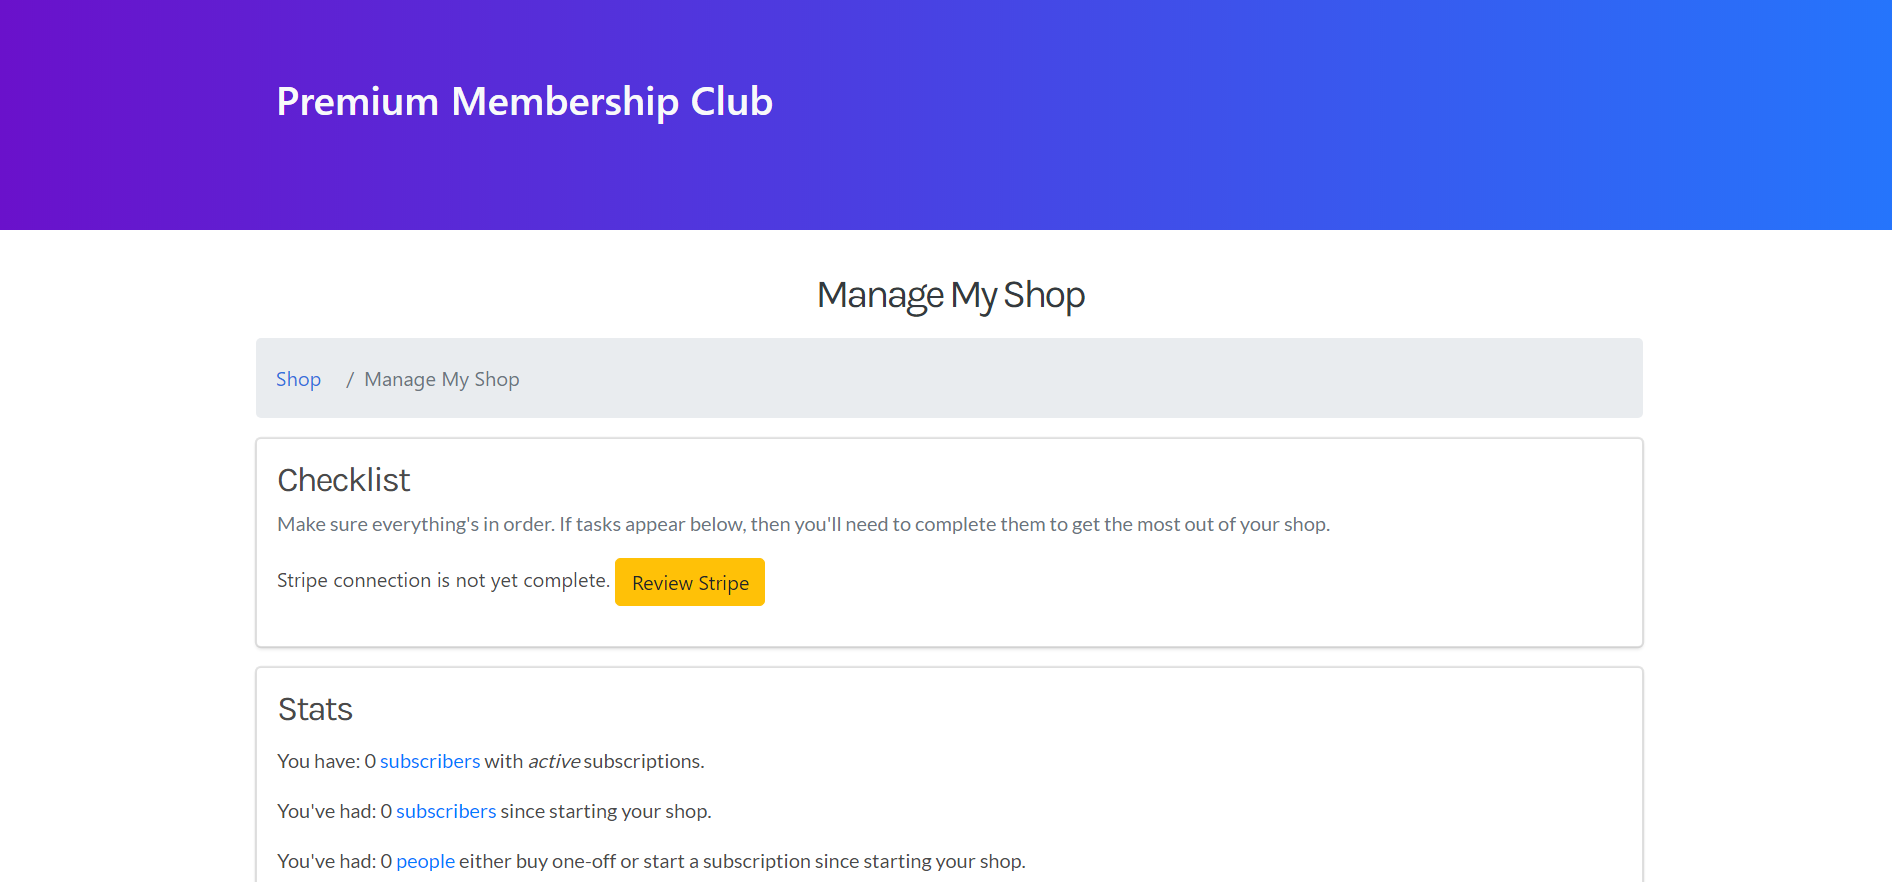
Step 2: Scroll to the bottom of the list and under “Shop Settings” choose “VAT Settings”.
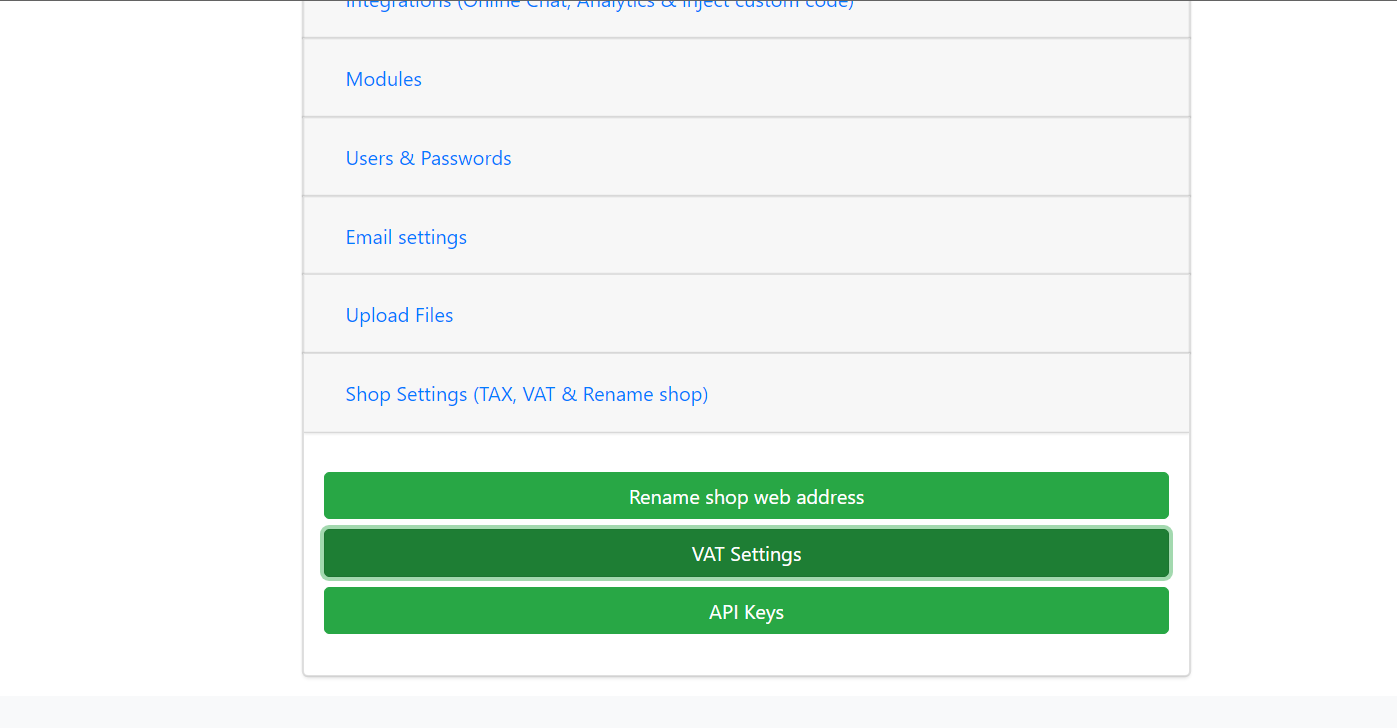
Step 3: To activate VAT choose “Yes. Charge VAT at 20%” and click “Save”
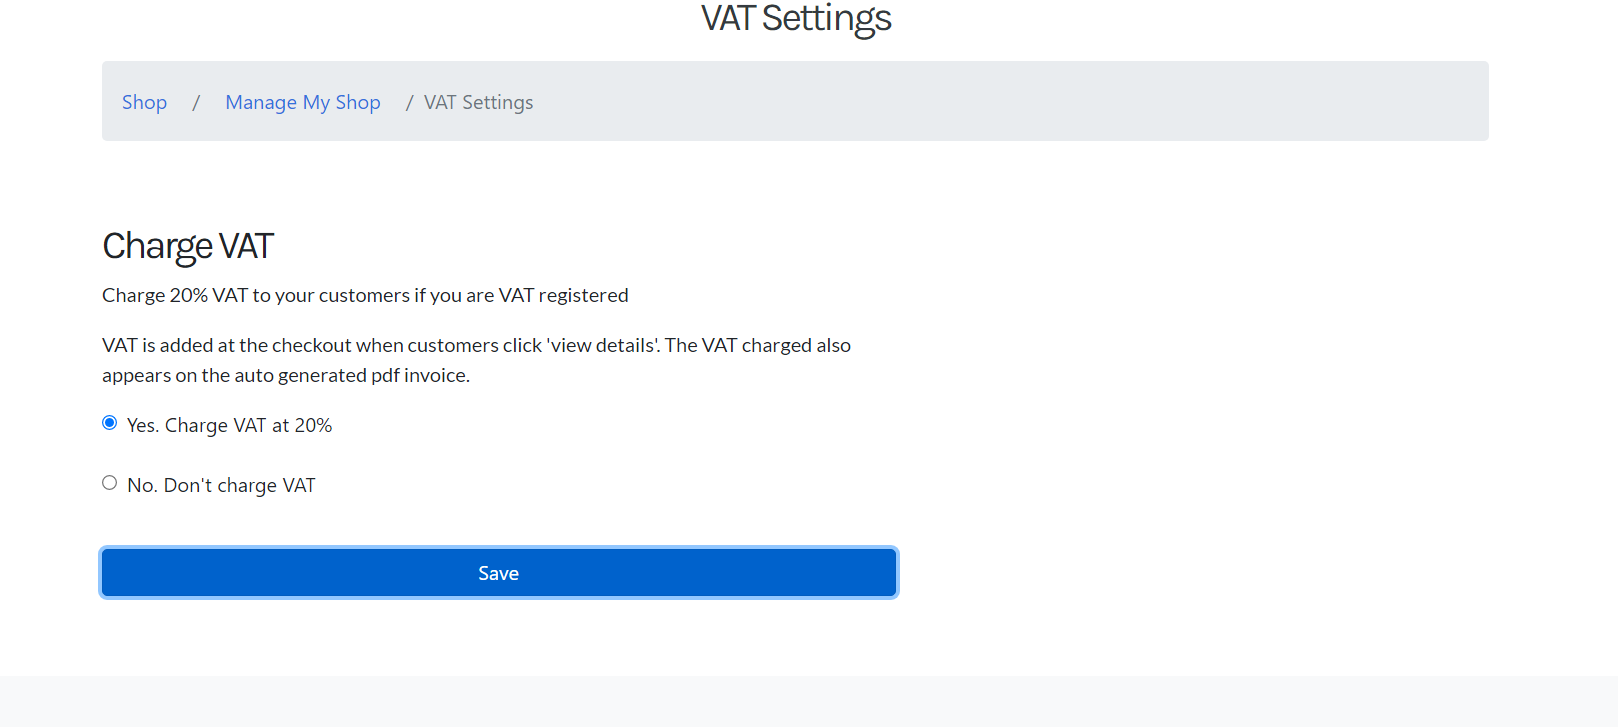
Now your shop is ready to charge VAT to your customers who sign up to your shop on Subscribie!
Invoices generated will automatically have vat added during checkout and subsequent automaic charges.
Watch the Tutorial to Charge VAT Automatically

41 - Charge Subscribers on an Ad-hoc Basis
Learn how to create an Ad-hoc charge to your subscribers at any time.
Please Note, An ad hoc charge only applies to Subscribers who have Subscribed to at least one of your plans, which can be a regular plan (e.g. £10 a month) or a free trial. This is because Subscribie needs to obtain payment authorisation, which is done when they sign up for a plan. Free Plans do not require payment authorisation, so they cannot be used for ad hoc charges.
Steps to Charge Subscribers on an Ad-hoc Basis
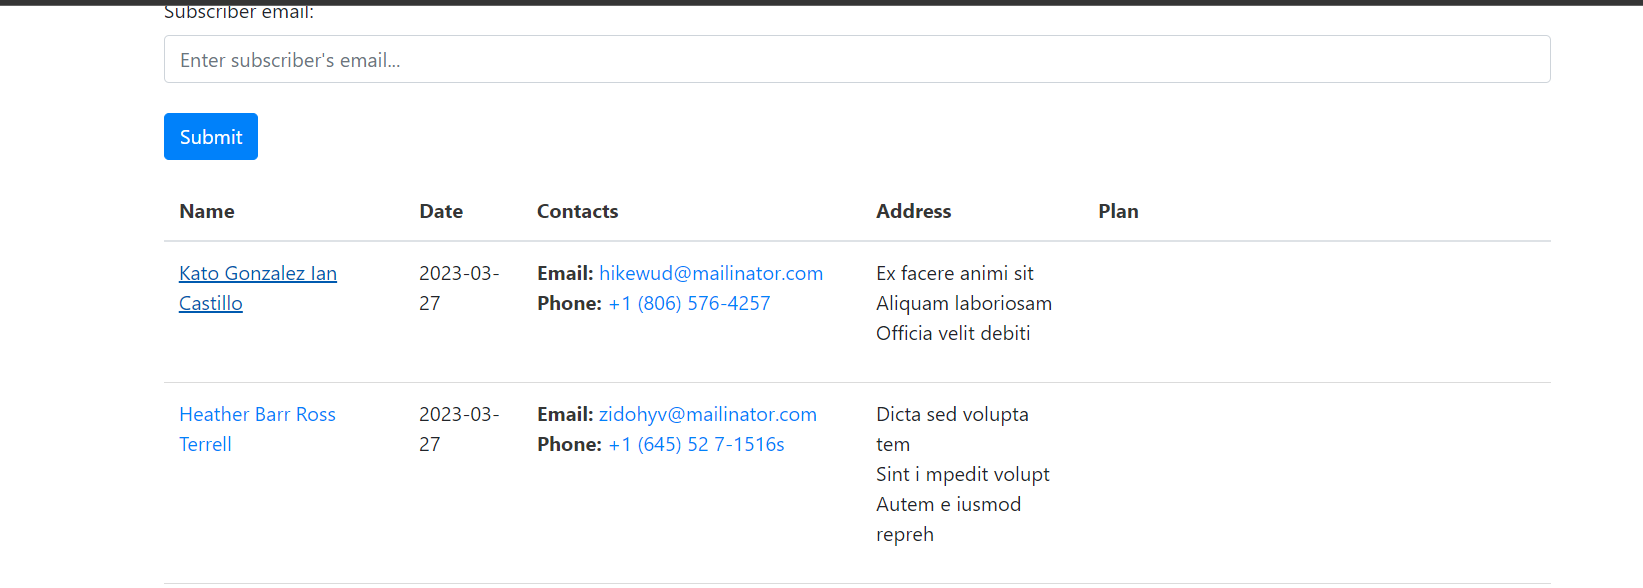
Step 1: In your dashboard go to View Subscribers under My Subscribers.

Step 2: Select the Subscriber you would like to add an Ad Hoc charge to. Please note, An Ad Hoc Charge can only be charged to a customer that is subscribed to at least one of your plans.
Ad Hoc charges can not be charged to Free Subscribers (Subscribers who have subscribed to a free plan.)
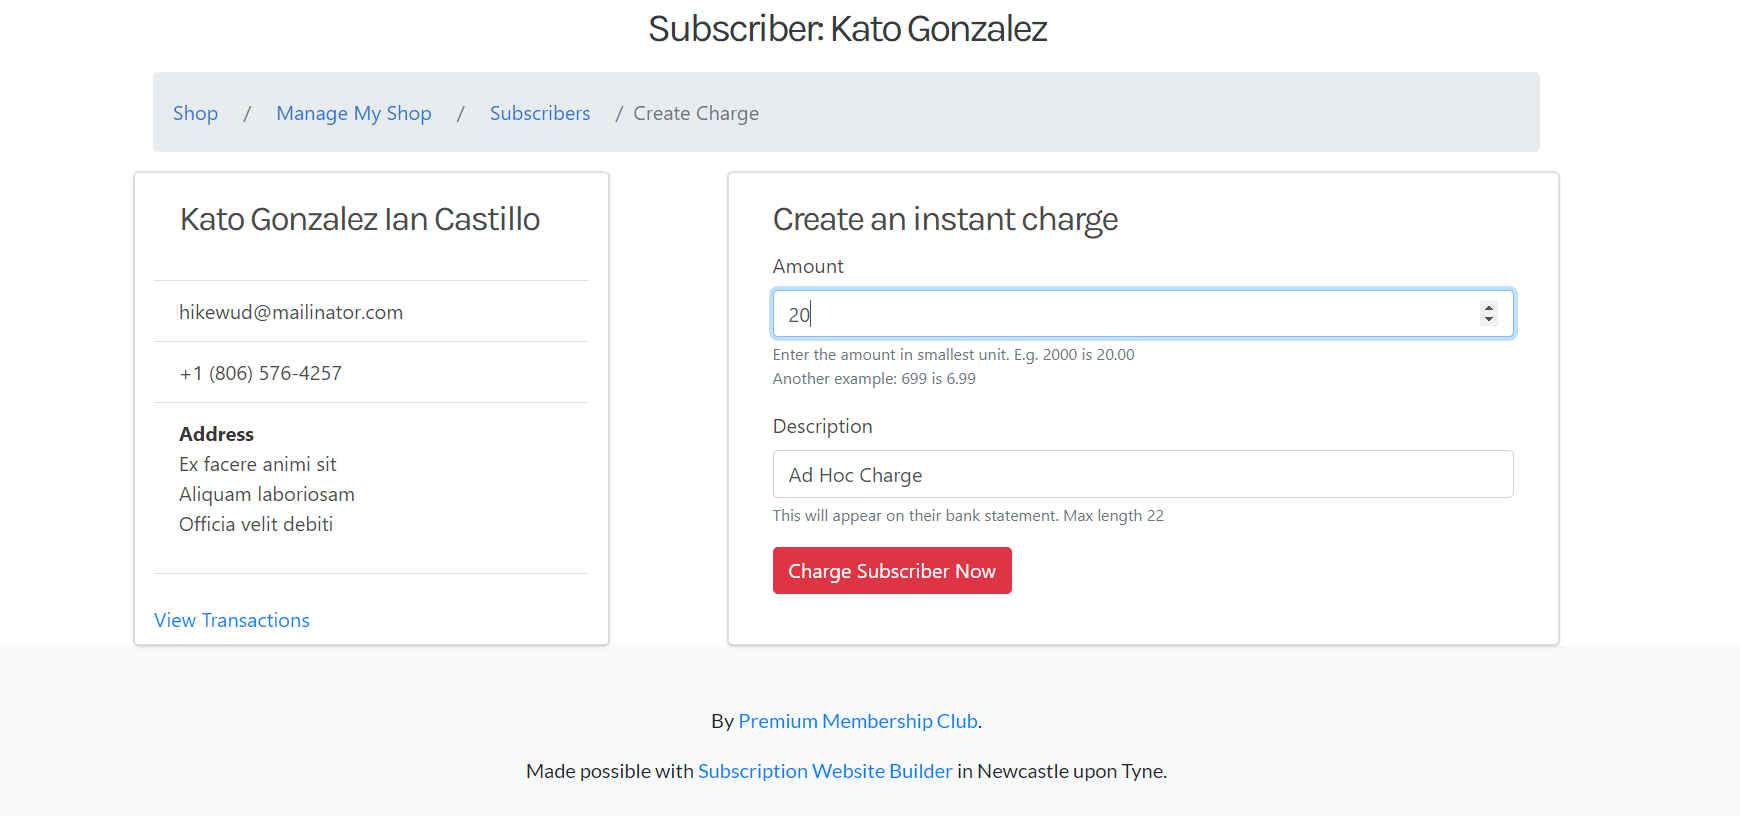
Step 3: Click Charge Subscriber.

Step 4: Enter the amount you would like to charge the customer under Amount and add a description in the Description text box and click Charge Subscriber Now.
When Charging a customer, always add two extra Zeros at the end of the value. For instance, 2000 means 20.00, not 2000.00. This is a precautionary measure to prevent overcharging a customer.
You have now successfully created an Ad Hoc charge to your customer.
Need to refund a customer? Check out our guide on refunding a customer and pausing a customers subscription.
Watch the Tutorial to Charge Subscribers on an Ad-hoc Basis
